
From - https://developers.google.com/recaptcha/intro
"reCAPTCHA is a CAPTCHA system, that is a system that allows web hosts to distinguish between human and automated access to websites".
Sometime site owner don't want spammers on there site or any type of automated/bot abuse. reCAPTCHA is one of the service provided by Google for protecting your site.
We will be seeing how can we use reCAPTCHA v2 with Perl by creating a simple app in Mojolicious
Let get started.
1. Sign up for an API key pair
First we have to register our website at - https://www.google.com/recaptcha/admin/. Provide it with the following parameters
- Label - Some name for this
- reCAPTCHA type - select v2. We will be doing "I am not a robot" check.
- Domains - Your domain name (e.g. myname.com). For local host write "localhost". You can add multiple domain also.
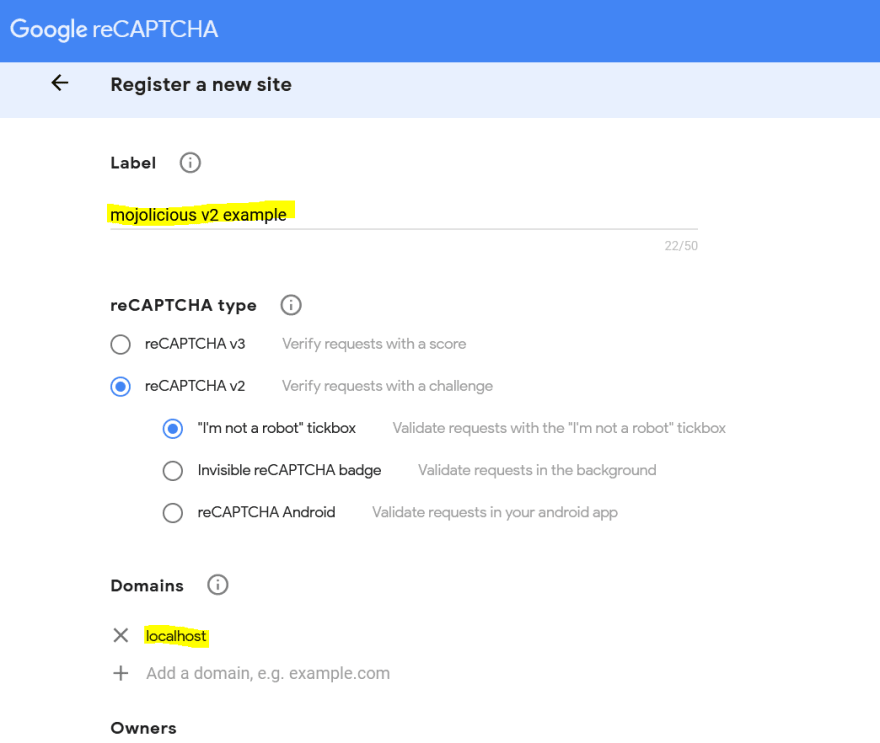
After submit you will get "Site Key" and "Secret Key".
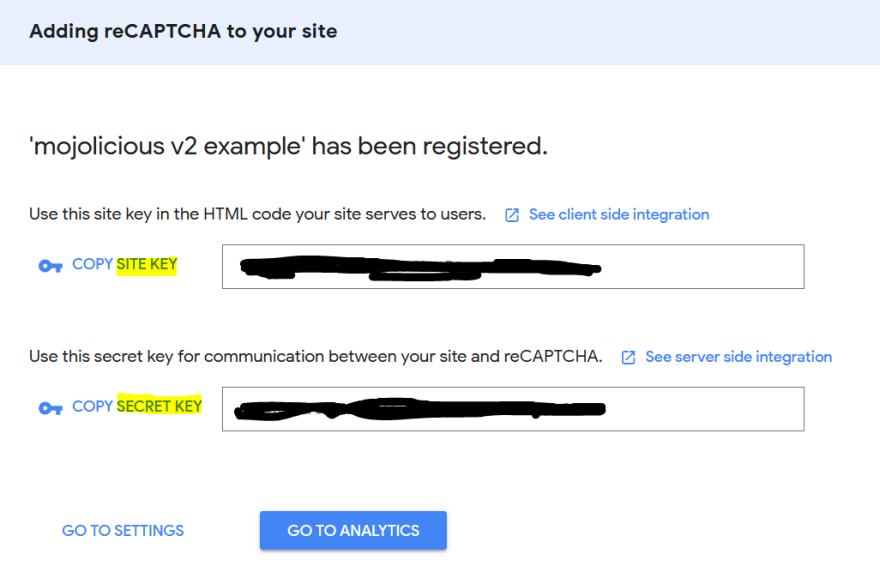
As mentioned -
- "Site Key" will be used on client site (web page) and visible to user.
- "Secret Key" will be used on server side and known to site owner only.
2. Adding the widget on client side
We will creating a simple "Log In" page for the demo.
We will be authenticating the user. After success they will get a home page where we will be welcoming them and they can logout from there. In case of authentication failure error will be thrown.
A reCAPTCHA will be available on the log in page to distinguish between human and automated access
For more details - https://developers.google.com/recaptcha/docs/display
For using the reCAPTCHA in your web page we have to include the js file.
<head>
    <script src="https://www.google.com/recaptcha/api.js" async defer></script>
</head>
We will be adding below code in the form where we want reCAPTCHA widget on our web page.
<div class="g-recaptcha" data-sitekey="<Your Site Key>"></div>
Add your "Site Key" here as obtained in Step 1.
We will be using Mojo::Template and Mojolicious::Plugin::TagHelpers to generate client side code. We will be creating a simple form
<html>
    <head>
        <script src="https://www.google.com/recaptcha/api.js" async defer></script>
    </head>
    <body>
        %= t h1 => 'Login'
        % if (flash('error')) {
            <h2 style="color:red"><%= flash('error') %></h2>
        % }
        %= form_for login => (method => 'post') => begin
            <label>username:</label> <%= text_field 'username' %>
        <br /><br />
            <label>password:</label> <%= password_field 'password' %>
        <br /><br />
            <div class="g-recaptcha" data-sitekey="<Your Site Key>"></div>
        %= submit_button 'Log in', id => 'submit'
        %= end
    </body>
</html>
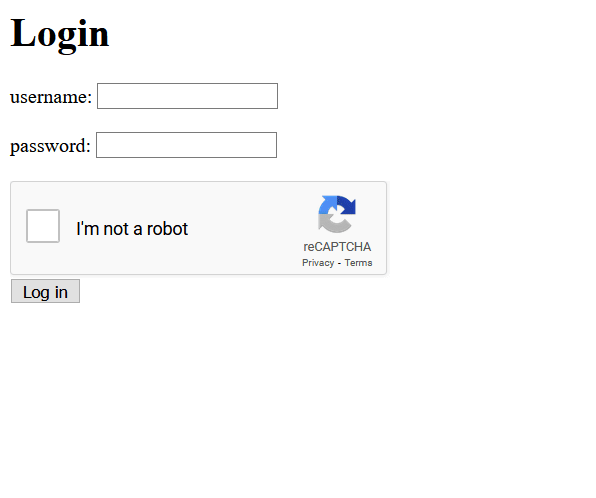
You can look at the Mojolicious::Plugin::TagHelpers documentation for more help about tags used. In summary, this will create a simple page containing 2 text boxes for 'username' and 'password' field, a reCAPTCHA widget and a Log in button which we will see later.
3. Creating Server side and validating
As mentioned before we will be using Mojolicious on Server side. For now we will just be using Mojolicious::Lite. You can do the same thing on full mojolicious app too.
We will start with the creation of the first page.
#!/usr/bin/env perl

use strict;
use warnings;
use Mojolicious::Lite;

get '/' => sub {
    my $c = shift;
    $c->render;
} => 'index';

app->start;
What we are saying here is - When we hit the base url (/), render the index page(mentioned in Step 2).
Now there are few ways to include the html template in your code.
- You can create a 'templates' dir parallel to your main script, put your templates there(here index.html.ep) and it will be rendered from there.
- You can put your template in DATA section.
For now we will using the later approach. For more details you can take a look at Mojolicious::Guides::Rendering
So add the html template create in Step 2 to the bottom of the current script. E.g.
#!/usr/bin/env perl

use strict;
use warnings;
use Mojolicious::Lite;

get '/' => sub {
    my $c = shift;
    $c->render;
} => 'index';

app->start;

__DATA__

@@ index.html.ep
<html>
    <head>
        <script src="https://www.google.com/recaptcha/api.js" async defer></script>
    </head>
    <body>
       ...
    </body>
</html>
Save the file and run below command on your terminal -
morbo recaptcha_v2_verification.pl
Go to browser and hit "http://localhost:3000". You can see your shiny login page with reCAPTCHA widget.😅
Now remember we have created a form in index page. So we have to do some action when the form will be submitted. For that we have to add another route to our mojo app.
post '/login' => sub {
    my $c = shift;
    if ($c->auth) {
        if ($c->verify_captcha) {
            $c->session(auth => 1);
            $c->flash(username => $c->param('username'));
            return $c->redirect_to('home');
        }
        else {
            $c->flash('error' => 'Captcha verification failed');
            $c->redirect_to('index');
        }
    }
    $c->flash('error' => 'Wrong login/password');
    $c->redirect_to('index');
} => 'login';
When the form will be submitted we will get a post request with parameters on 'login' endpoint. We are checking the validity of username/password and verifying the captcha.
If both succeed we are allowing the user to login and redirecting him to 'home' page. If failed we are flashing the error and redirecting to 'index' page. We are using couple of Helpers here. Also for verification of reCAPTCHA we will be doing post request. For that we will be using Mojo::UserAgent. The definitions of them are -
use Mojo::UserAgent;

# Check for authentication
helper auth => sub {
    my $c = shift;

    # Never do it in production
    if (($c->param('username') eq 'admin') && ($c->param('password') eq 'admin')) {
        return 1;
    }
    else {
        return 0;
    }
};

# Get User-Agent
helper ua => sub {
    my $ua = Mojo::UserAgent->new;
    $ua->transactor->name('Mozilla/5.0 (Windows NT 6.1; WOW64; rv:77.0) Gecko/20190101 Firefox/77.0');
    return $ua;
};

# Verify the reCAPTCHA
helper verify_captcha => sub {
    my $c = shift;
    my $param = $c->param('g-recaptcha-response');

    my $captcha_url = 'https://www.google.com/recaptcha/api/siteverify';
    my $response
        = $c->ua->post(
        $captcha_url => form => {response => $param, secret => $ENV{'CAPTCHA_V2_SECRET_KEY'}})
        ->result;
    if ($response->is_success()) {
        my $out = $response->json;
        if ($out->{success}) {
            return 1;
        }
        else {
            return 0;
        }
    }
    else {
        # Connection to reCAPTCHA failed
        return 0;
    }
};
In auth helper we are authenticating the user. For simplicity purpose I am not using any database and done it like that. Please don't do in production.
In verify_captcha we are verifying the captcha by doing a post request and checking the response for success.
The response is a JSON object -
{
  "success": true|false,
  "challenge_ts": timestamp,  // timestamp of the challenge load (ISO format yyyy-MM-dd'T'HH:mm:ssZZ)
  "hostname": string,         // the hostname of the site where the reCAPTCHA was solved
  "error-codes": [...]        // optional
}
If we get success as true we are returning with 1(true) meaning reCAPTCHA verification is successful.
For more details have a look at - https://developers.google.com/recaptcha/docs/verify
$ENV{'CAPTCHA_V2_SECRET_KEY'} is the 'Secret Key' that we got in step 1. Try to set it in environment and not hardcoded in file.
Now after successful login we will redirect the user to 'home' page. For that we will create another route. Also we want to protect that route so that an unauthenticated user can't access it. For that we will be using under.
under sub {
    my $c = shift;
    my $auth = $c->session('auth') // '';
    if ($auth eq '1') {
        return 1;
    }

    $c->render(template => 'denied');
    return undef;
};

get '/home' => sub {
    my $c = shift;
    $c->render();
} => 'home';

__DATA__

@@ home.html.ep
%= t h1 => 'Home Page'
<h2 style="color:green">Hello <%= flash('username') %></h2>
<a href="<%= url_for('logout') %>">Logout</a>

@@ denied.html.ep
%= t h2 => 'Access Denied'
<a href="<%= url_for('index') %>">Login</a>
Also after a successful login, if user want to logout we have to handle that too. For that we will create another route -
get '/logout' => sub {
    my $c = shift;
    delete $c->session->{auth};
    $c->redirect_to('index');
} => 'logout';
That all, now lets open the browser and refresh the home page.
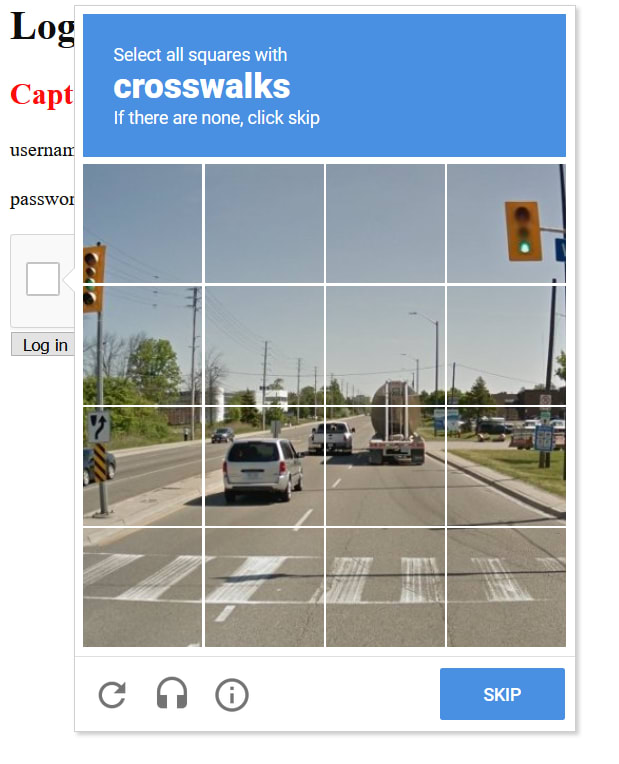
You will see the login page. Try to login with the username and password ('admin' here). If your captcha verification is success you will see home page

In case of failure it will through error and sometimes ask you select images.
The complete example is also available at Github
I hope this is helpful to you. I will be writing a separate article for reCAPTCHA v3.
Perl onion logo taken from here
Mojolicious logo taken from here
reCAPTCHA logo taken from here
EDIT - Article for reCAPTCHA v3 is available at Using google reCaptcha v3 with Perl


Oldest comments (1)
Thanks Gaurav , for the elaborate article.