
Recently I got the latest version of Raspberry Pi which is 400. I got it as a complimentary from Zebrium during Linux Foundation KubeCon 2020. I have to put it for good use. I already implemented Pihole using Raspberry Pi. Later I destroyed the Pihole and started using NextDNS. Using Pi 400, I implemented distributed load testing in JMeter. This blog post will focus on distributed load testing in JMeter using Raspberry Pi 400.
What is Distributed Load Testing?
Running your load test in your local machine is not a good idea. You will reach the resource limits quickly and you cannot scale your resources or the load.
You will also have background processes running which might interfere your testing.
By distributing the load to multiple nodes, you can easily scale the load and resources (vertical scaling). You can spin up the cloud instances, set up the load test environment and destroy the instances.
If you do not want to burden yourself in setting up and maintaining the instances, you can opt in JMeter-on-Cloud solutions like RedLine13.
Step-by-Step Instructions
Apache JMeter has a detailed step-by-step instruction for the distributed load testing. Even if you follow the instructions as-is, you might hit a few road blocks.
This setup uses:
- Windows 10 Pro (Controller) and Raspberry Pi OS (Worker Node)
- Java 15 in Windows 10 Pro and Java 11 in Raspberry Pi (this was intentional)
- JMeter 5.4 in both the OS

Here are the checkpoints before you start:
- Controller and Worker Node must be in the same subnet
- Firewall must be turned off and the required ports are opened
- Java and JMeter version must be identical in all the nodes
- Setup SSL for RMI
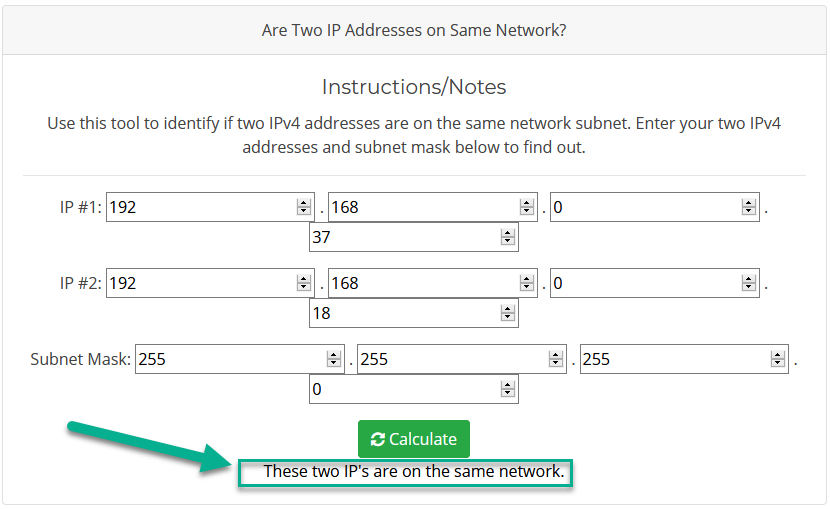
How to find whether the nodes are in same subnet?
My controller node has 192.168.0.18 and my worker node has 192.168.0.37. To find the IP address and subnet mask in Windows, you can use ipconfig in command prompt and in Raspberry Pi, issue ifconfig in terminal.
- Go to https://www.meridianoutpost.com/resources/etools/network/two-ips-on-same-network.php
- Enter both the IP addresses and subnet mask
- Hit Calculate
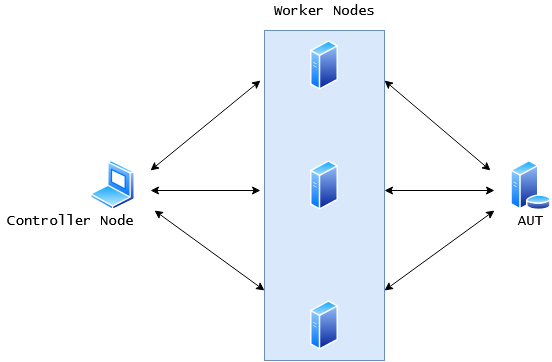
How it works?
Here is the pictorial representation of how it works. On a very high level, controller node instructs the worker node(s) by sending the JMeter file. Worker node will execute the threads as per the test plan design. Threads will hit the target application.
From Controller Node, you can view the results, execution status, and errors/exceptions. You can start the test either using the CLI mode (recommended) or Non-CLI mode.
Let's get started
SSL Setup
By default, JMeter uses SSL for RMI. If you want to disable SSL, you can do that in the properties file. Uncomment below property in jmeter.properties or configure it in user.properties.
server.rmi.ssl.disable=false
But we are going to setup SSL for RMI in this experiment. It is pretty straight forward.
Go to bin folder in Controller node, launch create-rmi-keystore.bat (Windows OS) or create-rmi-keystore.sh for macOS/Linux.
Keep answering the questions as shown below.
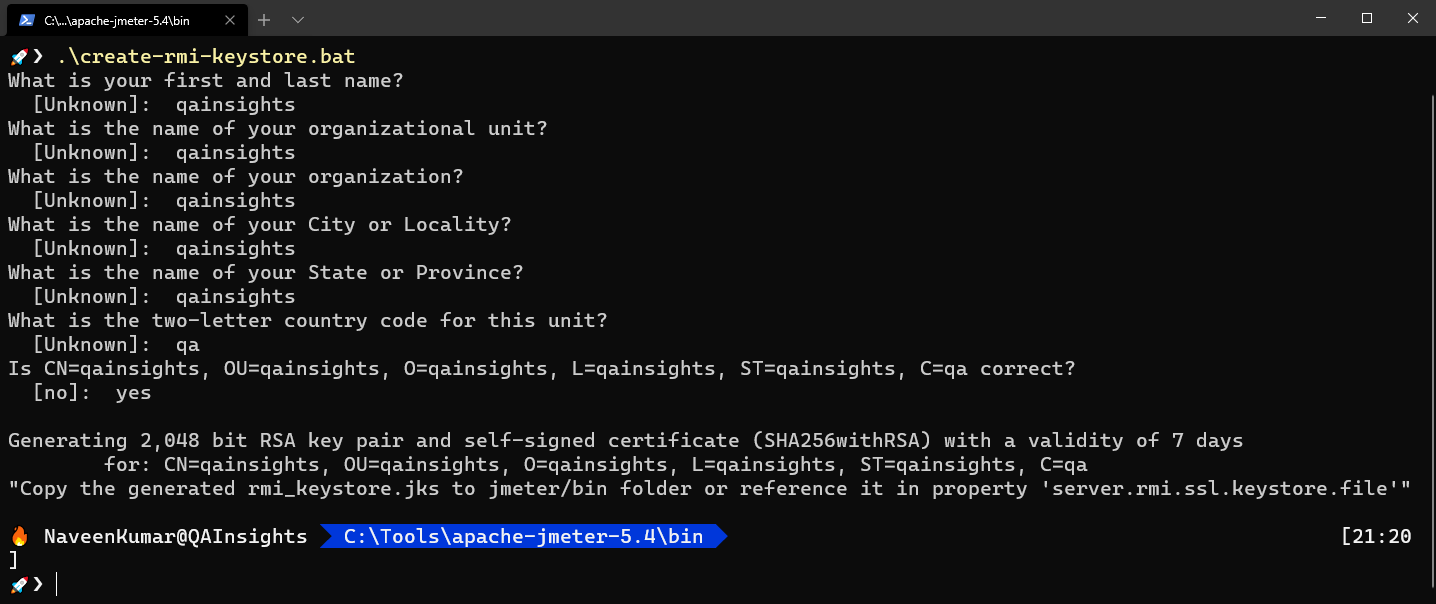
If you get the below error, it means already key is present.

After successful generation, you could see the rmi_keystore.jks file in bin folder. Copy this file into all the Worker nodes (bin folder).
Important Notes:
- The default passphrase for the keystore is
changeit - Make sure you change the alias name in the properties file
server.rmi.ssl.keystore.alias=qainsights - Below are the default RMI configuration properties
# Configuration of Secure RMI connection
#
# Type of keystore : JKS
#server.rmi.ssl.keystore.type=JKS
#
# Keystore file that contains private key
#server.rmi.ssl.keystore.file=rmi_keystore.jks
#
# Password of keystore
#server.rmi.ssl.keystore.password=changeit
#
# Key alias
#server.rmi.ssl.keystore.alias=rmi
#
# Type of truststore : JKS
#server.rmi.ssl.truststore.type=JKS
#
# Keystore file that contains certificate
#server.rmi.ssl.truststore.file=rmi_keystore.jks
#
# Password of truststore
#server.rmi.ssl.truststore.password=changeit
#
# Set this if you don't want to use SSL for RMI
#server.rmi.ssl.disable=false
Controller Node JMeter Setup
Now it's time to configure the controller node JMeter setup.
- Open
jmeter.propertiesin your favorite editor - Find
remote_hostsproperty - Add all the worker nodes IP addresses separated by comma
- E.g.
remote_hosts=192.168.0.37
Worker Node(s) JMeter Setup
You can either SSH or take remote your worker node(s). In this case, I am using VNC Viewer to take remote my Raspberry Pi 400.
Paste the rmi_keystore.jks file in the bin folder.
Launch jmeter-server using the below command.
./jmeter -s -Djava.rmi.server.hostname=192.168.0.37
or
./jmeter-server -Djava.rmi.server.hostname=192.168.0.37
If everything goes well, you will get the below output. Now your remote machine is ready to take instructions.
Created remote object: UnicastServerRef2 [liveRef: [endpoint:192.168.0.37:45971,SSLRMIServerSocketFactory(host=/192.168.0.37, keyStoreLocation=rmi_keystore.jks, type=JKS, trustStoreLocation=rmi_keystore.jks, type=JKS, alias=rmi),SSLRMIClientSocketFactory(keyStoreLocation=rmi_keystore.jks, type=JKS, trustStoreLocation=rmi_keystore.jks, type=JKS, alias=rmi),objID:[-79d83a36:1768d7268d4:-7fff, 2199432749051545387]]]Back to Controller Node
Let's go back to Controller Node (Windows 10 Pro). We have already configured the remote hosts. Go to bin folder in command prompt or terminal, launch the JMeter using the below command.
jmeter -Djava.rmi.server.hostname=192.168.0.18
This will launch JMeter in non-CLI mode.
Open the test plan which you are going to execute.
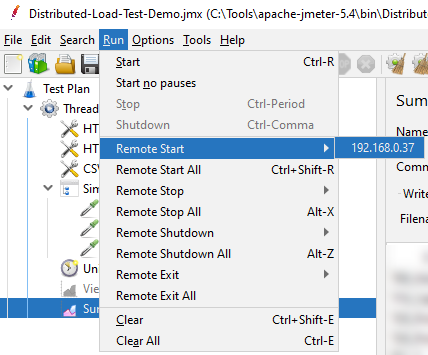
Do not hit Run button. Instead, go to Run > Remote Start where you could see the remote hosts IP addresses. Select the IP address or you can have remote start all using Run > Remote Start All.
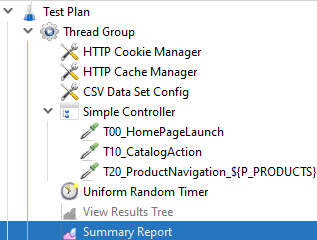
Below is the sample test plan.
In the worker node, you will see the below output stating that testing has been started.

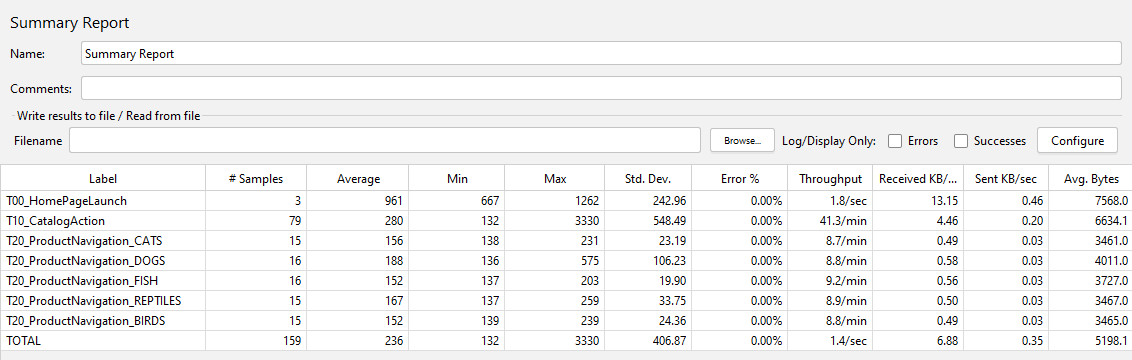
During the test execution, you can monitor the stats in Summary Report in JMeter (Controller Node).
After the execution is completed, you can stop the JMeter instance in your worker node or keep it running.
Congratulations! You just completed the distributed load testing.
Tip
To remote start the test in CLI mode, use the below command.
jmeter -Djava.rmi.server.hostname=controller_IP -n -t Distributed-Load-Test-Demo.jmx -l RemoteRun.jtl -R worker_IP1,worker_IP2..
Important Points
- If you get any error during this process, make sure you check the
jmeter.logfiles in Controller and Worker nodes. - Always launch the Controller and Worker node using
Djava.rmi.server.hostnameargument or configureRMI_HOST_DEF=-Djava.rmi.server.hostname=xxx.xxx.xxx.xxx in thejmeter-serverfile - Make sure all the nodes are in same subnet
- Firewall is disabled
- JMeter strips the response data to optimize the network usage
- RMI cannot communicate across subnets without a proxy
- More about RMI Properties
Final Words
The initial effort to set up the distributed load testing might take time depends on the issues you face. The similar approach you can use it in AWS, GCP, Azure or other cloud providers.
If you want to save this overhead, you can also opt for ready-made JMeter-on-Cloud solutions. It all depends on how much you want to spend on the setup, maintenance, and spend time and effort on securing the nodes with the latest patches, versions etc.
You can also leverage Docker, Kubernetes tech for the distribution or write a shell script to automate most of the moving parts.


Top comments (0)