You have heard about Kaggle being awesome. You also are striving to improve your data science skills and are getting started with deep learning or just getting started on Kaggle.
Just as you think you are getting the grasp of training your deep neural network on Kaggle, you get stuck.
So what’s the problem?
So you’ve learnt you can save Pytorch models (strictly speaking, the state dictionary) and load them later at your convenience. You’ve trained your model on Kaggle and saved it. When you need to access the saved model, you just can’t find it and this might force you to start all over again. 😓😓😓
We all know that training a model can be quite a painful process so having to do that all over again is not an option. Worry not, I(and Kaggle) got you!
In this article, I will show you how to load your trained Pytorch model in 5 simple steps.
Assumptions
I will assume that:
- You already know how to train a model.
- You understand the concept of a Pytorch’s model state dictionary. Look at this resource for more information.
- You have at least a basic understanding of how to save Pytorch models and load them. If not, this post is a good place to start. The project I was working on and the subsequent need to author this article was born out of my participation in the Udacity Pytorch Challenge.
Step 1: Train your model
In this example, I wrote a function called train() that takes the number of epochs as a parameter.

Step 2: Save your model

Note: The approach above (saving only the state dictionary) may not be the best as when you are loading, you will need to build a model with the same architecture as the one which you saved.
Step 3: Commit your Kernel
See below for what a complete commit looks like.

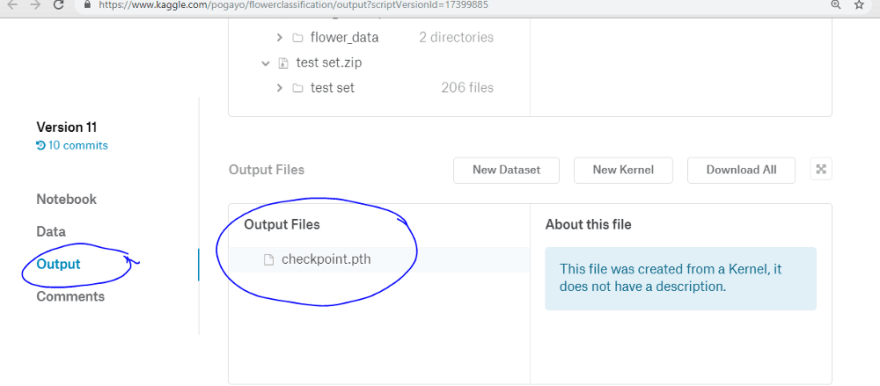
You may have to wait for a few minutes for Kaggle servers to publish your saved file. You can then open your kernel and you will see your file under the output section as shown below.
Step 4: Add your kernel as a dataset
That’s not the end. Go to the +dataset tab on the far right, and click it to add your kernel’s output file as a data source.
Your kernel is now listed as a data source. Printing the content of your input folder will list your kernel as one of the sources.
See the image below for how to view and access your output files using code.
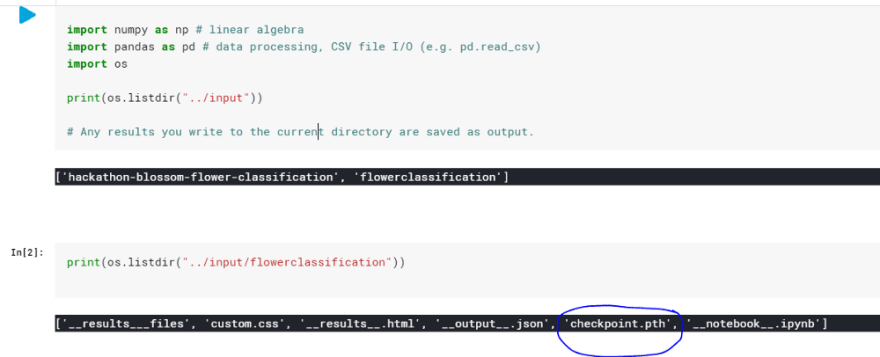
To view your file on the sidebar, click Workspace -> input then you will see your kernel listed as one of the files under your kernel which is in the input directory.
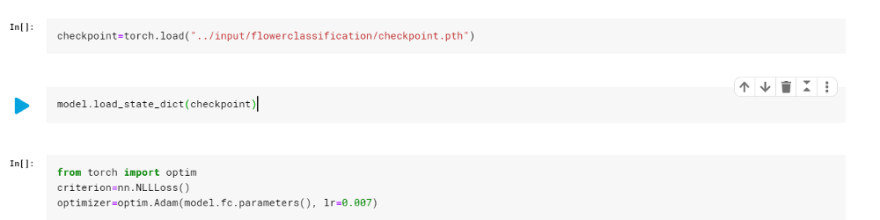
Step 5: Load your model
Now that you know how to access your saved checkpoint, you are ready to load your weights!
Make sure the model that you build has the same architecture as the one whose state dictionary you save. There is a way to save both the architecture and the state dictionary in a single file so that you don’t have to remember, but that is not the focus of this tutorial.
And that’s it!
I hope this ->😃😃😃 is your mood after you’ve successfully loaded your first model. Go forth and prosper! And of course, leave your feedback in the comment section below.


Top comments (0)