I always wanted to load an image into the grid of a spreadsheet because it looks cool, so I coded a script for LibreOffice Calc that does that.

LibreOffice supports Python scripting, which is convenient for me because I program in Python a lot, but for Python scripting to be enabled in LibreOffice, you must install the Python script support provider.
In Ubuntu:
sudo apt install libreoffice-script-provider-python
Now, to load images in your Python script, you need the Pillow library. LibreOffice uses the system Python, so you can simply do:
pip install Pillow
and the library will be available in your LibreOffice Python scripts.
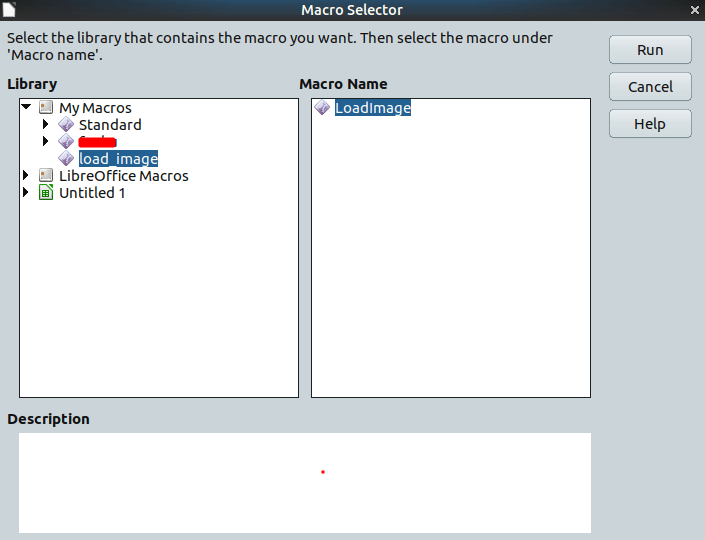
Next, where to put the Python script for LibreOffice? On Linux, your scripts are in ~/.config/libreoffice/4/user/Scripts/python. Anything you put there will be picked up by the LibreOffice macro engine. For example, if you have a file ~/.config/libreoffice/4/user/Scripts/python/load_image.py, and in that file there's a function named LoadImage, and the script loads without an error, you are able to see it in the Macro Selector that opens when you select Tools > Macros > Run Macro.
Now, what do we put in our script. First we need to import Image from the Pillow library:
from PIL import Image
Next, create a function named LoadImage, and in this function, get the current sheet. (We assume Calc is currently open, and a sheet is open too.)
# Assuming a spreadsheet is currently open.
desktop = XSCRIPTCONTEXT.getDesktop()
model = desktop.getCurrentComponent()
active_sheet = model.CurrentController.ActiveSheet
Nothing needs to be imported for this. XSCRIPTCONTEXT is injected by LibreOffice's scripting host.
In order to know what image to load, we would like to read the full path from cell A1 in the spreadsheet.
path = active_sheet.getCellByPosition(0, 0).String
Next, load the image and scale it to a small size using PIL, because we don't want to use too many cells in the spreadsheet. If anything goes wrong, abort here and put an error message in cell A1. If image loading is successful, clear the text in cell A1 (the image file path) and continue.
try:
    im = Image.open(path)
    scale_factor = LONGER_EDGE_PIXELS / max(im.width, im.height)
    out_w = int(scale_factor * im.width)
    out_h = int(scale_factor * im.height)
    out = Image.new("RGB", (out_w, out_h), (255, 255, 255))
    rsz = im.resize((out_w, out_h))
    out.paste(rsz)
    image_load_successful = True
except Exception as ex:
    active_sheet.getCellByPosition(0, 0).String = str(ex)
    image_load_successful = False

if not image_load_successful:
    return None

active_sheet.getCellByPosition(0, 0).String = ""
LONGER_EDGE_PIXELS is a constant inserted further up in the script. I have set it to 100. The image is scaled so that the longer edge (width or height, whichever is longer) takes up 100 pixels.
Note that the resized image is pasted onto a newly created image object, because we need to ensure the image we are using is using the RGB pixel format (not RGBA or indexed).
Before doing anything to the spreadsheet, temporarily disable some handlers that would slow down rendering the image, because they would get executed all the time:
model.enableAutomaticCalculation(False)
model.lockControllers()
model.addActionLock()
Now it's time to resize the columns and rows that are going to be used as pixels.
columns = active_sheet.getColumns()
rows = active_sheet.getRows()
for y in range(out_h):
    rows[y].Height = ROW_HEIGHT
for x in range(out_w):
    columns[x].Width = COLUMN_WIDTH
ROW_HEIGHT and COLUMN_WIDTH again are constants inserted further up in the script. I have set them to 180 and 200. These may need some tweaking, and I have found that using Calc's zoom function changes the aspect ratio.
Perhaps there would be a way of resizing a whole range at once, but I could not be bothered to find out how.
And finally, we can do the actual image rendering. Because we need to convert individual values for red, green, and blue into an RGB colour value, insert a nested function named _rgb further up:
def _rgb(r, g, b):
    return (r << 16) | (g << 8) | b
Now read the colour values from the resized image pixel by pixel using getpixel, and use the cell's CellBackColor property to set its background colour.
for y in range(out_h):
    for x in range(out_w):
        active_sheet.getCellByPosition(x, y).CellBackColor = _rgb(*out.getpixel((x, y)))
That's it! The loop above will take a while. On my computer, it takes 6-15 seconds to render an image. Once the rendering is finished, unlock the handlers that were locked above.
model.removeActionLock()
model.unlockControllers()
model.enableAutomaticCalculation(True)
Finished! Now go and enter the path to an image file in cell A1, and execute LoadImage.
Note that since it's always using the active sheet, you can have a workbook (?) with multiple sheets, and load an image on each of them to create a little 'gallery' in an ODS file.
You can find the full script in this GitHub repo:


Top comments (0)