With the introduction of Android Jetpack’s ViewModel and Data Binding we are able to reduce the number of lines of code in out apps significantly. In this article we will walk through a simple application that implements 2-way Data Binding.
With 2-Way Data Binding when the value of the object changes, the User Interface changes and when the UI changes, the value of the object changes.
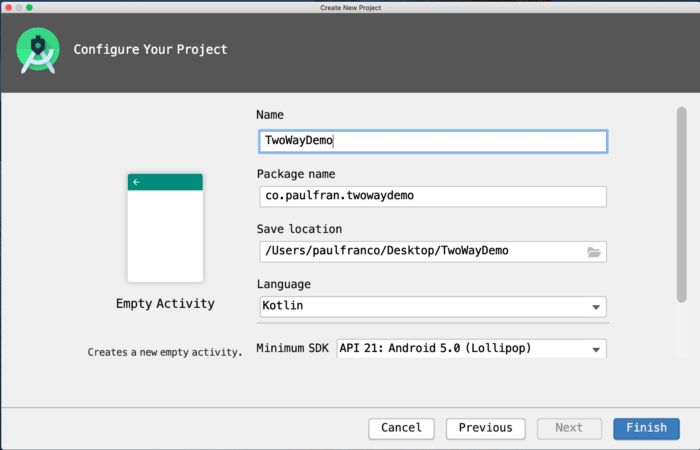
Lets begin by starting a new Project in Android Studio. Select Empty Activity as the project template.

I’ll be naming the project TwoWayDemo.
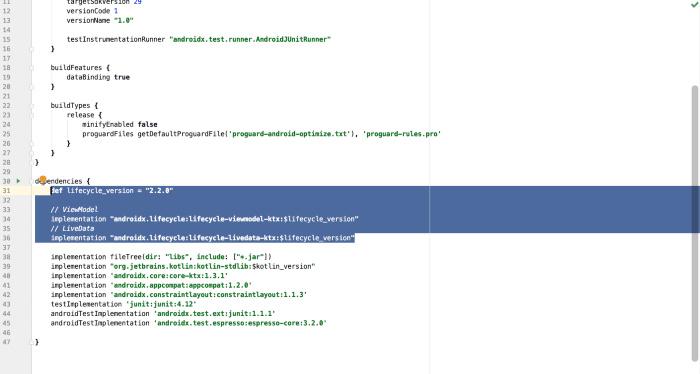
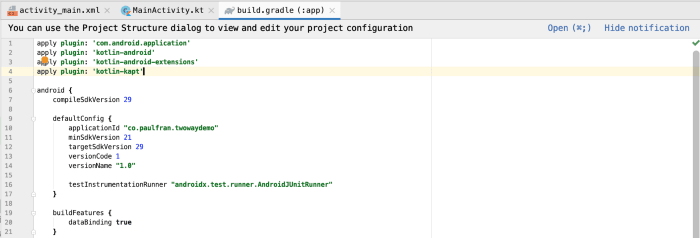
The next step is to enable Data Binding in the buildFeatures block, add the dependencies for ViewModel and LiveData in the dependencies block, and apply the kotlin-kapt plugin in the app’s build.gradle file. A list of updated dependencies for Lifecycle-aware components can be found here: https://developer.android.com/jetpack/androidx/releases/lifecycle

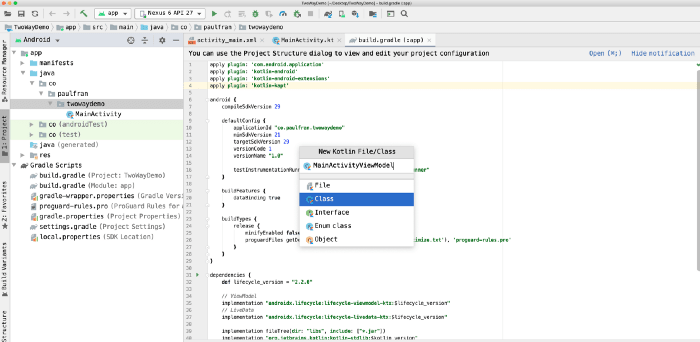
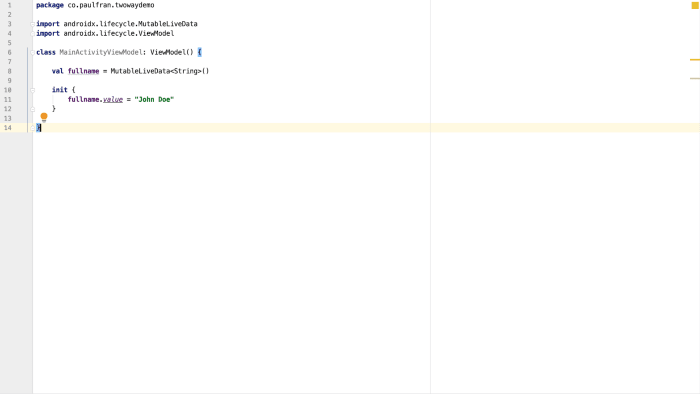
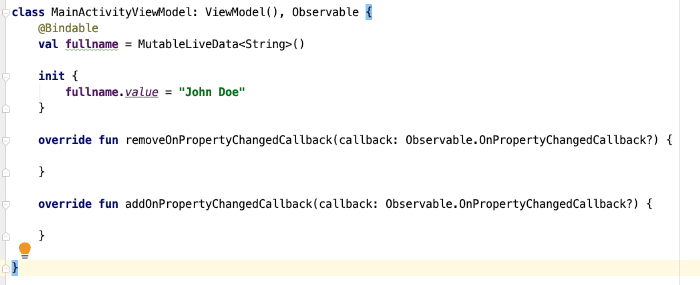
Next we will create a ViewModel Class called MainActivityViewModel which for now will only hold a single MutableLiveData of type String. MutableLiveData is Read/Write while LiveData is ReadOnly. We will initialize a variable of fullName with the initial value of “John Doe”.
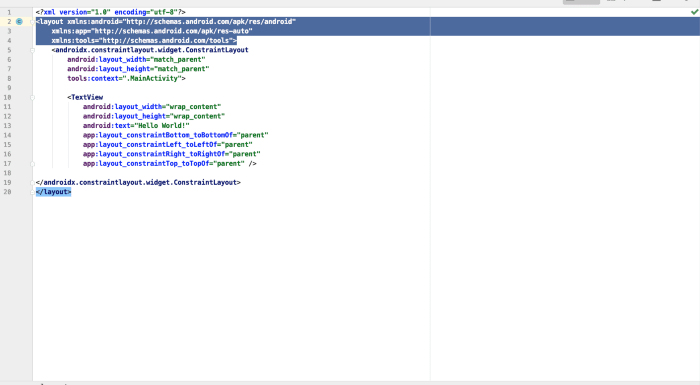
In order to utilize data binding, we need to add Layout Tags as the outermost tags in our activity_main.xml file.
Now, we need to add Data Tags and define a reference variable for the MainActivityViewModel Class.

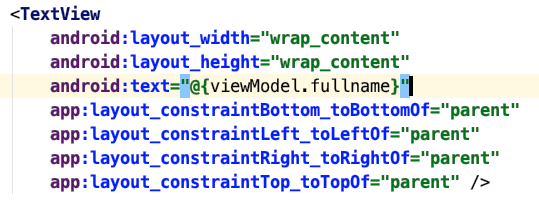
We can now bind the value of the fullname MutableLiveData to the TextView.
To complete our initial set up we need to define our data binding object in our MainActivity and replace the setContentView with our binding object.

Now we need to define a reference variable for our ViewModel.
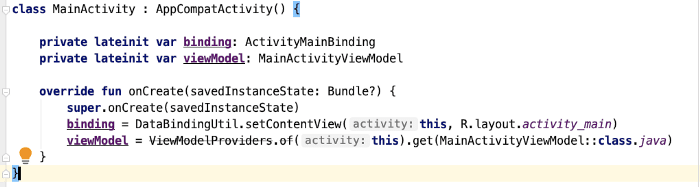
We now need to assign this viewModel Object to the viewModel object we defined in out activity_main layout file.

Finally, since we are using LiveData we have to set MainActivity as the LifeCycle owner.

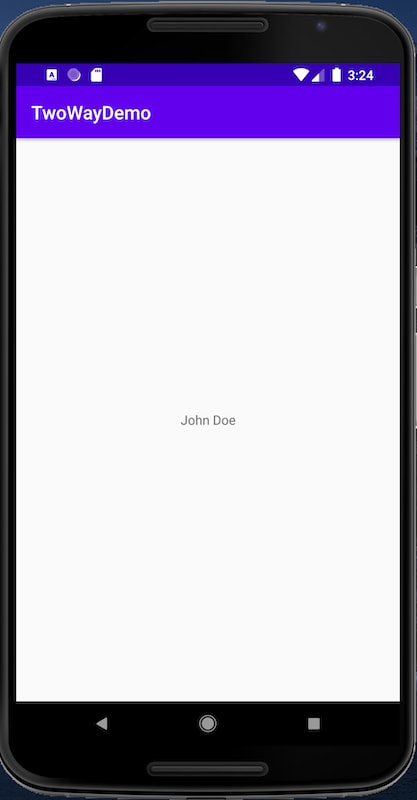
If we run our app, we should be able to see a TextView with the fullname value we defined earlier in our MainActivityViewModel class.
This is one-way data binding. We bound a view to a ViewModel Object. The bound views are displaying the values of the properties of the ViewModel object. Now that we have implemented one-way data binding, lets make a few changes to illustrate 2-way data binding.
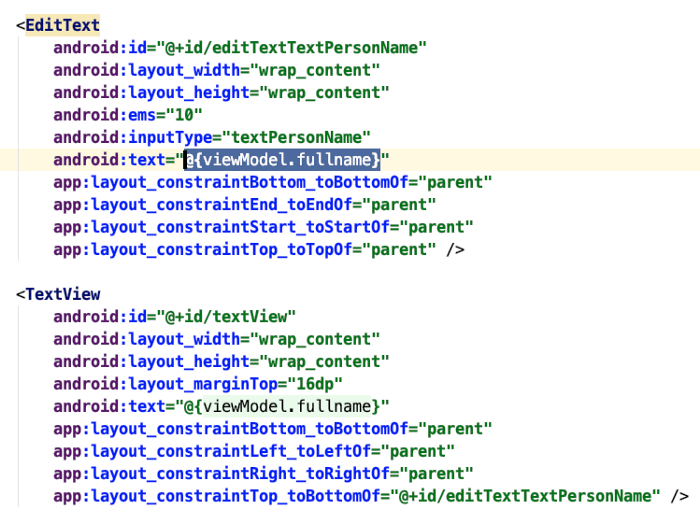
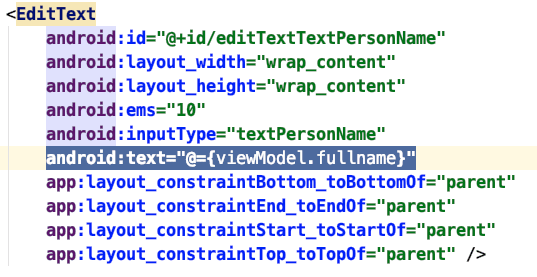
Above the TextView, lets add an EditText so that when we type something on the EditText it will be immediately displayed in the TextView.
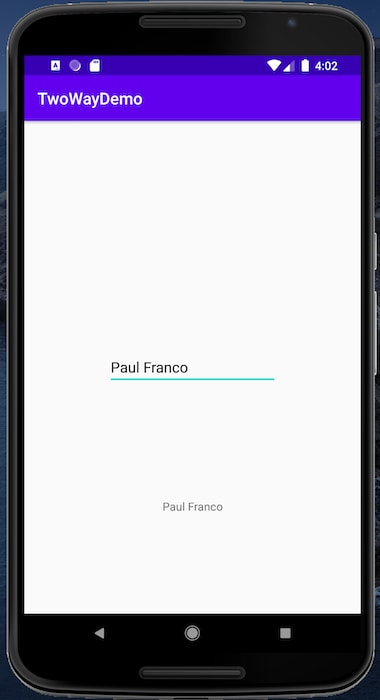
Now that we have bound the EditText to viewModel.fullname, we can see that both the EditText and the TextView are displaying “John Doe”.
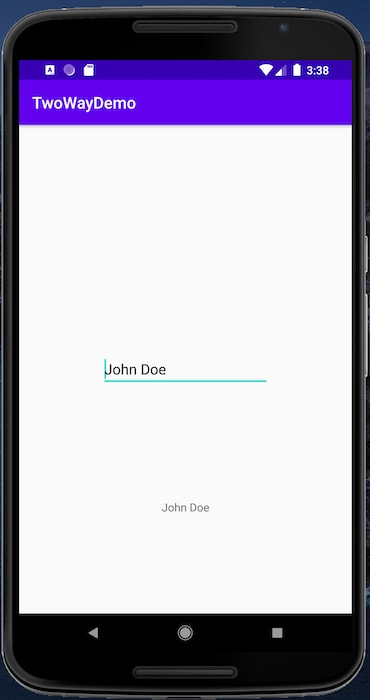
But if we try to change the EditText to Robert Smith, nothing happens to the EditText.
This is because our app is still only implementing one-way data binding. In order to fully implement 2-way data binding we have to make a small change in our activity_main layout out file. In our EditText we have to add a = sign in between the @ and { of our text property.
We also have to annotate our fullname variable in out MainActivityViewModel with the Bindable annotation.

The last step is to extend Observable and implement its methods.
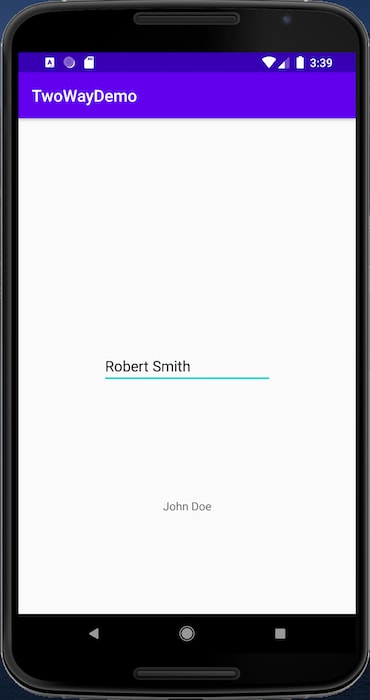
When you run the app you will see that as you type something in the EditText the TextView will automatically display whatever you wrote. This was a simple example of how to implement 2-way Data Binding with ViewModel and LiveData.


Latest comments (0)