As I mentioned previously, I'm currently building a .Net based Open Source LegalTech platform called Panache Legal. For development and testing I build docker images for the various microservices which are then hosted on Docker Hub and while I can use these with Docker Desktop, I'd prefer to get things up and running with Kubernetes so that I can learn more about that environment and also test things like scaling, which is why we're building this MicroK8s system.
In this example I'm going to be showing how I get Panache Legal up and running, but you may want to choose different containers more suited to your needs, either way, this should still provide the groundwork you need to get going.
Deployment files
To spin up our containers in MicroK8s we could simply jump straight into the command line and deploy our app that way using the following
microk8s kubectl create ......
But for Panache Legal we have multiple containers we need to create, all of which have various command line arguments, and this can become a little cumbersome.
Instead of the command line we'll use deployment files so that we have all the setup in an easy to maintain place.
For Panache Legal I maintain some basic deployment files in the GitHub repository here.
There are individual deployment files for each of the microservices, along with two other scripts DeleteServices.sh and StartServices.sh which provide an easy single script to run which will create or remove all of the services in one go.
Lets take a look inside these files and see how they are setup. For reference you can also check out the kubernetes documentation for deployments.
Let's have a look at the Client service, which provides a .NET Web API for storing and maintaining client information. This Microservice has its own database associated with it and is protected by JWT token authentication, handled by the Identity service.
Looking at the first part of the file.
apiVersion: apps/v1
kind: Deployment
metadata:
  name: panachesoftware-service-client
  labels:
    app: panachesoftware-service-client
We specify that this is a Deployment and we provide a name for the app panachesoftware-service-client This is the internal name MicroK8s will use for the app and can be set to whatever you need.
The spec part of the file.
spec:
  replicas: 1
  selector:
    matchLabels:
      app: panachesoftware-service-client
  template:
    metadata:
      labels:
        app: panachesoftware-service-client
Sets out what pods this deployment will manage, in this case we're keeping it simple so we just reference the name we provided in the metadata section.
In addition here we specify the number of replicas. For the moment I simply use 1 replica, but the microservice based approach to Panache Legal means that certain services, like Identity and the UI may be set to use multiple replicas so that more than one instance of the service will run, allowing our application to scale as demand increases.
The next section provides details of the container itself.
spec:
      containers:
      - env:
          - name: ASPNETCORE_ENVIRONMENT
            value: Development
          - name: ASPNETCORE_URLS
            value: http://+:55005
          - name: ConnectionStrings__MySQL
            value: server={db-server-IP};port=3306;database=PanacheSoftware.Client.K8S;user={db-user};password={db-password};GuidFormat=Char36
          - name: PanacheSoftware__CallMethod__APICallsSecure
            value: "False"
          - name: PanacheSoftware__CallMethod__UICallsSecure
            value: "False"
          - name: PanacheSoftware__CallMethod__UseAPIGateway
            value: "True"
          - name: PanacheSoftware__DBProvider
            value: MySQL
          - name: PanacheSoftware__Secret__ClientServiceSecret
            value: AA04416A-A87B-4D88-956B-27CBFFCC2802
          - name: PanacheSoftware__StartDomain
            value: panachesoftware.com
          - name: PanacheSoftware__Url__IdentityServerURL
            value: http://{server-IP}:30002
          - name: PanacheSoftware__Url__IdentityServerURLSecure
            value: https://{server-IP}:30002
        image: panachesoftware/panachesoftwareserviceclient:latest
        name: panachesoftware-service-client
        ports:
        - containerPort: 55005
      hostNetwork: true
      dnsPolicy: ClusterFirstWithHostNet
The name, value pairs shown here all correspond to environment variables expected by the service, so if you were to look at the appsettings.json file of the client service .NET project, you will see corresponding settings.
"ConnectionStrings": {
    "MSSQL": "Data Source=localhost;Database=PanacheSoftware.Client;User ID=sa;Password=Passw0rd123!;Connect Timeout=30;Encrypt=False;TrustServerCertificate=False;ApplicationIntent=ReadWrite;MultiSubnetFailover=False",
    "MySQL": "server=raspberrypi;port=3306;database=PanacheSoftware.Client;user=pi;password=Passw0rd123!;GuidFormat=Char36"
  },
  "PanacheSoftware": {
    "DBProvider": "MySQL",
    "StartDomain": "panachesoftware.com",
    "CallMethod": {
      "APICallsSecure": "false",
      "UICallsSecure": "false",
      "UseAPIGateway": "true"
    },
    "Url": {
      "IdentityServerURL": "http://localhost:55002",
      "IdentityServerURLSecure": "https://localhost:44302",
      "APIGatewayURL": "http://localhost:55003",
      "APIGatewayURLSecure": "https://localhost:44303"
    },
    "Secret": {
      "ClientServiceSecret": "1314EF18-40FA-4B16-83DF-B276FF0D92A9"
    }
  }
All I've changed in the example deployment files is to put placeholders, like {db-server-IP} and {db-user}, in the file where you will need to change these to be applicable in your system.
We setup MySQL in a previous part so you should have the relevant username and password for the services that require a database, and we're using the same machine to host MicroK8s and our MySQL database so {db-server-IP} and {server-IP} will be the same.
if you need to determine the IP address of your VM you can use the following command
hostname -I | awk '{print $1}'
Be aware that in general, a new IP address will likely be assigned each time you VM starts. One way to change this is to update the DHCP IP reservations within your router to make sure that the IP address assigned to your VM (based on its hostname) always remains the same.
Outside of the environment variables there are a couple of other important items.
image specifies the docker image that will be used in this deployment. This is the image name along with the appropriate tag, in this case the client service with the latest tag.
panachesoftware/panachesoftwareserviceclient:latest

Alongside this the containerPort specifies the port number that the service will be running on, in this case 55005.
When an app is deployed in MicroK8s it will be made available on the cluster IP, however we want to make the service available by going to the IP of the VM itself so we add an additional section to the deployment file.
---
apiVersion: v1
kind: Service
metadata:
  name: panachesoftware-service-client-service
spec:
  type: NodePort
  selector:
    app: panachesoftware-service-client
  ports:
    - protocol: TCP
      port: 55005
      targetPort: 55005
      nodePort: 30005
You could have included this service detail in a separate file, but for our setup it is easier to include it within the deployment file.
By choosing NodePort for our type it specifies that the app will be exposed via a port on the host, rather than on the cluster IP. If you don't add anything further it will be assigned a random port within the '30000-32767' range by default.
We need our services to talk to each other, as shown by the references to other other parts of the platform in the environment variables i.e. PanacheSoftware__Url__IdentityServerURL providing the address of the Identity Server, so we need to specify a specific port that will always be used, this is the final section.
ports:
    - protocol: TCP
      port: 55005
      targetPort: 55005
      nodePort: 30005
Where we tell MicroK8s to map the port '55005' of the service to be exposed on port '30005' of the host.
Performing the deployment
Now we've gone through the details of the deployment files go ahead and run through the Panache Legal examples adjusting the placeholders as appropriate.
If you edit the files on another machine, maybe the Windows Host rather than on the Linux VM we created then you can copy the files to your Linux VM using a tool like WinSCP.
If you want to use the provided scripts to run the deployment files for you then make sure to set those files as executable with the following commands.
chmod +x DeleteServices.sh
chmod +x StartServices.sh
One thing to note here is that if you have the Linux Firewall running, as discussed when we were setting up the MicroK8s dashboard, you may need to allow the ports that the services will use to be exposed. MicroK8s will actually edit iptables behind the scenes and allow access to the nodeport ports, 30001-30010 for our services, but if we go to these addresses in our browser it will fail, we need to enable the 55001-55010 port range in ufw, which is confusing, but works!
Allow these ports via the following command.
sudo ufw allow 55001:55010/tcp
Now, either run the StartServices.sh script with the following command.
./StartServices.sh
Or start-up your services individually with something like.
microk8s kubectl apply -f panachesoftware-client-service.yaml
If you're running the StartServices.sh script, once it completes you should be able to see the 10 pods it creates starting up by using the following command.
microk8s kubectl get pods -o wide

You can also watch the progress of the pod creation via the dashboard we configured in Step 2.
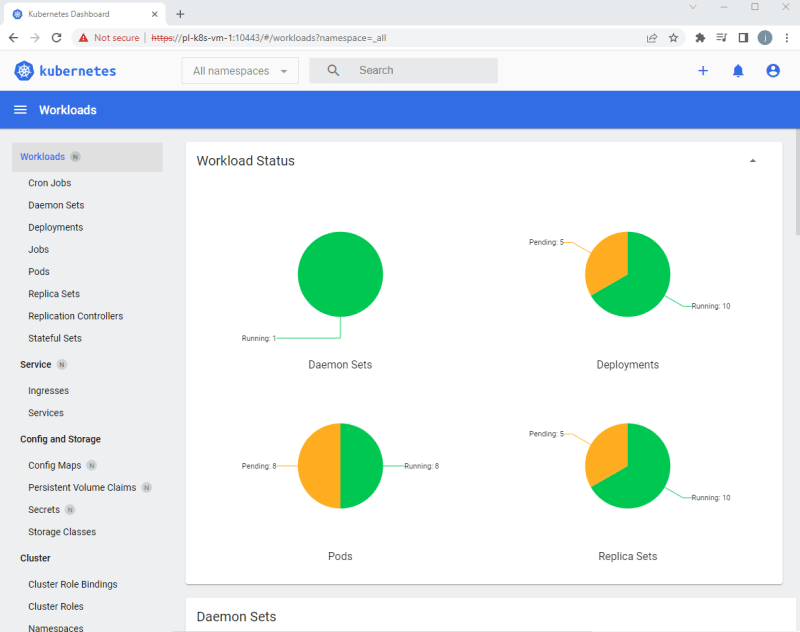
On first creation it will take a bit of time to complete as the various containers need to be downloaded from Docker Hub, but after a while you should see the status of the pods move from ContainerCreating to Running.
Once everything is running let's test it out, on your windows host you should be able to got to http://{VM-IP-Address}:30001 and see the Panache Legal Login screen.
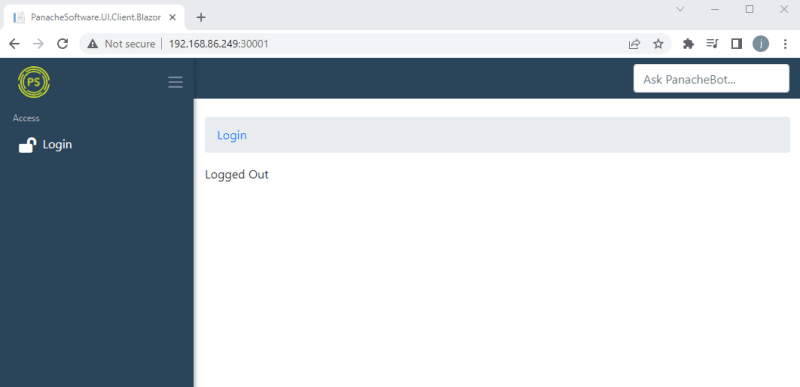
Assuming you kept the PanacheSoftware__StartDomain environment variable as panachesoftware.com the system will have started up and created a default user with the details, Username: admin@panachesoftware.com, Password: Passw0rd123!. So hit Login and use those credentials to access the system.

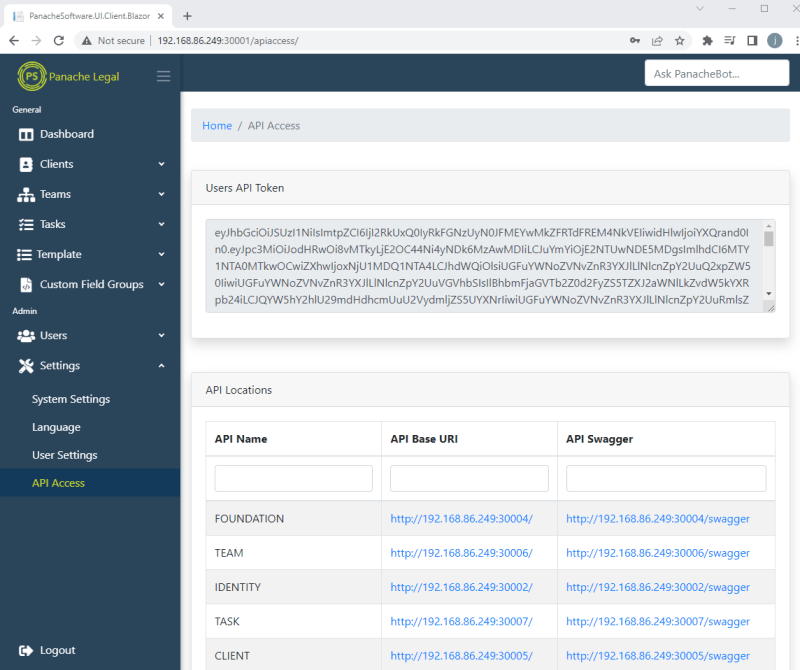
In the left menu, if you go to Settings > API Access you should see a list of the individual services that make up the Panache Legal Platform, all of which are hosted as separate pods in MicroK8s. On this screen you can see the links to those services swagger definition, and you can note that they are all assigned to the ports specified in the deployment files.
If you head on over to phpMyAdmin, that we setup in step 2, you should be able to see that all of the databases associated with our services have been automatically created via the entity framework.

If you find that any pods didn't create, maybe they are stuck with a status of crash loop or some other error, you can check the logs for the service within the 'Pods' area of the dashboard, just click on the 3 dots on the right hand side and choose 'Logs'.

In general, the majority of errors often relate to the service not being able to connect to a database, so check usernames and passwords and all the access settings we configured in Step 3.
Next Steps
The main bulk of the work is now complete. So far we've.
- Created a Linux VM
- Setup MicroK8s
- Setup MySQL
- Setup NGINX
- Setup phpMyAdmin
- Spun up some services in MicroK8s
If all we need to do is host some docker containers locally then your work is done. But if you want a little bit more, lets head over to our final step where we're going to make our local environment available to the outside world by using SSH.
Pete


Latest comments (0)