Hello Developer,
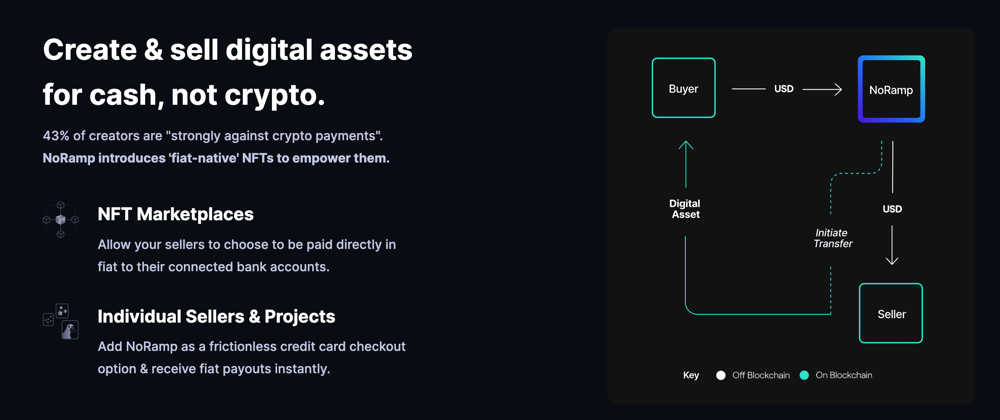
We are excited to bring you NoRamp, a payment platform for both web2 and web3 applications. NoRamp enables developers to seamlessly integrate fiat payment for both individuals and marketplaces.
NoRamp is removing the friction developers have generally faced trying to integrate payment solutions. For example, smaller teams require a lot of technical and legal work behind the scenes to integrate with financial services like Stripe to integrate and offer a fiat solution, but with NoRamp creating bills and making the UI for payments can be done in less than 10 lines of code.
1: Signing Up
The first thing we need to do is create an account. For this, you’ll go to NoRamp Testnet and click on "Sign Up".

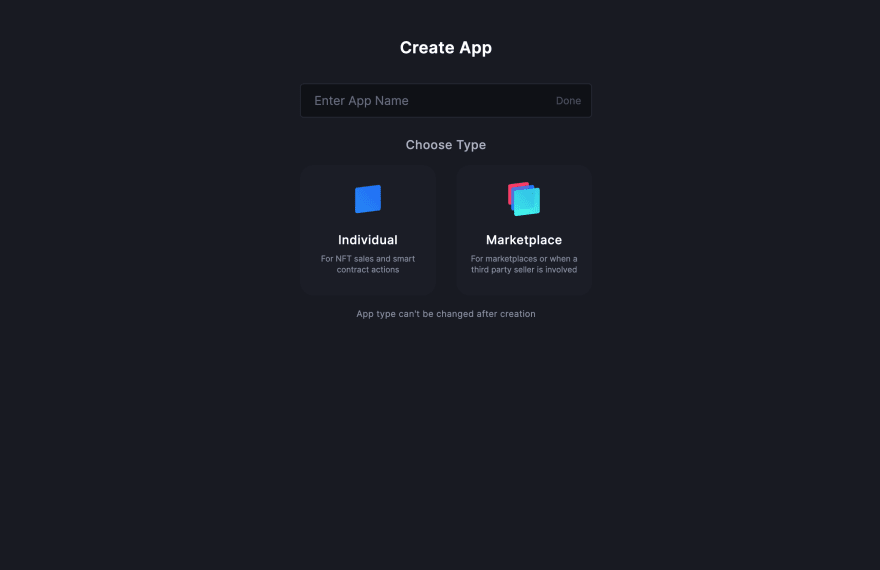
After signing up, you’ll be redirected to our dashboard, where you can create two types of applications: Individual and Marketplace. For the purpose of this demo, we'll go ahead and choose "Individual"
2: KYC
Now, after creating our account and application, you'll see a sidebar on the left side with multiple pages where you can control your payment platform.

You’ll then be clicking on "Settings" and then you’ll click on the "KYC" sub tab.

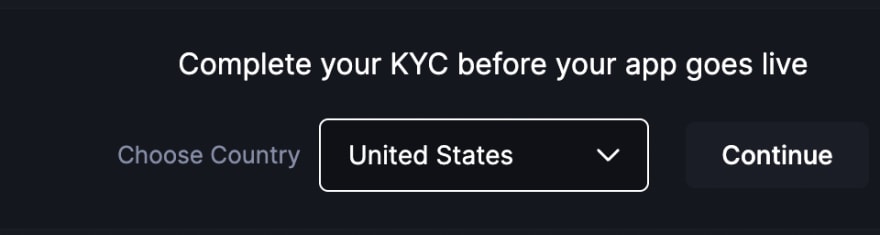
In this step, you'll be completing "KYC" with test data. This is basically registering your legal or individual business inside NoRamp through Stripe.
To do this, choose the country where you are located and click on "Continue".
After doing the step above, you’ll be redirected to the Stripe page for KYC.

After following the steps on the screen, you'll be prompted to introduce banking information in order to complete the KYC. Since this is a testnet, make sure you click on "Use test account"

After doing so, you can click on "Submit" and you'll be ready to integrate.
Make sure your KYC status says "Completed".

3: Integrating
Now, it’s time for the fun stuff. Integrating at both a technical and UI level.
For the integration, you can go to API Documentation or click on "Integration" on the sidebar menu.

4: Creating a Price
Prices are like bills, they are meant to be paid by the user. You can create prices through NoRamp's endpoint. Prices can be dynamic (one-time payment) or static (re-usable).
In order to create a price, we can do it through fetch in Javascript. For this example, we'll use Deno, but you can do this with any Javascript runtime that supports the Fetch API.
const data = {
  "currency": "usd",
  "amount": 50,
  "type": "static"
});

const response = await fetch('https://api-testnet.noramp.io/prices/{YOUR_APP_ID}', {
  method: "POST",
  headers: {
    'content-type': 'application/json',
    'authorization': 'Bearer {API_KEY}',
  },
  body: JSON.stringify(data)
})

console.log('response', await response.json());
{YOUR_APP_ID}: The id of your app (Can be found in the upper right corner)
{API_KEY}: The API key for your application. Can be found in "API Key" or by clicking here. (Keep it safe and secret)
In the example above, we are creating a bill to be paid at an amount of 50$, and its type is static which means the same bill can be paid as many times as desired.
Now this will generate a response similar to
  data: {
    id: "price_aPlsak129KDjam28a",
    ...
    type: "static",
    amount: 50,
    currency: "usd",
    ...
  }
We'll use our field data.id for the payment widget integration.
5: Integrating Payment Widget
In the Integration tab, we'll see an html code containing a similar iframe:
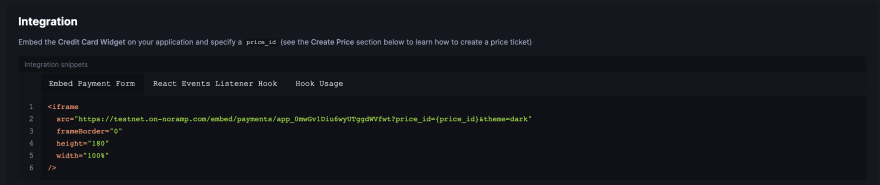
For this, in {price_id} we'll use the price previously generated with our script. After copying and modifying the code with our price id, we will put it in a html file.
After opening our html file in the browser, we'll see our payment widget taking place:

Since we are in testnet, we will use our testnet card "4242 4242 4242 4242" "04/24" "44444"
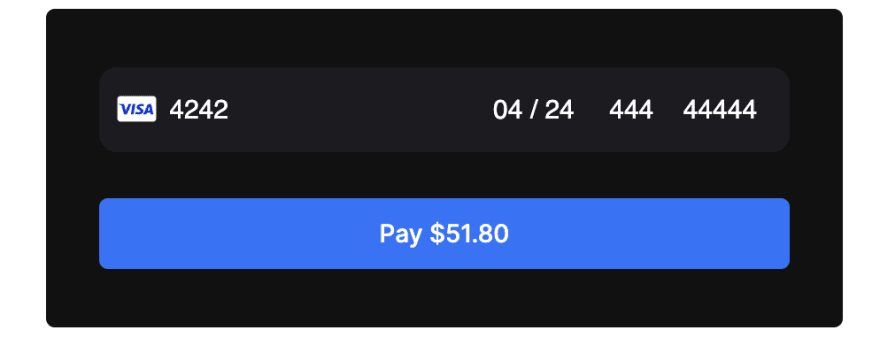
We'll go ahead and click on "Pay $51.80"

Congratulations! Our payment has successfully gone through. Now, if you go to your Dashboard, you will be able to see the cash your application has received as well as the payments processed.
6: Webhooks
So far we have successfully integrated our payment systems, but at most of the times, we need to keep a level of awareness between NoRamp and our application. This level of automatic awareness can be achieved through Webhooks, a feature included in NoRamp that sends notification in POST requests to an specific endpoint. These notifications have multiple shapes and forms, most commonly, when the payment has been put on hold and when the payment has finished.
In order to attach a webhook, we can go ahead and click on "Webhooks" on the sidebar or by clicking here. When clicking on "Add Webhooks" we can fill the information with the URL we want to request whenever a payment event happens.

After a payment event has happened, our endpoint will receive a JSON body that will look like this:
{
  type: "payment",
  data: {
    id: "pay_2EShzjpKRG6nWyHwKSyJlT",
    app: { ... },
    price: {
      id: "price_6VN56mOtUtdUJyRf31TCxs",
      ...
      type: "dynamic",
      amount: 50,
      currency: "usd",
      ...
    },
    status: "paid",
    final_amount: 50,
    price_item: {
      currency: "usd",
      provider_processing_fee_percent: 2.9,
      provider_min_amount_fee: 0.3,
      app_fee: 0,
      app_type: "individual",
      platform_fee: 3.9,
      amount: 50,
      amount_total: 51.80226570545829,
      amount_transaction_fee: 0,
      amount_platform: 1.95,
      amount_seller: 0,
      amount_app: 48.05
    },
    payment_provider: "card",
    ...
  }
}
Then in your backend, you can decide what to do with this information, from storing it in a database to updating the UI of your application.
7: Summary
You have successfully created a payment integration system in literally less than 15 lines of code. This shows how easy and seamless it is to use NoRamp. For this reason, NoRamp is a great payment solution for individual developers and start-ups as it saves the technical and legal work that goes behind most of the current integrations in the market.
For NoRamp documentation: https://testnet.noramp.io/docs
For WebHook documentation: https://testnet.noramp.io/docs/api/webhooks
For further contact, you can reach out to: hello@noramp.io
We hope to see NoRamp powering your applications, developers.
Remember to follow us on Twitter @No_Ramp and stay tuned for upcoming and exciting developments.


Oldest comments (0)