
Hello there. This article is about providing management via a UI by installing a window manager or desktop environment for servers and establishing a remote connection. A graphical server and desktop environment are not used on remote servers because server resources are usually limited. In this post I will be working on a remote server with i3, a lightweight window manager.
Note: Instead of a remote server, I will prepare a virtual server by giving a random IP on my own computer with Vagrant and perform the operations. This is how you can make your first attempts.
What's i3 wm
For operating systems based on the Linux kernel, the graphical interface does not directly belong to the operating system. It is a module that connects to the operating system like any application. In this way, a crash on the graphics side does not affect the operating system. It is sufficient to resolve the graphics server error and restart it.” X Window” is a widely used graphics server developed in a very flexible way. Most current and known distributions use Xorg as graphics server. It contains a "window manager" inside. Its task is to organize operations such as screen layout of windows, adjusting the size, creating virtual desktops. Enlightment, Blackbox, kwin in kde and i3 etc… These are examples of window managers. i3 window manager is very light (1.2mb) and easy to use thanks to keyboard shortcuts. This is an alternative to install on your remote servers that are not very resource rich.
Installing Ubuntu server via vagrant(optional)
With Vagrant, you can create a virtual server on virtualbox and work on this server. After installing the appropriate vagrant version and oracle virtualbox application for your system, you can create a vagrant box and work as if you were working with a machine with a static IP.
Click the link to download vagrant
“vagrant boxes” describe operating systems that are installed and ready to be used. After downloading and creating a vagrant file on “Vagrant cloud”, it can be raised with vagrant.
With vagrant box add {title} or {url}, you can download a new vagrant box from the new cloud. You can check with vagrant box list, create a vagrantfile with vagrant init, and raise the server with vagrant run. If different configurations are required, you can create vagrant fie manually and then raise it with vagrant up.
Let's download the ubuntu box, which is in the first place on the cloud.
$ vagrant box add ubuntu/trusty64
After checking if it is in the list, let's save the following vagrant file with the name Vagrantfile in the directory we are working in. It can then be lifted up with vagrant up. You can send a "shut down" signal with vagrant halt to turn it off.
NAME = "remote-Server"
IP = "192.168.1.XX"

Vagrant.configure("2") do |config|
  config.vm.box = "ubuntu/trusty64"
  config.vm.hostname = NAME
  config.vm.network "public_network", ip: IP

  config.vm.provider "virtualbox" do |vb|
    vb.customize ["modifyvm", :id, "--memory", '2048']
    vb.name='remote-server'
  end
    config.vm.provision "shell" do |s|
    s.inline = "echo Server created succesfully!"
  end
end
The IP given here is an IP address in the internal network. The virtual machine is a different computer in the internal network and is connected with a bridge adapter.
Select your bridge adapter after the up command. Wifi or ethernet adapter. You can see the hostname and username information, and other information...
Once it's up we can connect via ssh.
$ ssh vagrant@192.168.1.X
password: vagrant
and we are inside...
Installation of xserver and i3 wm
If your server does not have a graphics server on it, it must be installed before i3. You can check it with startx. It is a shell script that runs xinit.
Xorg and openboxshould be installed on Ubuntu. It is available in the Repository. You can install them using “apt install”. You can find x graphics server installations on Centos, opensuse, fedora or bsd based systems in user guides, wiki pages and forums. (stackoverflow, superuser, stackexchange etc)
Afterwards, the i3 package in the repository can be downloaded and installed.
Then the graphics server should be started using the startx shell script.
If you do not have limiting factors such as memory and storage space on your remote server, you can use "xfce desktop environment". This “DE” has a clean interface and uses very little resources.
Connection of Server
There are different options available at this stage. You can make a remote connection and manage the system with the "remote connection" application you want. You can select an application that you can connect with the operating system you use and the operating system you use on the remote server. Tools such as teamviewer, anydesk, tigerVNC, tightVNC, realVNC, remmina, zoho assist, Apache Guacamole, NoMachine, xrdp, freeNX are widely used. Here we come across SSH, RDP and VNC as protocols. SSH (Secure Shell) is a secure remote connection protocol.RDP (Remote Desktop Protocol) is a protocol developed by Microsoft that enables connection with the graphical interface of remote windows machines. VNC (Virtual Network Connection) is a platform-independent, server-client architecture protocol that allows to manage applications on a graphical interface running on any network server with a remote connection. You can use any of the above tools for remote control.
Apache Guacomole is a little different. Because it has a client-less structure. After the installation on the server side, the connection can be established and managed via the web browser of any computer.
You can use one of the advanced software mentioned above or other than these. But I will use a vnc application to be lightweight. The packages required on the server side are i3 and xorgfor Ubuntu server. Apt will automatically install the dependent packages. Firefox and vim can also be installed. These packages should also be installed in distributions such as Centos, SUSE, Arch. Package names may be different in the repository, but basically a graphical server driver and a window manager or desktop environment are needed.
$ sudo apt install xorg i3 firefox vim
Then tightvncserver should be installed.
$ sudo apt install tightvncserver
Then the server should be started with the vncserver command. At this stage, vnc password should be determined, if needed, password can be set for view-only mode.
It gives each session an id and to kill the session;
$ vncserver -kill :session_number
Connection can be made by using any client application that supports vnc on the client side. realVNC or remmina etc. applications can be used.
In order to have a secure connection, tunneling is done with ssh on the client side. 5900+N port is the default vnc port. Here N stands for the screen number. So more than one X session can be connected. Default port + session number is to make it easier to manage.
$ ssh -L 5901:127.0.0.1:5091 -C -N -l username ip_addr
You can monitor whether the connection is established with netstat.(It may differ in some distros. For example, on Solus, the ss command does the same job as netstat.)
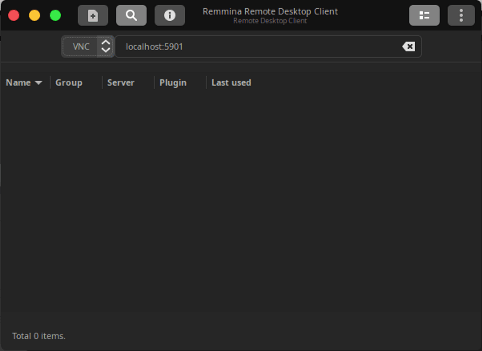
Then, it is sufficient to select the VNC protocol onRemmina and connect to the localhost:5901 port. Then the connection can be established with vnc password.
It offers an option to change the config file at first launch or to use it with its default settings.Alt+enter is used to open terminal with default settings. Alt+h can be used to split the new window's position vertically, alt+v to split it horizontally. You can learn the usage information in detail from the user's guide on its web page or from the blogs. Below is a firefox browser, active processes and a terminal.

vncserver can be made into a systemd service. In this way, vnc session can be started at every system startup.
It can be used in a lightweight "desktop environment" like xfce instead of a "window manager". You can integrate it by making some changes in the configuration settings…


Top comments (0)