
At Ovyl - we build a ton of IoT projects for clients. A CLI (Command Line Interface) can be one of the most useful, and powerful tools when it comes to embedded systems development. You can use it to control your system, request data, and run tests. This is also incredibly useful if you do not have the ability to debug on the device.
Recently we ran into a great use case for needing a CLI on a seemingly simple product. We were writing firmware that was controlling a RGB LED and attempting to closely match several different colors of an existing product, as well as add some new colors. Colors can be quite...subjective and after emailing several cuts of firmware to the client containing different RGB values for each desired color, we ended up adding a simple CLI so the client could send RGB values to the device and experiment with different color settings on their own, and pick what they felt was the best match. This is just one example of how a CLI can save you a lot of time when developing firmware.
In this post we will walk through creating a very simple, portable, UART-based CLI, and integrating it into a popular platform.
BUILDING THE CLI
For this example, we are going to be using Nordic’s NRF52840-DK.
We love Nordic Semiconductor, we have used their Bluetooth SoC’s in several of our client’s projects. Their toolchain is easy to work with, their example code is invaluable, and their support is some of the best in the industry. Not to mention they are one of the most popular brands of Bluetooth radios.
Now, if you are familiar with Nordic’s SDK, you probably already know it has extensive CLI support. Their CLI is very impressive however, it’s complex, large, and not very portable.
At Ovyl we work with a variety of platforms and microcontrollers, so we have some specific goals for our CLI:
- Platform agnostic, portable
- Lightweight - let’s not take up a bunch of flash and RAM
- Easy integration - please don’t make me deal with a bunch of overhead
- No dynamic memory allocation - I try to always avoid this C only no C++
- Unit-tested.
To get started, we did what most engineers do - and that’s try not to reinvent the wheel. I found this GitHub repo for a very light-weight, easy to integrate, embedded CLI.
We created a fork to make sure we give credit to Sean Farrelly, since he did the heavy lifting here. Thanks Sean!
There are a lot of open source CLI’s out there that are embedded systems/resource constrained-friendly, but we liked this one best. If you have any suggestions for alternatives that meet our requirements, feel free to comment below.
Next let’s go over the changes we made to how the library works. The first thing I noticed was that I could not poll cli_process() as it was expecting it to be called once the full command had been received. This is not ideal for us. So we made some updates by adding an is_ready flag based on the terminator.

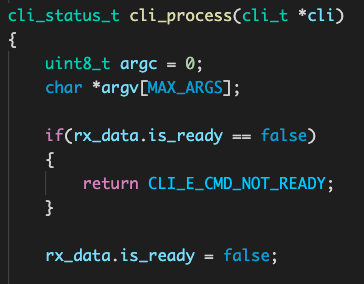
Now we can poll it after every byte received if we want:

(it's not checking for return value yet)
Next I changed some of the “magic numbers” in a few places to use #defines and I removed a buffer that was not really needed. We also added some support for clearing the buffer, especially in the event of an unknown command. A few other small tweaks, and I felt like it was in a good place.
The final addition was a main.c file for testing out the implementation as well as a makefile to confirm we can build it. Overall, fairly minor updates to make it work for us. Here is that commit.
INTEGRATION
Next we are going to get this integrated into a Nordic sample project.
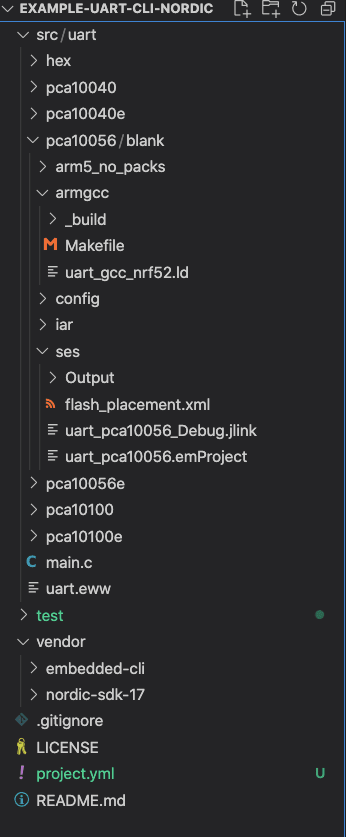
When starting a new project I like to organize it the ceedling way (stay tuned for our next blog post about how to do this).In the meantime, we like to structure like this:
/src
/vendor
/test
We are going to put our Nordic SDK in the /vendor folder and add our embedded-cli repo into /vendor as a git submodule. Now we have this structure:
So I have basically just copied the sample code from the Nordic SDK in /examples/peripheral/uart and pasted it into our /src folder.
I like Segger SES for debugging but it's a pretty meh IDE, so I usually end up writing my firmware in vs code and, if I need to, use SES for debugging. So I like to have both my makefile and the Segger SES project file up to date.
This is probably the worst part. The makefile, just needs a couple lines updated:

Now we need to update the SES project file and I have to say - this part sucks.
So I normally open the .emProject file in vs code, then update ALL of the file directories AND the c_user_include_directories references. To do that I just highlight the current directory, then CMD+D, and replace with the updated location in the /vendor directory.
Once this is updated and building, I add the CLI files in a CLI folder in SES. And we are good to go:

And we are in business!
By the way, I use CoolTerm for my terminal emulator/virtual com port tool. It’s cross platform, and the best free one I have found.
Now we can send some commands, but first we have to apply the proper settings for appending a newline:

Now we can send commands:
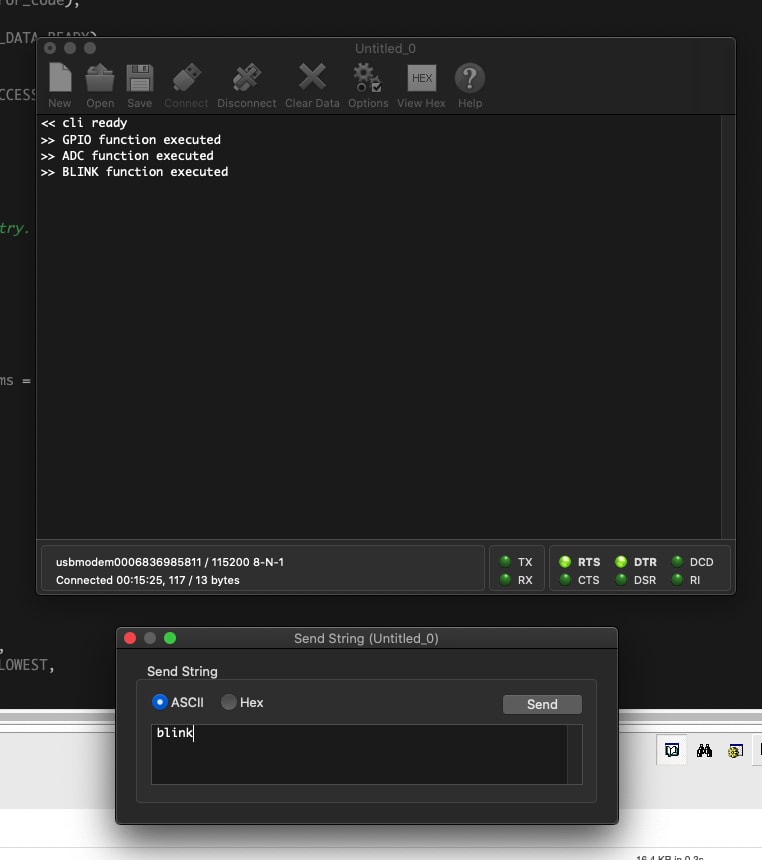
Nice.
You can find the source code for our basic CLI library here: https://github.com/Ovyl/embedded-cli
You can find our integration example here: https://github.com/Ovyl/example-uart-cli-nordic


Latest comments (0)