Typescript, according to its own website, is a “strongly typed programming language that builds on Javascript”. It can be seen as a superset of solutions and resources that makes Javascript more reliable.
Socket.IO is a “library that enables real-time, bidirectional and event-based communication between browser and the server”. It makes it easier to construct websocket-based solutions where the server can send updates to the browser in real-time.
In this article we will create a simple application implementing Socket.io using Typescript where the browser is updated via a third party http request. In this case we will have an order listing which is updated every time a new order arrives.
Setting up the project's structure
Let’s start by creating our server folder
mkdir websocket-typescript && cd websocket-typescript
Then initialize our project
npm init
set dist/app.js as entry point
In order to keep this project working as the updates come by, we will install our dependencies with specific versions:
# install typescript globally
npm install typescript -g

# dev-dependencies
npm i --save-dev @types/express@4.17.13 @types/node@16.6.2 ts-node@10.2.1 tslint@5.12.1 typescript@4.2.4

npm i --save class-transformer@0.3.1 class-validator@0.12.2 dotenv@10.0.0 express@4.17.1 routing-controllers@0.9.0 socket.io@4.1.3

# Initialize Typescript:
tsc --init
Now open your favorite text-editor and go to the root of our project. You'll find a tsconfig.json file there. This file indicates that it is a Typescript project.
Copy and paste this content into the tsconfig.json file replacing the initial one:
{
  "compilerOptions": {
      "module": "commonjs",
      "esModuleInterop": true,
      "target": "ES2015",
      "moduleResolution": "node",
      "sourceMap": true,
      "outDir": "dist",
      "emitDecoratorMetadata": true,
      "experimentalDecorators": true
  },
  "lib": [
      "es2015"
  ]
}
-
"module": "commonjs"Is the usually used for Node projects; -
"esModuleInterop": trueWill make sure that our imports behave normally; -
"target": "ES2015"Helps to support ES2015 code; -
"moduleResolution": "node"Specifically implies that this is a Node project; -
"sourceMap": trueEnables the generations of.mapfiles; -
"outDir": "dist"This is where our output files will be generated; -
"emitDecoratorMetadata": trueEnables experimental support for emitting type metadata for decorators which works with the module; -
"experimentalDecorators": trueEnables experimental support for decorators; -
"lib": ["es2015"]This includes a default set of type definitions;
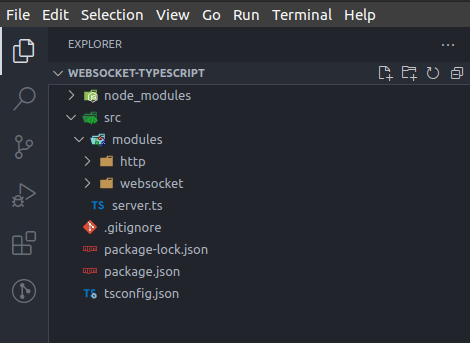
Now create a folder named src and a server.ts in it. Our folder structure will be divided in two: http and websocket.
This will be the initial content of our server.ts file:
require('dotenv').config()
import 'reflect-metadata';

import {
   createExpressServer,
   RoutingControllersOptions
} from 'routing-controllers'

const port = process.env.APP_PORT || 3000;

const routingControllerOptions: RoutingControllersOptions = {
   routePrefix: 'v1',
   controllers: [`${__dirname}/modules/http/*.controller.*`],
   validation: true,
   classTransformer: true,
   cors: true,
   defaultErrorHandler: true
}

const app = createExpressServer(routingControllerOptions);

app.listen(port, () => {
   console.log(`This is working in port ${port}`);
});
Now in the console type
tsc && node dist/server.js
You should see this:
![]()
Note that we haven't configured nodemoon in this project, so as we change the server, you'll need to rerun this command
Socket.io in Node
So far nothing new. You've probably created lots of Node projects similar to this. Now here's where the fun begins. In order to have access to our Socket Server Instance in different parts of our application we will implement the Singleton Design Pattern. Within the websocket folder create a file called websocket.ts. This will be its initial content:
import { Server } from 'socket.io';

const WEBSOCKET_CORS = {
   origin: "*",
   methods: ["GET", "POST"]
}

class Websocket extends Server {

   private static io: Websocket;

   constructor(httpServer) {
       super(httpServer, {
           cors: WEBSOCKET_CORS
       });
   }

   public static getInstance(httpServer?): Websocket {

       if (!Websocket.io) {
           Websocket.io = new Websocket(httpServer);
       }

       return Websocket.io;

   }
}

export default Websocket;
First we are importing the Server object from socket.io. Our class will inherit from it. Let’s take a look at the getInstance Method. It receives an optional parameter called httpServer and returns a Websocket instance. It checks if the private static attribute io is initialized. If not, it calls its own constructor and always returns a running instance of The Websocket implementation.
Let’s get back to our server.ts file now. To use the socket implementation we need to import it first:
import Websocket from './modules/websocket/websocket';
Now in order to correctly implement this we have to change the way that our http server is created. That is because the Server object, which our Websocket class inherits from, expects an instance of NodeJS’s default http. Therefore in the beginning of the server.ts file we must add:
import { createServer } from 'http';
Just after the creation of the constant app we must add:
const httpServer = createServer(app);
const io = Websocket.getInstance(httpServer);
Last but not least, change the app.listen part to
httpServer.listen(port, () => {
   console.log(`This is working in port ${port}`);
});
In order to separate the responsibilities of Sockets and Server, we must create a default pattern that each Socket class must implement. So add a file called mySocketInterface.ts to the websocket folder and add this to it:
import { Socket } from "socket.io";

interface MySocketInterface {

   handleConnection(socket: Socket): void;
   middlewareImplementation?(soccket: Socket, next: any): void

}

export default MySocketInterface;
This is important because every socket-based class that we create from now on will implement this interface which will guarantee that we have exactly the methods that we need.
Without further ado we can finally create our orders.socket.ts file within the websocket folder. This file will be responsible for handling every socket connection regarding Orders. You may create other files in the future for different parts of your application. This will be its initial content:
import { Socket } from "socket.io";
import MySocketInterface from "./mySocketInterface";

class OrdersSocket implements MySocketInterface {

   handleConnection(socket: Socket) {

        socket.emit('ping', 'Hi! I am a live socket connection');

    }

   middlewareImplementation(socket: Socket, next) {
       //Implement your middleware for orders here
       return next();
   }
}

export default OrdersSocket;
Since the OrdersSocket class implements MySocketInterface interface it is obligated to contain the handleConnection method. The middlewareImplementation method is optional and you can leave it out if you want.
Let’s get back to the websocket.ts file. We’ll now create a new method to initialize and handle each socket implementation that we have. This is what it will look like:
public initializeHandlers(socketHandlers: Array<any>) {
       socketHandlers.forEach(element => {
           let namespace = Websocket.io.of(element.path, (socket: Socket) => {
               element.handler.handleConnection(socket);
           });

           if (element.handler.middlewareImplementation) {
               namespace.use(element.handler.middlewareImplementation);
           }
       });
   }
don't forget to change the import statement to
import { Server, Socket } from 'socket.io';
This function is supposed to receive an array which will contain elements with information about each socket path and handler.
Now let’s get back to our server.ts file and enhance it. Import the OrderSocket class and just after the creation of the constant io add the following:
io.initializeHandlers([
   { path: '/orders', handler: new OrdersSocket() }
]);
Great! To test all of this I've created a really simple html file which if you open in your browser you should see a message on screen if everything is right. You can download it here
Socket.io in the browser
Let's get started on the table and Http part no. We'll create a simple page to display information about the orders. I'm using bootstrap to make it slightly easier in terms of style, but feel free to use any framework of your choice.
You can download the index.html file here. We will only focus on the javascript part. The first thing we have to do once our page is loaded is to check for socket connection and once it is established emit an event requesting the initial orders listing, so create a index.js file and paste this as initial content:
const socket = io("http://localhost:3000/orders");

socket.on('connect', () => {
    socket.emit('request_orders');
});

socket.on('orders_updated', (orders) => {
    populateTable(orders.data);
})

socket.on('disconnect', () => {
    console.error('Ops, something went wrong');
});

function populateTable(data) {
    data.forEach(order => {
        document.querySelector('#orders-table tbody')
            .insertAdjacentHTML('afterend', createTableRow(order));
    });
}

function createTableRow(order) {
    let tRow = `<tr>
            <th scope="row">${order.id}</th>
            <td>${order.date}</td>
            <td>${order.total}</td>
            <td>${order.status}</td>
        </tr>`;

    return tRow;

}
We'll now get back to Node to create the endpoint in which we'll receive new orders. It is a good practice to set your business rules in a service file. And that's what we'll do. Create a libs folder and a orders.service.ts file in it:
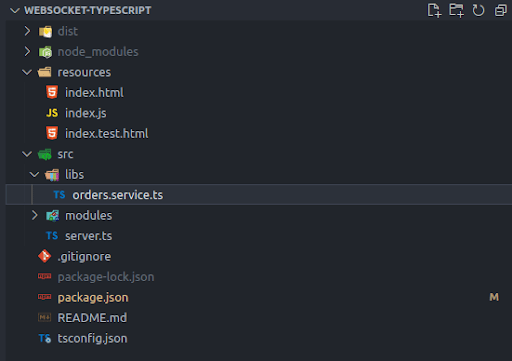
This will be the file content:
import Websocket from "../modules/websocket/websocket";

class OrdersService {

    public insertOrder(order) {
        //save in your database

        //send the update to the browser
        this.updateSockets(order);
    }

    private updateSockets(order) {
        const io = Websocket.getInstance();
        io.of('orders').emit('orders_updated', { data: [order] });
    }
}

export default OrdersService;
This is quite simple, but we're getting an instance of the Websocket class and emitting an event which our frontend file will listen and then update our table.
Now create a file orders.controller.ts within the http folder. This will be its content:
import { JsonController, Post, Body } from "routing-controllers";
import OrdersService from "../../libs/orders.service";

@JsonController('/orders', { transformResponse: true })
class OrdersController {

   @Post('/')
   insertOrder(@Body() order: any) {
       let orderService = new OrdersService();
       orderService.insertOrder(order);

       return {
           status: 200,
           success: true
       };
   }
}

export default OrdersController;
Here the routing-controllers lib is helping us set a path to the order route for our web server and we're simpl calling the orders.service file that we just created.
Ok so go ahead to postman and send a POST request to http://localhost:3000/v1/orders/ with this content:
{
   "id": "4",
   "date": "2021-11-05",
   "total": "$13.00",
   "status": "Pending"
}
Don't forget to rerun the command to compile typescript in Node and check the table. It should be updating as the requests are sent.

That's all folks
This is just a sketch and one of the many ways to build a Socket.io based application. Feel free to leave a comment on possible better solutions =]
References
https://www.typescriptlang.org/
https://socket.io/docs/v4/
https://socket.io/docs/v4/namespaces/
https://socket.io/docs/v4/middlewares/
https://www.typescriptlang.org/tsconfig
https://dev.to/rajat19/create-a-new-node-js-project-in-typescript-nao
https://developer.mozilla.org/pt-BR/docs/Web/API/Element/insertAdjacentHTML
https://github.com/typestack/routing-controllers


Top comments (4)
Thanks for posting this, I'm getting type errors in the code and I wanted check is
constructor(httpServer) {super(httpServer, {
cors: WEBSOCKET_CORS
});
}
equivalent to
constructor(httpServer : http.Server) {super(httpServer, {
cors: WEBSOCKET_CORS
});
}
i.e httpServer has a type of http.Server ?
This information is worth millions, thank you very much. I wish you could answer me what type of data is the httpServer parameter, my editor is complaining :(
My import lines look like this:
import {Server, Socket} from 'socket.io';
import {Server as HttpServer} from 'http';
you will be good to go
Also, you have the html and JS file for the frontend in the resources folder. How do you access that, there are no routes etc... to that location.