
Being a Flutter Developer it becomes hard to use cloud functions as they need to be written in Javascript/Node.js. Appwrite came as a surprise to me.
What is Appwrite?
Appwrite is an open-source, self-hosted Backend-as-a-Service that makes app development easier with a suite of SDKs and APIs to accelerate app development.
Where is stands against Firebase?
It is the go-to open-source alternative to Firebase. It gives you all what Firebase has to offer including Cloud Functions. That brings us to our topic of discussion.
What are Cloud Functions?
As per Google
Cloud Functions lets you write simple, single-purpose functions that are attached to events emitted from your cloud infrastructure and services. Your function is triggered when an event being watched is fired. Your code executes in a fully managed environment. There is no need to provision any infrastructure or worry about managing any servers.
But most platforms don't allow to write functions in dart or need to be trans compiled to JavaScript making it a tedious process.
Appwrite comes to our Rescue. It provides Dart runtime upto Dart v2.13
Appwrite can also execute our custom code in response to any Appwrite system event like account creation, user login, or document update.
So, let's first install Appwrite on our Systems.
Docker Installation
You can download the executable file to install Docker for Windows from here and follow the easy steps. After Successfull installation you'll be left with a screen like this:

Appwrite Installation
Just choose a directory to be the root of your appwrite installation. and run the following command on PowerShell.
docker run -it --rm ,
    --volume /var/run/docker.sock:/var/run/docker.sock ,
    --volume ${pwd}/appwrite:/usr/src/code/appwrite:rw ,
    --entrypoint="install" ,
    appwrite/appwrite:0.10.4
Enabling Dart Environment
In the Appwrite installation folder look for .env file. Within the file add dart-2.12 to the comma seperated list in the environment variable _APP_FUNCTIONS_ENVS and _APP_FUNCTIONS_RUNTIMES. This enables Dart runtime environment for Appwrite Cloud Functions.
In the root directory of Appwrite where you have your docker-compose.yml run the following command:
docker-compose up -d
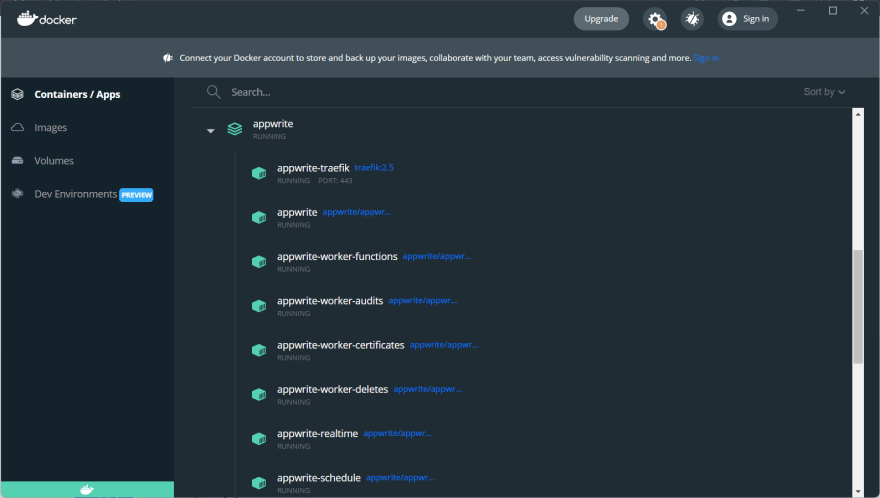
After that on opening Docker you'd be able to see Appwrite Instance running.
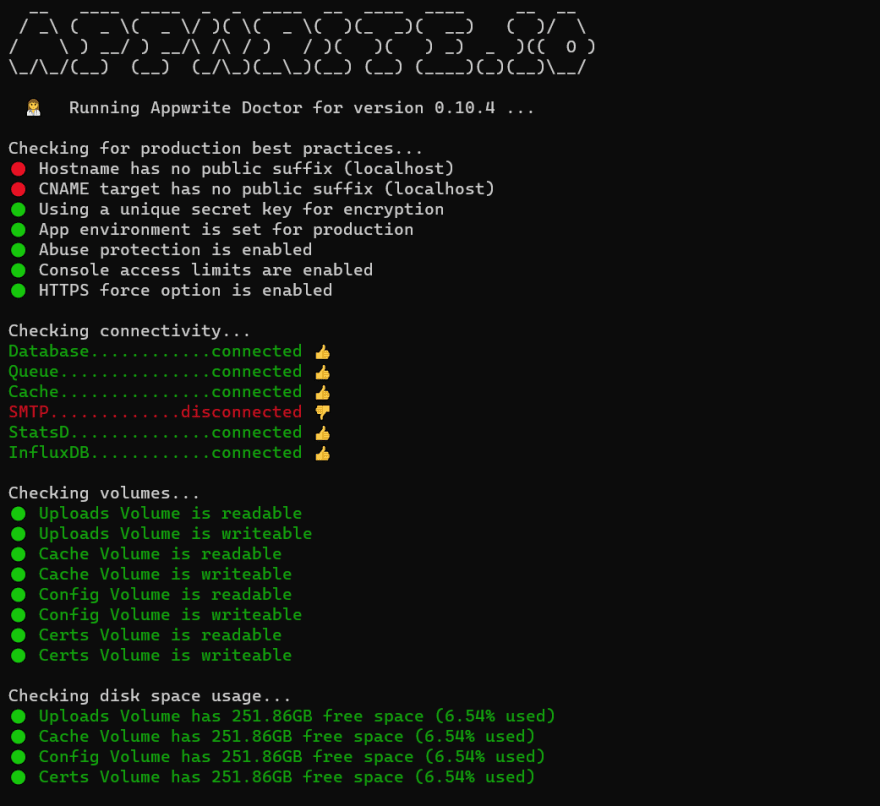
To check if everything is ok you can try running docker exec appwrite doctor which will give you a similar output:
Go to your defined host address and you'll be able to see the appwrite console. You'll need to create a new User to access the console. The Landing page after signing in would look something like this:

Project Creation
Create a new folder with main.dart and pubspec.yaml, or you can copy from Appwrite Demos Function Repository.
Adding Dependency
We need to install the dart_appwrite package present on pub.dev.
open your pubspec.yaml file and make sure it looks like this:
name: project_name
version: 1.0.0
description: ""

environment:
  sdk: ">=2.12.0 <3.0.0"

dependencies:
  dart_appwrite: ^1.0.1
Template code for your Cloud Function
add the following code in your main.dart.
import 'dart:io';

import 'package:dart_appwrite/dart_appwrite.dart';

void main(List<String> args) {
  // Initialise the client SDK
  final Client client = Client();
  client
          .setEndpoint('https://[HOSTNAME_OR_IP]/v1') // Your API Endpoint
          .setProject(Platform.environment['APPWRITE_FUNCTION_PROJECT_ID']) // Your project ID
          .setKey('919c2d18fb5d4...a2ae413da83346ad2') // Your secret API key
      ;

//Your Custom Code
}
Use your system's local ip address instead of localhost or 127.0.0.1.
Getting Dependencies
In your Terminal, run the following commands:
$ set PUB_CACHE=.appwrite
$ dart pub get
This will get dependencies and store them inside .appwrite folder. Now you project will have 2 auto-created files as .appwrite and pubspec.lock.
Deploying Cloud Function
Inside the Appwrite Console, tap on the Functions menu. In the functions dashboard, tap the Add Function button.
Inside the Dialog Box enter your function name and choose the environment as Dart 2.12.

Clicking on create will create a function on the appwrite console.
Deploy Tag/Custom Dart Code
Before deploying we'll need to create a GZipped File of your project. So in the root directory of your dart project, run the following commands:
$ cd ..
$ tar -zcvf code.tar.gz project_name
After this go to the Function overview page and click on Deploy Tag. Write command as dart main.dart and select your GZipped File.

or you can also deploy the function using CLI by entering the following command:
appwrite functions createTag `
    --functionId=6162f0965a4e4 `
    --command='mycommand' `
    --code='/myrepo/myfunction'
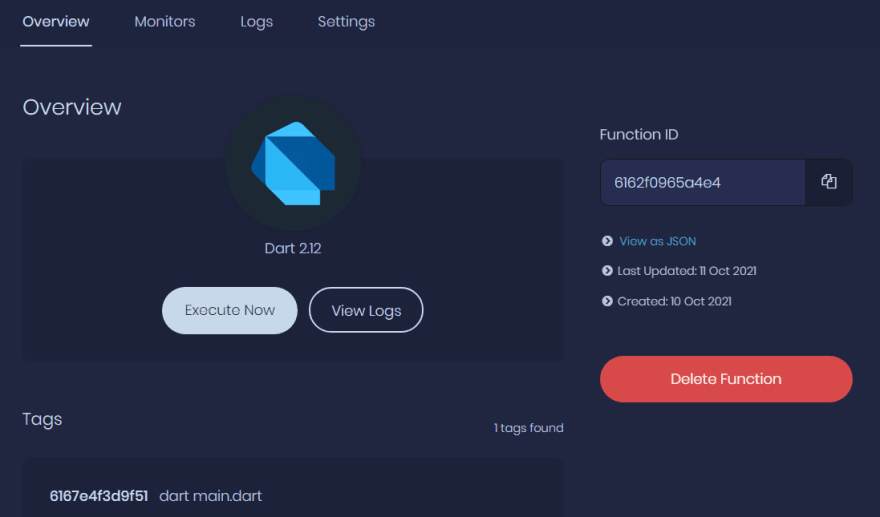
The Deployed Tag will appear like this:

Click Activate and the Deployed Function would be activated and ready to execute.
Testing the Function
This is how your Function Overview Page will look like after performing all the above mentioned steps.
Click on Execute Now and wait for few seconds and click View Logs. If the Function ran successfully you'll get something like this.
THANK YOU
This was my take on creating and deploying Cloud Functions with our very own Dart Language. Would love to hear your suggestions and feedback.


Top comments (0)