In this blog, we’ll setup a Drone CI server in Kubernetes using Helm. If you’re a beginner and are lost in the labyrinths of the documentations and GitHub READMEs, this simple blog will bootstrap you in just a few minutes.
Introduction
Drone by Harness is a continuous integration service that enables you to conveniently set up projects to automatically build, test, and deploy as you make changes to your code. Drone integrates seamlessly with Github, Bitbucket and Google Code as well as third party services such as Heroku, Dotcloud, Google AppEngine and more.
While Drone also has a cloud SaaS platform, we’ll be focusing on setting up the hosted version on Kubernetes. By default, Drone CI is configured to run as a Docker container and is meant to be setup in a server or a VM. In fact, all the CI build steps are performed using individual Docker containers.
However it is also possible to setup the Drone CI server on a Kubernetes cluster. Drone also provides a Helm chart to do so, which we will be using here. However this mode of installation is not present in the primary user documentation, hence the requirement of this blog. The Helm chart we will be using is present in this GitHub repository.
Pre-Requisites
- A Kubernetes Cluster: Any Kubernetes cluster of sufficient capacity can be used. I will be using a GKE cluster of three e2-micro VMs for the setup.
- Helm: Ensure that you have Helm installed on your local machine.
- GitHub Account: For this blog, we’ll be using GitHub for creating an OAuth application for the Drone server.
- kubectl: We’ll be using kubectl to access some of the Kubernetes cluster info.
Step-1: Setting up a GitHub OAuth Application for Drone
Before deploying Drone in Kubernetes, we need to create an OAuth application so that the users can authorise access of their GitHub repositories to Drone. We are using GitHub for this purpose here, however this can be achieved using other major Git hosting service providers as well like BitBucket, GitLab among others. Checkout the docs for the full list.
Go to https://github.com/settings/developers and create a new OAuth application and choose New OAuth App.
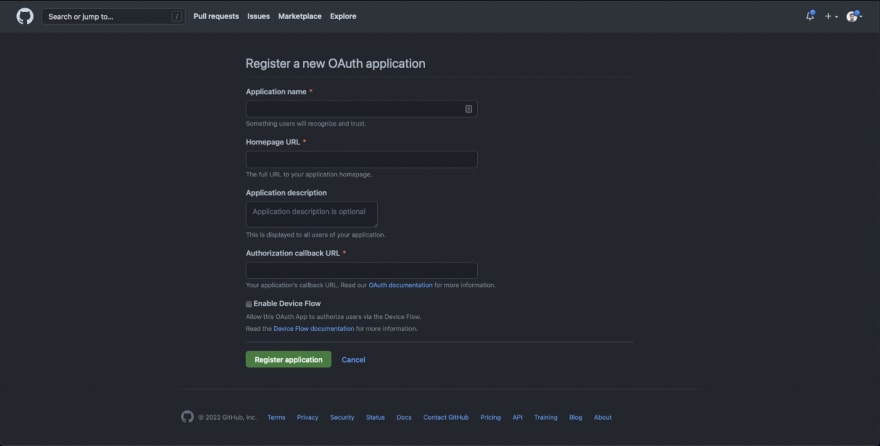
Put application name as Drone.
For the Homepage URL, we need to provide the Drone server application endpoint. Depending on how we’re configuring the access to the application in Kubernetes i.e. either using a NodePort or a LoadBalancer type of service, we will obtain the URL.
We’ll be using a NodePort type of service for the purpose of this demo. Currently, we don’t have the Drone server deployed in Kubernetes and hence the NodePort service isn’t available to us just yet. However, we can choose an unused NodePort value right away which will be later used for the server deployment. I will be using the port 32000, as an example.
With the NodePort value decided upon, we can simply use it with the external IP of any of the Kubernetes nodes to obtain the Homepage URL. In other words, this will be the endpoint of the Drone server once we install it. To get the external IP of the nodes, we can use the following command:
kubectl get nodes -o wide | awk '{ print $7 }'
You’ll obtain a similar result:
EXTERNAL-IP
35.238.118.197
34.68.253.216
35.222.5.86
You may choose any one of the external IPs available to you. For this demo I’ll be using the 35.238.118.197 IP. Hence, our Homepage URL becomes http://35.238.118.197:32000 and for the authorisation callback URL, we will use http://35.238.118.197:32000/login. Optionally, feel free to add any description that seems fit to you.
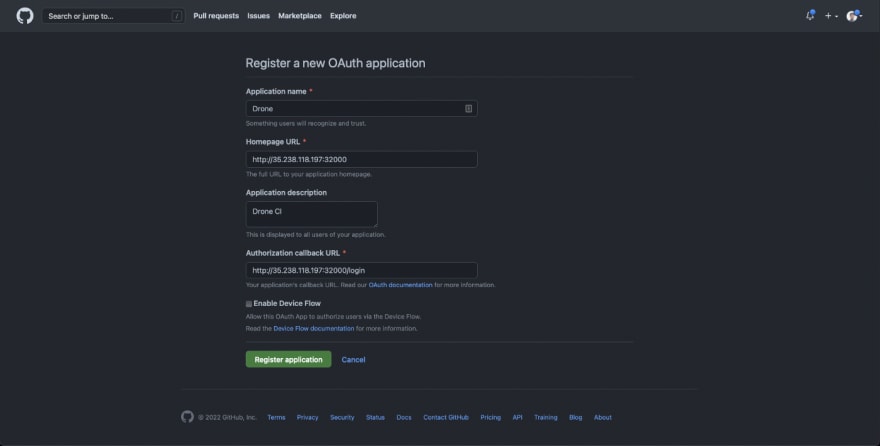
Once done, choose Register application. This should register your Drone application with the GitHub.

Now all we need to do is obtain a client secret key so that it can be used by Drone to authorize the login requests via GitHub OAuth. To do so, choose Generate a new client secret. This should prompt GitHub to authenticate you so that client secret key creation can be validated. Once done, you’ll obtain the secret key. Copy and save the key somewhere else as you won’t be able to access it from GitHub the next time, when we’ll make use of it to configure the Drone server. Also take a note of the client ID.
Step-2: Configuring the Drone server Helm chart
Before we configure the deployment options, we will add the Helm repo. To do so, execute the following commands:
helm repo add drone https://charts.drone.io

helm repo update
Once done, we can configure the server deployment options. To do so, we’ll use a YAML file, which can be obtained here. Download and save the file by the name values.yaml and open it using any text editor. We’ll be doing a minimal configuration setup in this demo, though you can explore all the other configuration options as well.
First, we’ll modify the Kubernetes service to be used for the server deployment. As decided earlier, we’ll be using a NodePort type of service, therefore service.type field value will be NodePort. Also, for the service.nodePort field, we will use the value 32000.
...
service:
  type: NodePort
  port: 8080
  annotations: {}
  nodePort: 32000
...
Next, we’ll configure the Drone specific options, which will be provided as environment variables. The first env is DRONE_SERVER_HOST, for which we will provide the external IP that we had selected earlier. Ensure that the IP address value is wrapped in quotes, to specify it as a string.
For the DRONE_SERVER_PROTO env, provide the value http as we will be using the HTTP protocol for the Drone server requests and runner polling.
For the DRONE_RPC_SECRET env, we need to provide a secret value that the Drone server and runners will share and use for authenticating the requests. To generate this value, you may use the following command to get a 32 character length secret:
openssl rand -hex 16
You can then provide this value as a string for the env.
Lastly, we will provide the GitHub OAuth application client ID and client secret key which we had created in the first step for the DRONE_GITHUB_CLIENT_ID and DRONE_GITHUB_CLIENT_SECRET envs respectively.
...
env:
  DRONE_SERVER_HOST: "35.238.118.197"
  DRONE_SERVER_PROTO: http
  DRONE_RPC_SECRET: "727b7fe17e8de56689f46943c76d25f8"

  DRONE_GITHUB_CLIENT_ID: 620a9d86236b7470558a
  DRONE_GITHUB_CLIENT_SECRET: 35e31b8fddd16c2cb3b681e2a4b84a1ee9c8ce57
...
Save and close the file.
Step-3: Create the Drone server deployment in Kubernetes
Open a terminal in the directory where your values.yaml file is located.
Firstly we’ll create the namespace where the deployment will take place with the following command. I will be using the drone namespace here.
kubectl create namespace drone
Next, run the following command which will install the Drone server in Kubernetes:
helm install --namespace drone drone drone/drone -f values.yaml
It will take a while for the command to execute and setup all the Kubernetes resources. Upon its completion, you’ll notice a similar output:
NAME: drone
LAST DEPLOYED: Sun Sep  4 17:39:07 2022
NAMESPACE: drone
STATUS: deployed
REVISION: 1
TEST SUITE: None
NOTES:
1. Get the application URL by running these commands:
  export NODE_PORT=$(kubectl get --namespace drone -o jsonpath="{.spec.ports[0].nodePort}" services drone)
  export NODE_IP=$(kubectl get nodes --namespace drone -o jsonpath="{.items[0].status.addresses[0].address}")
  echo http://$NODE_IP:$NODE_PORT
This indicates that the server is successfully deployed in Kubernetes. We can validate that all the Kubernetes resources have been successfully setup using the following command:
kubectl get all --namespace drone
This should give you a similar output:
NAME                         READY   STATUS    RESTARTS   AGE
pod/drone-77cd496d5d-jf7gc   1/1     Running   0          3m26s
NAME            TYPE       CLUSTER-IP      EXTERNAL-IP   PORT(S)          AGE
service/drone   NodePort   10.28.177.200   <none>        8080:32000/TCP   3m31s
NAME                    READY   UP-TO-DATE   AVAILABLE   AGE
deployment.apps/drone   1/1     1            1           3m32s
NAME                               DESIRED   CURRENT   READY   AGE
replicaset.apps/drone-77cd496d5d   1         1         1       3m34s
Step-4: Access Drone server UI
Before accessing the Drone server UI, make sure that if there’s a Firewall for the Kubernetes nodes then there’s an ingress rule allowing all the http traffic on port 32000.
This would allow us to reach the server endpoint using the NodePort and node external IP. For example, I will be accessing http://35.238.118.197:32000 URL in my browser.
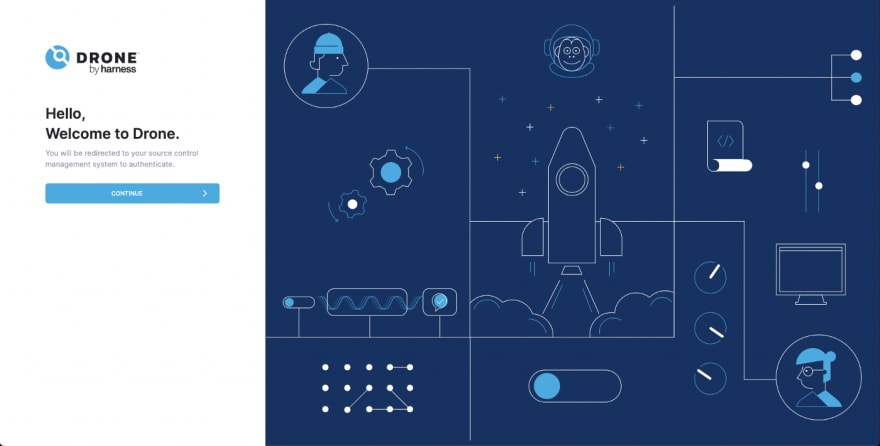
We can successfully access the Drone server UI now. Choose CONTINUE to proceed with the user authentication. Upon doing so, you’ll be prompted for GitHub OAuth authorization. This is by virtue of the OAuth application that we had created earlier in GitHub. Once done, you’ll be prompted to fill up your user details. Once done, choose SUBMIT.

You’ll be then able to access the Drone server dashboard, where all your repositories can be accessed, by virtue of the GitHub OAuth which gives permission to the Drone application to access all your repos.

Summary
In summary, we observed how Drone CI can be setup in Kubernetes using Helm. We created a GitHub OAuth application to authorize the users and provide access to the repositories. Then, we configured the server deployment by providing the relevant details using a config file and finally we used that config file to create the server deployment in Kubernetes using Helm, which allowed us to access the Drone server UI.


Top comments (3)
That was a good read, thank you, followed and bookmarked!
Thank you!
Thank you, Neelanjan. Now that you have Drone server running, do we need to install the Docker runner before CI jobs will begin executing?