Twitter: https://twitter.com/ndehouche
Project overview
Some of your best ideas and content are generated on-the-fly in Discord conversations. In this tutorial, we are going to create a Discord bot that will allow you to automatically send messages from a Discord server to Notion, if an Admin reacts to them with a specified emoji, say ✍️.
This can notably be useful to automatically save FAQs, user suggestions, or just generally great content from your Discord server.
First, we are going to create a Discord bot, save its access token, and invite it in our Discord server. You can skip the following section, if you are already familiar with creating Discord bots.
How to create a Discord Bot
- Log on to the Discord.
- Go to the applications page.
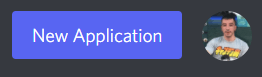
Click on the “New Application” button, give a name to your application, and click “Create”.

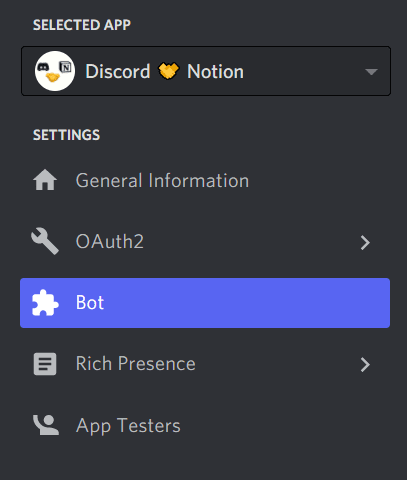
Navigate to the “Bot” tab and click “Add Bot”, and confirm with “Yes, do it!”.


5. Copy the access token you get and save it somewhere safe.

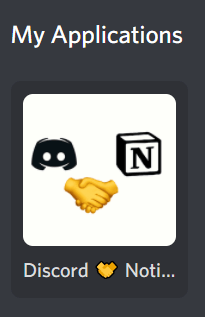
We are now going to invite our bot in our server. Go "Back to Applications" and open your bot's page.

Open the “OAuth2” tab.
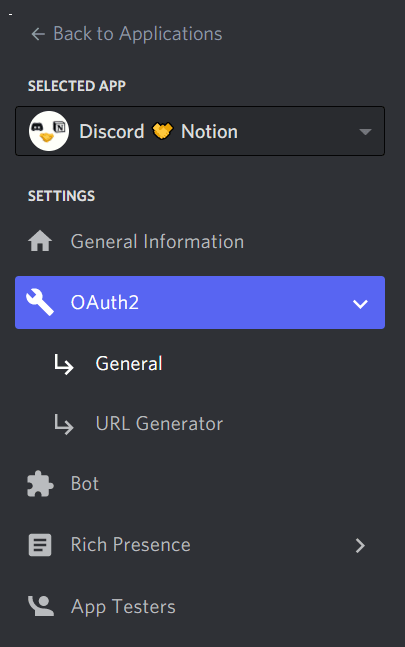
Go to URL Generator and select “bot” under “scopes”.

For this application, our bot needs to read and write messages, as well as possibly manage emojis if you want to use custom reactions, and read message history, if you want to add support for messages posted before the addition of the bot to the server. We select the corresponding permissions, and copy the generated URL.

This URL will open a Discord permission page that will allow you add the bot to any server you manage.
Now let's create a Notion integration that will allow our Discord bot to write into a Notion page. You can skip the following section if you are already familiar with the Notion API.
How to create an integration with the Notion API
The Notion API is currently in Beta, so a few things described here may change, but but as of the time of this writing (January 2022), here is how to create a Notion integration that will allow us to write into a Notion page from an external application.
- Go to My Integrations page and click the "+ New integration" button.

- Give your integration a name and select the workspace you would like it to be associated with.
 We won't need any user information for this application, so select No User Information and submit your form.
 3. Copy the "Internal Integration Token" you get and save it somewhere safe.

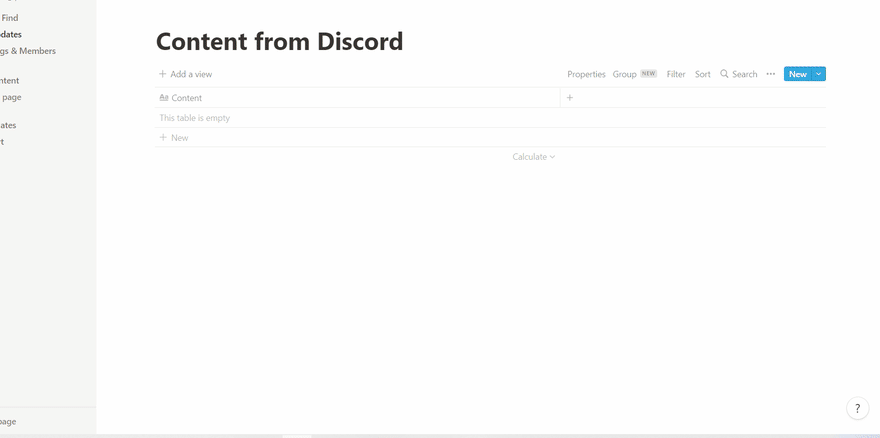
- Create a new page in your Notion workspace, and insert a new database in it, by typing /table and selecting a full page table.
5. Click on the Share button and use the selector to find your integration by its name, then click Invite and copy the link you get.
 This link should be of the form https://www.notion.so/?v=...
The 32 characters you get right before the question mark are you database ID. Save this ID somewhere safe.
We can now finally get Discord and Notion to talk to each other.
This link should be of the form https://www.notion.so/?v=...
The 32 characters you get right before the question mark are you database ID. Save this ID somewhere safe.
We can now finally get Discord and Notion to talk to each other.
How to connect Discord and Notion in Node.js
We need to have npm and Node.js installed and the dotenv package to import the various API keys into Node.js.
We will also need to install the Notion SDK and discord.js.
Create a folder for your project and a
.envfile in which you will safely store our environment variables for Discord and Notion.
The following environment variables are respectively the Discord access token we got here, the Notion integration token we got here, and the Notion database ID we got here.
DISCORD_TOKEN='...'

NOTION_KEY='secret_...'

NOTION_DATABASE_ID='...'
Now we can start writing our Node.js program, let's call it
index.js.
As early as possible in your program, import and configure dotenv.
require('dotenv').config()We can then import our secret environment variables.
const token = process.env.DISCORD_TOKEN

const NOTION_KEY=process.env.NOTION_KEY

const NOTION_DATABASE_ID=process.env.NOTION_DATABASE_ID
We start a new notion client instance.
var {Client} =require("@notionhq/client");

const notion = new Client({ auth: NOTION_KEY })
We add a function that can write in a notion page, using notion.pages.create.
async function addItem(text) {

try {

const response = await notion.pages.create({

  parent: { database_id: NOTION_DATABASE_ID },

  properties: {

    title: {

      title:[

        {

          "text": {

            "content": text}}]}},})

console.log(response)

console.log("Success! Entry added.")} catch (error) {

console.error(error.body)

}}
And we are done with Notion! Let's now turn our attention to Discord.We import the discord.js module, with Client, Intents, and MessageEmbed.
var { Client, Intents, MessageEmbed } = require('discord.js')Create an instance of a Discord client
const client = new Client({ intents: [Intents.FLAGS.GUILDS, Intents.FLAGS.GUILD_MESSAGES, Intents.FLAGS.GUILD_MESSAGE_REACTIONS] });Emit a ready event. This is important. Your bot will only start reacting to messages after ready is emitted.
client.on('ready', () => {

console.log('I am ready!');});
Now we can write our algorithm to saves messages to Notion, when an Admin (you can use any other role or combination of roles) reacts to them with emoji ✍️. We also make the bot confirm that it has performed this action by quoting the original message and displaying the author's name and profile photo.
client.on('messageReactionAdd', (reaction, user) => {

if (user.bot) return;

console.log('reaction');

if(reaction.emoji.name === "✍️") {

if (reaction.message.member.roles.cache.some(role => role.name === 'Admin')) {

let embed = new MessageEmbed()

.setTitle('Content added to Notion')

.setDescription(reaction.message.content)

.setAuthor({name: reaction.message.author.tag, iconURL: reaction.message.author.displayAvatarURL()} )

addItem(reaction.message.content)

reaction.message.channel.send({embeds: [embed]}).catch(console.error)

return;}}});
Finally, we log our bot in
client.login(token);
We can now run node index.js. Here is what the bot should be able to do.
Here is the complete program for your copypasta pleasure.
require('dotenv').config()
// Discord token
const token = process.env.DISCORD_TOKEN

// Notion API keys
const NOTION_KEY=process.env.NOTION_KEY
const NOTION_DATABASE_ID=process.env.NOTION_DATABASE_ID

// Notion client
var {Client} =require("@notionhq/client");
const notion = new Client({ auth: NOTION_KEY })

// Function to write to Notion
async function addItem(text) {
  try {
    const response = await notion.pages.create({
      parent: { database_id: NOTION_DATABASE_ID },
      properties: {
        title: {
          title:[
            {
              "text": {
                "content": text
              }}]}},})
    console.log(response)
    console.log("Success! Entry added.")
  } catch (error) {
    console.error(error.body) }}


// Import the discord.js module
var { Client, Intents, MessageEmbed } = require('discord.js');
// Create an instance of a Discord client
const client = new Client({ intents: [Intents.FLAGS.GUILDS, Intents.FLAGS.GUILD_MESSAGES, Intents.FLAGS.GUILD_MESSAGE_REACTIONS] });

// Ready event
client.on('ready', () => {
  console.log('I am ready!');

});


// Bot algorithm
client.on('messageReactionAdd', (reaction, user) => {
   if (user.bot) return;
   console.log('reaction');
   if(reaction.emoji.name === "✍️") {
if (reaction.message.member.roles.cache.some(role => role.name === 'Admin')) {
   let embed = new MessageEmbed()
   .setTitle('Content added to Notion')
   .setDescription(reaction.message.content)
   .setAuthor({name: reaction.message.author.tag, iconURL: reaction.message.author.displayAvatarURL()} )
   addItem(reaction.message.content)
   reaction.message.channel.send({embeds: [embed]}).catch(console.error)
   return;}}});

// Log our bot in
client.login(token);


Oldest comments (0)