Summary
JWT, JSON Web Token, is one of the open Internet protocol standards, described as "a compact, URL-safe means of representing claims to be transferred between two parties" in RFC 7519 .
It is popular and used widely to authenticate where Web API works. It is also available on SSO aka Single Sign-on.
One of the Symfony great bundles named LexikJWTAuthenticationBundle gives us the power 🔥 to add JWT access control to apps 🌟
This post shows how to implement JWT for authentication. Moreover, by letting it cooperate with access control in Symfony's SecurityBundle, it can be used for authorization.
Here we go.
Environment
Reference
Tutorial
Overview
The steps are as follows:
- Prepare Symfony project
- Install the bundle
- Configure
- Testing via command lines
1. Preparation
1-1. Create Symfony project
This post might be some help:

2. Build up JWT authentication and authorization
2-1. Install LexikJWTAuthenticationBundle
Thanks to composer and Choosit (lexik), the command line will take you just with a step!
$ composer require "lexik/jwt-authentication-bundle"
The output was:
Info from https://repo.packagist.org: #StandWithUkraine
Using version ^2.16 for lexik/jwt-authentication-bundle
./composer.json has been updated
Running composer update lexik/jwt-authentication-bundle
Loading composer repositories with package information
Updating dependencies
Lock file operations: 6 installs, 0 updates, 0 removals
  - Locking lcobucci/clock (2.2.0)
  - Locking lcobucci/jwt (4.0.4)
  - Locking lexik/jwt-authentication-bundle (v2.16.0)
  - Locking namshi/jose (7.2.3)
  - Locking stella-maris/clock (0.1.6)
  - Locking symfony/polyfill-php56 (v1.20.0)
Writing lock file
Installing dependencies from lock file (including require-dev)
Package operations: 6 installs, 0 updates, 0 removals
  - Downloading stella-maris/clock (0.1.6)
  - Downloading lcobucci/clock (2.2.0)
  - Downloading namshi/jose (7.2.3)
  - Downloading lcobucci/jwt (4.0.4)
  - Downloading lexik/jwt-authentication-bundle (v2.16.0)
  - Installing stella-maris/clock (0.1.6): Extracting archive
  - Installing lcobucci/clock (2.2.0): Extracting archive
  - Installing symfony/polyfill-php56 (v1.20.0)
  - Installing namshi/jose (7.2.3): Extracting archive
  - Installing lcobucci/jwt (4.0.4): Extracting archive
  - Installing lexik/jwt-authentication-bundle (v2.16.0): Extracting archive
Generating optimized autoload files
116 packages you are using are looking for funding.
Use the `composer fund` command to find out more!

Symfony operations: 1 recipe (9ad0fc3489604428ab4d55a826a98856)
  - Configuring lexik/jwt-authentication-bundle (>=2.5): From github.com/symfony/recipes:main
Executing script cache:clear [OK]
Executing script assets:install public [OK]

 What's next?


Some files have been created and/or updated to configure your new packages.
Please review, edit and commit them: these files are yours.

No security vulnerability advisories found
Besides, namshi/jose and lcobucci/jwt are the key packages.
The config file is generated, placed as config/packages/lexik_jwt_authentication.yaml which contains:
lexik_jwt_authentication:
    secret_key: '%env(resolve:JWT_SECRET_KEY)%'
    public_key: '%env(resolve:JWT_PUBLIC_KEY)%'
    pass_phrase: '%env(JWT_PASSPHRASE)%'
Also, The lines below are appended to .env:
###> lexik/jwt-authentication-bundle ###
JWT_SECRET_KEY=%kernel.project_dir%/config/jwt/private.pem
JWT_PUBLIC_KEY=%kernel.project_dir%/config/jwt/public.pem
JWT_PASSPHRASE=(your-secret)
###< lexik/jwt-authentication-bundle ###
2-2. Generate a keypair
Well, actually, the keypair itselves has not been generated yet. It's, however, none of the problem, for the bundle also nicely helps us to generate a pair :)
$ php bin/console lexik:jwt:generate-keypair
Then you will see:
$ ls config/jwt/
private.pem  public.pem
2-3. Configure routes and firewalls
A few steps left on JSON Login to implement "endpoint that provides these tokens based on a username (or email) and password".
Edit config/routes.yaml to add a route to authenticate or authorize:
  controllers:
      resource: ../src/Controller/
      type: attribute
+ jwt_auth:
+     path: /auth
Then edit config/packages/security.yaml to use the route as auth gate:
  security:
      # ...
      firewalls:
          # ...
+         jwt_auth:
+             pattern: ^/auth
+             stateless: true
+             json_login:
+                 check_path: jwt_auth
+                 success_handler: lexik_jwt_authentication.handler.authentication_success
+                 failure_handler: lexik_jwt_authentication.handler.authentication_failure
          main:
              # ...
Besides, as to only 5.4, additionally, the below is required:
  security:
+     enable_authenticator_manager: true
3. Let's play: API access with JWT
3-1. Prepare route
Let's create API route.
$ php bin/console make:controller api
The output was:
 created: src/Controller/ApiController.php
 created: templates/api/index.html.twig


  Success!


 Next: Open your new controller class and add some pages!
3-2. Prepare routes and firewalls
Then, let JWT auth necessary in the route:
  security:
      # ...
      firewalls:
          # ...
          jwt_auth:
              # ...
          api:
+             pattern: ^/api
+             stateless: true
+             jwt: ~
          # ...
          main:
              # ...
      # Note: Only the *first* access control that matches will be used
      access_control:
          # ...
+         - { path: ^/auth, roles: PUBLIC_ACCESS }
+         - { path: ^/api, roles: IS_AUTHENTICATED_FULLY }
3-3. Get token by asking server to generate it
We're ready now. Connect to /auth with curl to get token:
$ curl -X POST \
      -H "Content-Type: application/json" \
      -d '{"username":"your-username","password":"your-password"}' \
      https://your-domain/auth
Besides, append -k/--insecure if you have to suppress tls error.
You will get:
{"token":"xxx.xxx.xxx"}
3-4. Use the token
$ curl \
      -o /dev/null -s -w "HTTP Response = %{http_code}\n" \
      https://your-domain/api
Without valid token, you will see 401 error 😵 due to access denied.
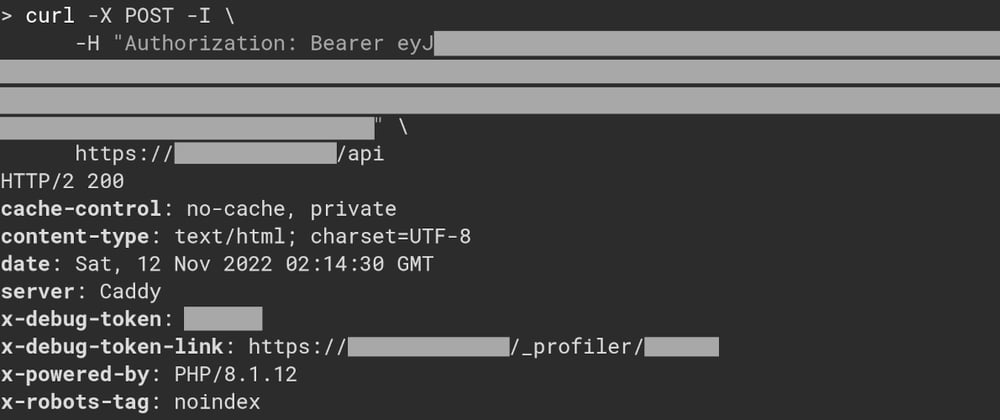
Next, try to include your token:
$ curl \
      -o /dev/null -s -w "HTTP Response = %{http_code}\n" \
      -H "Authorization: Bearer xxx.xxx.xxx" \
      https://your-domain/api
You will see 200 🙌 Yay, accepted 😄
Well, you may get 404 in case. It is because app can't find controller bound to the route. It's OK, too, as to JWT auth.
You may want to implement refresh token in addition. In such a case, this post might be helpful:


Oldest comments (0)