
TestNG is an automation testing framework for the Java programming language in which NG stands for "Next Generation". TestNG is inspired from JUnit which uses the annotations (@). TestNG overcomes the disadvantages of JUnit and is designed to make end-to-end testing easy.
Since Selenium does not have itself a reporting functionality TestNG makes test creation, execution, reporting more efficient and you can easily come to know how many test cases are passed, failed, and skipped. You can execute the failed test cases separately.
Its much easier to add TestNG plugin in Eclipse plugin.
So lets get started…
1.Adding TestNG plugin in Eclipse
Select help tab, go to Eclipse Marketplace and search for TestNG for Eclipse. You will see the plugin and just install it.
2.Adding Dependencies
Create a maven project and lets name it as "SeleniumTestNG".
Since we are going to create a maven project lets get selenium and other JAR files from the maven dependencies.
First copy the selenium dependency and set it in the pom.xml file.
https://mvnrepository.com/artifact/org.seleniumhq.selenium/selenium-java/3.141.59
<dependency>
    <groupId>org.seleniumhq.selenium</groupId>
    <artifactId>selenium-java</artifactId>
    <version>3.141.59</version>
</dependency>
Copy the TestNG dependency and set it in the pom.xml file.
https://mvnrepository.com/artifact/org.testng/testng
<! -  https://mvnrepository.com/artifact/org.testng/testng →
<dependency>
 <groupId>org.testng</groupId>
 <artifactId>testng</artifactId>
 <version>7.4.0</version>
 <scope>test</scope>
</dependency>
As well as set the WebDriver maven dependency for make our test simple.
https://mvnrepository.com/artifact/io.github.bonigarcia/webdrivermanager/4.4.3
<dependency>
    <groupId>io.github.bonigarcia</groupId>
    <artifactId>webdrivermanager</artifactId>
    <version>4.4.3</version>
</dependency>
3.TestNG annotations
Before begin our test lets have look at the TestNG annotations that we are going to use in here.
@BeforeTest - The annotated method will be run before any test method belonging to the classes inside the tag is run.
@test - Marks a class or a method as part of the test.
@AfterTest - The annotated method will be run after all the test methods belonging to the classes inside the tag have run.
4.Create the TestNG class
First create a class named "TestNG_Demo". You do not need to write main() method in a TestNG class to run it as TestNG takes care of that by defining annotations. You just need to provide proper annotations to methods and rest TestNG will execute them in a manner by implicit call to main method of TestNG class.
First for a simple test lets take a code that validate the title of a page.
public static void main(String[] args) {
WebDriverManager.chromedriver().setup();
WebDriver driver = new ChromeDriver();
driver.manage().window().maximize();
driver.get("https://ikman.lk/");
String expectedTitleikman = "ikman.lk - Electronics, Cars, Property and Jobs in Sri Lanka";
String actualTitle = driver.getTitle();
if (actualTitle.contentEquals(expectedTitleikman)) {
System.out.println("Test Passed");
}else {
System.out.println("Test Failed");
}
driver.close();
}
This code explains how to get the title from the "ikman.lk" and validate with the actual title. Since this is written in a main method this should be run on a Java class.
You can see we have mentioned the actual URL and we have used if statement to decide whether its really the actual title or not.
Lets write the same code in a TestNG class.
import org.openqa.selenium.WebDriver;
import org.openqa.selenium.chrome.ChromeDriver;
import org.testng.Assert;
import org.testng.annotations.AfterTest;
import org.testng.annotations.BeforeTest;
import org.testng.annotations.Test;
import io.github.bonigarcia.wdm.WebDriverManager;
public class TestNG_Demo {
String expectedTitleikman ="ikman.lk - Electronics, Cars,        Property and Jobs in Sri Lanka";
    private static WebDriver driver = null;

@BeforeTest
public void setup() {
WebDriverManager.chromedriver().setup();
    driver = new ChromeDriver();
}

@Test
public void test() {
driver.manage().window().maximize();
    driver.get("https://ikman.lk/");
String actualTitle = driver.getTitle();
Assert.assertEquals(actualTitle, expectedTitleikman);
}
@AfterTest
public void tearDownTest() {
driver.close();
}
}
In this code you can see we have used @test, @BeforeTest, @AfterTest annotations to separate the code. As this test, first its run the @BeforeTest and run the actual @test. Then comes the tearDown method.
And you cannot notice a if statement here because we have use the assertion to compare both actualTitle and the expectedTitle by importing the Assert class from TestNG.
import org.testng.Assert;
5.TestNG test-output
After running above TestNG Class we can see the actions performing and after a refresh a Results folder is creating as "test-output".
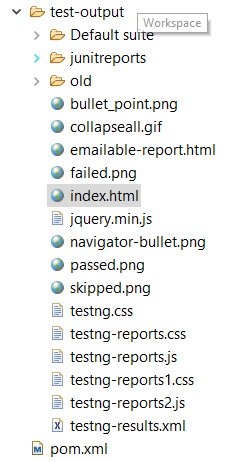
As you can see it has generated different kind of reports as output. Leta have a look at a one of them.

It has shown us a clear report of our results by grouping into different categories. In here since my test is passing it does not show any failed tests but if some exist this will show them and time taken to execute that test case and so on.
For your reference find my GitHub project here


Top comments (0)