
Step 1: Install CocoaPods on your Mac
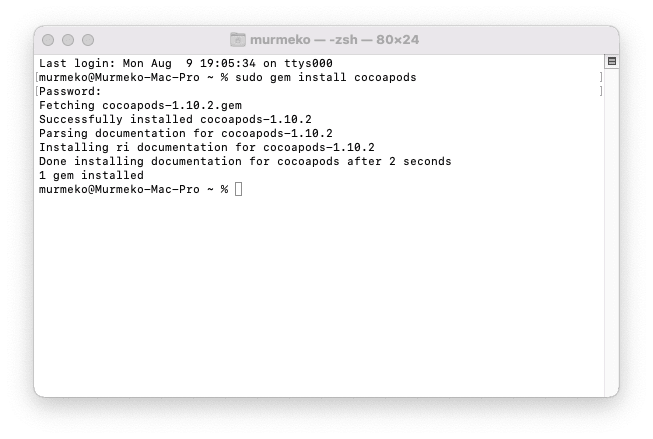
In order to create a CocoaPods, you must first install CocoaPods on your Mac. To install CocoaPods on your Mac, you need to open the Terminal application and run the following command.
When you run the command, Terminal will ask you to type your password, after entering your password CocoaPods will be installed on your Mac.
Step 2: Creating the pod
After installing CocoaPods on your Mac, use the "cd" command to change to the directory where you want to create the Pod using Terminal. For me the command is as follows.
After moving to the directory where you want to create your Pod, create the Pod by replacing the "POD NAME" part of the command below with the name of your Pod. Also, make sure that there are no spaces in the name of your Pod.
After running the command, Terminal will ask you the following questions about your Pod.
In the first of the questions, you are asked on which platform you will use your Pod, write “iOS” and continue. In the second, you are asked in which language you will write your Pod, write "Swift" and continue. In the third question, you are asked whether to include a demo application with your Pod, write “Yes” and continue. In the fourth question, which frameworks you will use to test your Pod, write “None” and continue. In the fifth question, you are asked whether you want to do View-based testing, write “No” and continue. If you followed the steps correctly, an Xcode window will open when the command finishes running.
Step 3: Signing in to Xcode with GitHub
If you are already logged into your Xcode with GitHub, you can skip this step and go to Step 4.
To sign in to Xcode with GitHub, you must first create a GitHub account. After opening a GitHub account, you should click the profile icon at the top right, click the "Settings" button from the drop-down list, and click the "Developer settings" button in the list on the left of the page you are directed to.
After pressing the button, you should press the "Personal access tokens" button on the left of the page you are directed to, and when the page is updated, you should press the "Generate new token" button, which is the 2nd button from the top right.

In the Note section of the new page that opens, you must enter the name of the Token you want to create, I briefly write "Xcode". In the Expiration section, we are asked to specify the expiration date of your Token, we can choose the "No expiration" option because we will use it in Xcode. In the Select scopes section, you specify the access permissions of your Token. Here you need to tick “repo”, “admin:repo_hook”, “delete_repo” respectively. After checking the boxes, we press the "Generate token" button at the bottom and our token is created.

Copy your password in the green box on the page we are directed to and return to Xcode. After returning to Xcode, click the Xcode tab in the Menu Bar and click the "Preferences" button. Click the “Accounts” button at the top of the window that opens, and then click the “+” button at the bottom left. Select GitHub from the list in the window that opens and click the “Continue” button. In the renewed window, paste your e-mail address that you used to open your GitHub account in the “Account” section, and your Token password that you copied from the green box in the “Token” section and press the “Sign In” button. If you followed the guide correctly, congratulations, you have integrated your GitHub account into your Xcode.

Step 4: Updating our Pod's settings and importing our Pod to GitHub
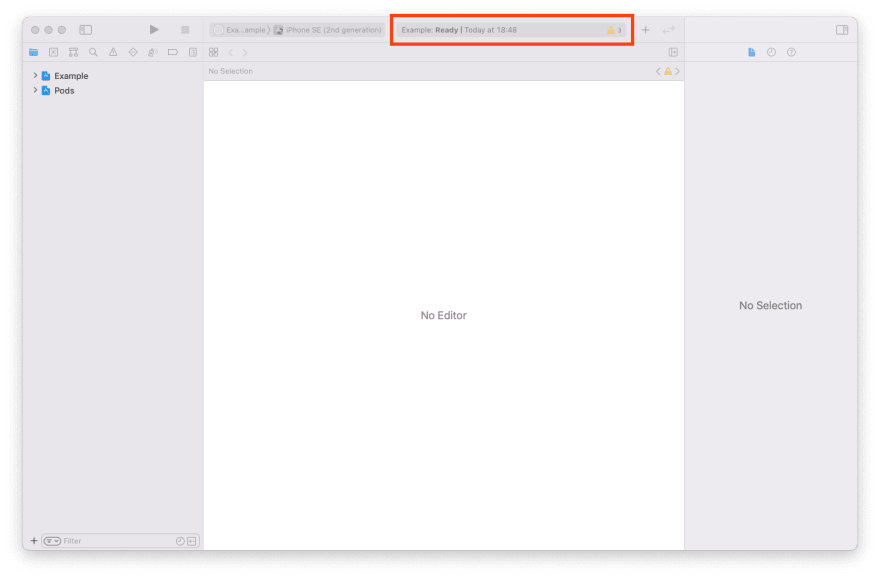
After creating your pod, you'll see a yellow warning sign appear to the left of the top middle bar of your Xcode. When you click on the sign, the Navigator part of your Xcode will switch to the Issue Navigator tab.
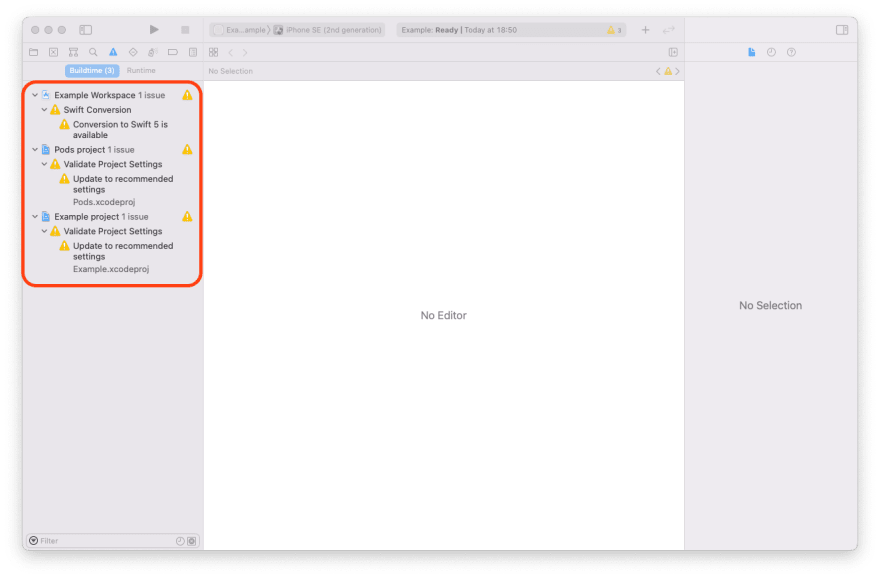
In the first warning in this section, Xcode tells us that it can convert your project's code to Swift 5 code. Click on the warning and convert your code of “Next, Next, Next” method to Swift 5 code. In the second and third warnings, Xcode is telling you that it can update the settings of your Pod and our example project to the recommended settings. Again, update the settings of your project with the “Next, Next, Next” method. The thing to keep in mind here is that Xcode is upgrading the minimum iOS version your sample project and Pod can run on from 9.0 to 12.0.
After all the warnings disappear, click on the "Source Control Navigator" button, which is the second of the horizontal buttons at the top of the Navigator section on the left. There are 4 folders here, right click on the "Remotes" folder, which is the 3rd folder from the top, and click on the "New 'POD NAME' remote" button. When you click the "Create" button at the bottom right of the window that opens, your Pod will be transferred to your GitHub.

After transferring your code to GitHub, click the "Project Navigator" button, which is the 1st from the left among the buttons at the top of the Navigator section of Xcode. Project Navigator lists the files that make up our project. Here, click on the arrows to the left of the files named “POD NAME” and Pods if they are minimized and expand your files. Then expand the "Podspec Metadata" folder, which is the 1st one from the top. Click on the file named POD NAME.podspec in the expanding folder. This file acts as the identity of your Pod. Here, you are expected to enter a brief summary of your Pod in the "s.summary" section, and a description of your Pod in the "s.description" section. I am writing the following for my own Pod, respectively.
After writing your summary and explanation, you need to update the minimum iOS version that your Pod can be used in from the "s.ios.deployment_target" section and specify the Swift version we used while writing your library. To specify the iOS version you used while writing our library, you should add "s.swift_version = '5.4'" under the "s.ios.deployment_target" section. At the end of all changes, your 'POD NAME'.podspec file should look like the one below.
After updating your 'POD NAME'.podspec file, open the "README.md" file in the folder where your file is located. Add " :git => 'https://github.com/Murmeko/POD NAME.git'" line under the "pod 'POD NAME'" line under the "## Installation" section here.
After you have done this, you finally need to update the “.podfile” file of your sample project. For this, open the "Podfile" file in Project Navigator and replace the "platform :ios, '9.0'" part with 12.0.
Now that we have everything set up, it's time to make our first Commit. For this, we click on the Source Control tab in the Menu Bar, click on the “Commit…” button from the drop-down list. We tick all the files that appear on the left of the window that opens, and write the name of our commit in the "Enter commit message here" box at the bottom. I will write “Updated project settings” as the name. After clicking the "Push to remote:" box at the bottom left, we click the "Commit Files" button at the bottom right and our files on GitHub are updated.
Step 5: Creating your library
After updating your code on GitHub, expand the "Development Pods" folder from the Project Navigator section, and then expand the "POD NAME" folder in the same folder. Update the file named "ReplaceMe.swift" that appears here as "POD NAME.swift" and open the file. You will write your code here.
First, import the Frameworks you will use while writing your code.
Next, create a class. The point you should pay attention to here is that you must define the class as " public ", otherwise you cannot use your library.
Then, define the function that will turn your images into black and white in this class that you have defined, so that it takes a “UIImage” and returns a “UIImage”. Also, remember that when defining the function, it must be "public".
Define the properties of the UIImage you will draw in your function. Here, make sure that the new UIImage you are going to draw has its dimensions from the original, otherwise the aspect ratio of the new image will change. Also, make sure that the color space of the new UIImage you will draw is "CGColorSpaceCreateDeviceGray".
Then draw your UIImage using all these definitions.
Finally, you must define a “public init” for the class you originally created. Otherwise, you won't be able to use your class in the project where you added your Pod.
Your library is ready! If you want, you can also add a sample application to the "Example" folder in the main folder of the project. You can use your library in your projects as follows.
Step 6: Publish the Pod
After creating your library, commit your project one last time. Then open the Terminal application and go to the directory where your project is located with the “cd” command. My directory is “Documents/Developer/GIFFromImages“. Then run the “pod lib lint” command in this directory. This script validates your files, if it successfully validates it will give the following output.
Then you need to register CocoaPods by running the “pod trunk register” command. Here, you should replace the "address@e-mail.com" part with your e-mail address, the "Your Name" part with your name, and the " — description='Name of your Mac'" part with the name of your Mac.
Once you've done this, open your project's GitHub page and click the "Releases" button on the right. Then click on the “Draft a new release” button on the top right of the page we are directed to.

Type 0.1.0 in the “Tag version” section on the page you are directed to. This is the part where you specify the version of your Pod. As you update your pod, you have to update the .podspec file and the releases section on GitHub. Then write “Release 0.1.0” in the “Release title” section on this page. Actually, you can write whatever you want here, but I will write it like this to avoid confusion. Then click on the "Publish release" button at the bottom left of the page, so you publish the 0.1.0 version of your Pod on GitHub.

After that, go back to Terminal and run the command " pod trunk push NAME.podspec ". And congratulations, your Pod is officially live!
For projects GitHub page:
GrayscaleImages


Example
To run the example project, clone the repo, and run pod install from the Example directory first.
Requirements
| Platform | Installation |
|---|---|
| iOS 12.0+ | CocoaPods |
Installation
GrayscaleImages is available through CocoaPods. To install it, simply add the following line to your Podfile:
pod 'GrayscaleImages'
:git => 'https://github.com/Murmeko/GrayscaleImages.git'
Author
Murmeko, yigiterdinc@gmail.com
License
GrayscaleImages is available under the MIT license. See the LICENSE file for more info.


Latest comments (0)