Build a Telegram Bot that Translates Text in 3 Steps with Node.js and Code.xyz - By Steve Meyer

Telegram is instant messaging and voice service with a focus on privacy. It also just so happens that they also have a pretty slick interface for creating bots. It’s all done from within the app, by talking to another bot called the BotFather.
This tutorial will walk you through creating a Telegram bot that can translate text into a few different languages. The translation will be handled by IBM Watson’s Language Translator. The Telegram bot API and Watson will be brought together by Standard Library.
If you’re not familiar with Standard Library, we combine a scaleable compute layer, along with automatically generated documentation, authentication, billing, and more. We strive to enable anybody to turn simple JavaScript functions into production-ready APIs, in seconds. And with the help of our online editor Code.xyz, you can ship to Standard Library with zero setup or installation on your local machine.
What You’ll Need Beforehand
1x Telegram Account
≈5x Minutes
Step 1: Consult the BotFather
It’s the day of the BotFather’s daughter’s wedding. You’ve got the opportunity to ask for one gift, which of course he cannot refuse. You choose to ask for Telegram bot of your very own. Whether you use the Telegram web app, or your phone’s respective client, go to the search bar and enter “botfather”. There might be a few options, make sure you pick the one with the “verified” check-mark.
Imposters! You want the one with the blue check.
With your conversation started, type /newbot and the BotFather will ask for a name. This is not the username of the bot, so it doesn’t have to be unique. I went with notoriaga_test_bot. Next, the BotFather will ask for a username (i.e., @BotFather ). This is how people will call your bot, so it must be unique. I, again, went with notoriaga_test_bot, but you’ll have to pick something different. After this step, the BotFather will return a token used to control your bot. Copy that down, we’ll need it in just a moment.
Now we need to enable inline mode for the bot. This lets people type @<bot-name> in any chat to use your bot, rather than having to open a chat as we did with the BotFather. Type /setinline and then click on the bot you just created. The BotFather will ask for some placeholder text. I went with Some text to translate… and that gets displayed like this —

Step 2: Add Some Basic Functionality with Standard Library
Code.xyz — Standard Library’s free online editor for APIs
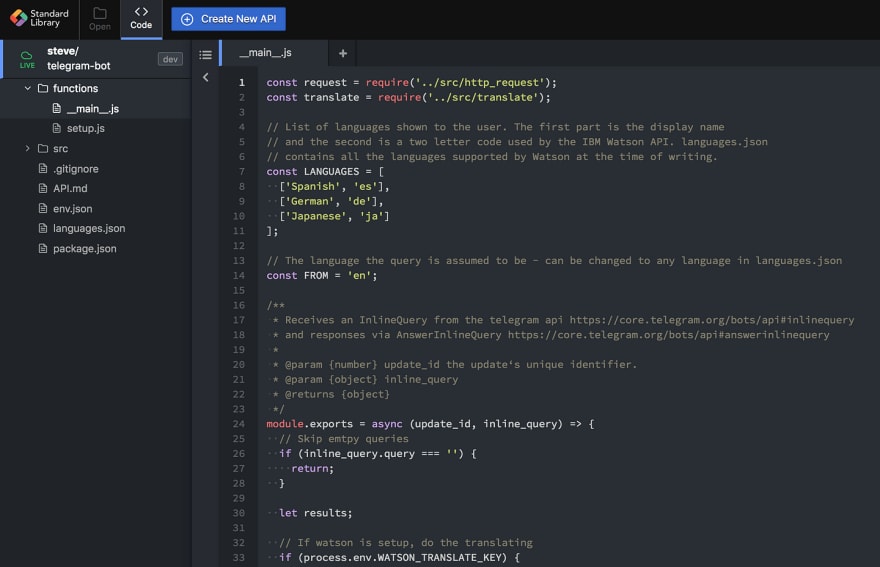
Before we get to the translating, let’s just get a basic “hello world” example working. Head over to Code.xyz, Standard Library’s online code editor. It comes preloaded with (almost) everything you need to get your bot going. You can find the code by following that link or by clicking on the “Featured API Sources” tab on the landing page.
Once loaded, open up the env.json file. You’ll see four different variables. For now, we are only concerned with TELEGRAM_BOT_TOKEN. That is that token from earlier. If you can’t find it for some reason, you can make a new one with /token while talking to the BotFather. Either way, put that token in your env.json.
Now head over to function/setup.js. This function, when run, registers the functions/__main__.js file in your project as the recipient of all your bot’s inline queries. After hitting run, you should get a response from Telegram that everything is good —

Now head back to Telegram to give your bot a try. Type @<bot_name> hello world, and after a moment a popup should appear that says echo —

Click the popup and —

Success! With the basic functionality set up, let’s make the bot do something a little more useful.
Step 3: Translate Inline Queries with IBM Watson
Head over your IBM Bluemix Dashboard (or create an account if you don’t have one). From your dashboard, click Create resource near the top right corner. Click AI from the categories sidebar on the left and then Language Translator. Give your service a name and click Create. Now your service page should have two credentials. The first is API Key. Simply copy that into your env.json as WATSON_TRANSLATE_KEY. Now for the Url, you are only interested in the host, that is, the part between https:// and /language-translator/api. Copy the host into your env.json as WATSON_TRANSLATE_HOST.

The complete env.json
With those new environment variables, go back to functions/setup.js and click run again. Now, the moment of truth. Go back to Telegram and enter @<bot_name> hello-world again. This time you should see —
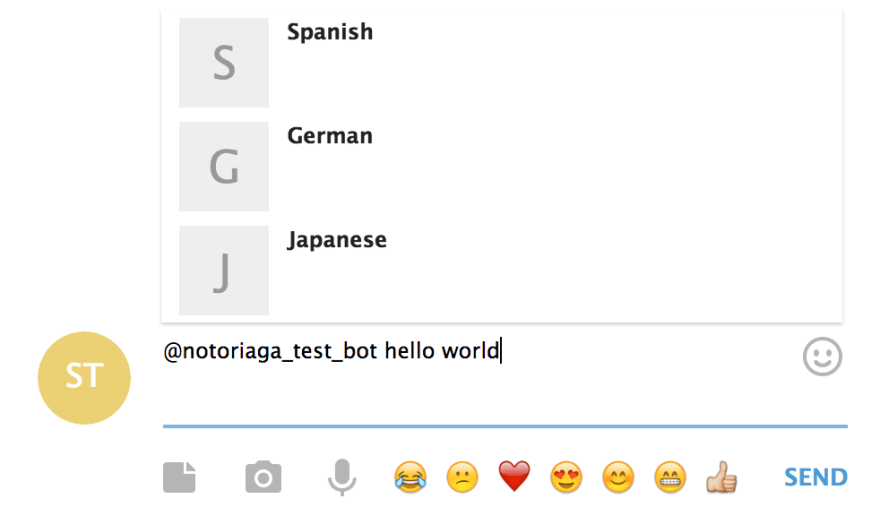
And of course, clicking on one enters that translation into the chat —

That’s All!
I hope this tutorial has been helpful in showing you how easy it is to combine disparate services using Standard Library. For more inspiration as to how you can better use Standard Library, you can check out more guides written by the team here. If you have a neat idea you’d like to share, reach out to me directly by e-mail: steve@stdlib.com, or follow me and the Standard Library team on Twitter.
Steve Meyer is a recent graduate of Oberlin College and Software Engineer at Standard Library. When he’s not programming, you can find him baking bread, or playing Spider-Man.


Top comments (0)