
The idea behind this project was to recreate an illustration found in YouTube channel Kurzgesagt's videos (as seen in the image above); limiting my self to using HTML and CSS.
Through creating this illustration, my aim was to learn and utilize various techniques of layouts and responsive design. In addition, I wanted to practice writing maintainable sass code using the BEM methodology.
Lastly, by documenting the process of creating the illustration I hope to share my knowledge on layouts and expose a few quirks of CSS.
First Steps
Using the drop tool
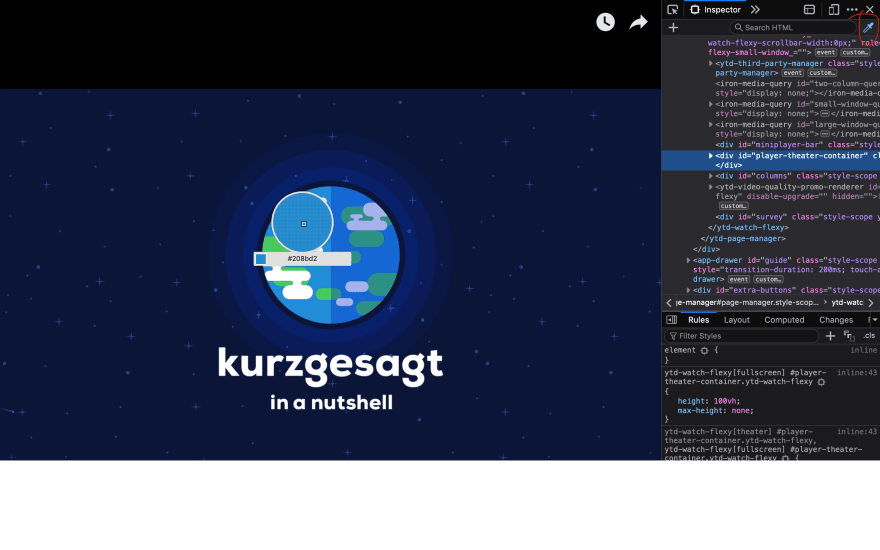
I used the colour picker tool in Firefox to grab the colour palette from Kurzgesagt's video. In Firefox, the colour tool automatically copies the HEX value to the clipboard. In this manner, I was able to create a palette with variable in SCSS like so:
// Palette
$earth-blue: #208bd2;
$trees: #45cb69;
$earth-outline-blue: #0a1436;
$earth-aura: #10329b;
$clouds: #ffffff;
$bg: #03081b;
Looking at the BEM methodology, I find the it is important to have descriptive names not only for html tags, but also for variables, mixins, and extends.
In this manner, it will be easier to recall the code by memory which ultimately allows for quicker changes.
Initial Structure
When starting, I find it important to define the structure starting with the 'blocks' or the main chuncks of html that define the blueprint for the layout. Looking at the illustration, I defined a base structure based on the following blocks: earth, clouds, trees, and earth's aura.
// base structure
<div class="wrapper">

    <div class="earth">
      <div class="earth_shadow_container">
        <div class="earth_shadow"></div>
      </div>

      <div class="clouds">
        <div class="lines_1"></div>
        <div class="lines_2"></div>
      </div>

      <div class="trees">
        <div class="line_1"></div>
        <div class="line_2"></div>
      </div>
    </div>

    <div class="earth_aura">
    </div>

    <div class="bg">
    </div>

  </div>
Above, I use descriptive names for blocks. This is in accordance with BEM's guide for naming tags which states that you should describe the block's purpose, and not its state.
Although it may be slightly abstracted for an illustration; I strongly feel it is still good practice to pay attention to small things like naming conventions, as they make the code a lot more readable.
Moreover, the wrapper - which will contain all the elements - has the following CSS code to render the art in full-screen:
.wrapper {
  display: block;
  position: relative;
  margin: 0 auto;
  width: 100vw;
  height: 100vh;
}
Apart from making it full-screen, the above code will allow for elements within to be easily centered relative to the users 'viewport', which is their device's screen. This is accomplished by using the vw and vh relative units in CSS.
Making Earth
Next, I began putting together the 'base' for the entire illustration which was the earth; its background, border, width, and height.
.earth {
  position: relative;
  width: 30vw;
  height: 30vw;
  top: 50%;
  left: 50%;
  transform: translate(-50%, -50%);
  background: $earth-blue;
  border: solid 1vw $earth-outline-blue;
  border-radius: 50%;
  z-index: 0;
  overflow: hidden;
}
Here, again, I use the vw unit to size the earth, this is because it will re-size based on the viewport's dimensions, so anyone can see it on their device.
Most notably, the following code centers the earth, right in the middle of the screen (both vertically and horizontally):
top: 50%;
left: 50%;
transform: translate(-50%, -50%);
background: $earth-blue;
To keep my code DRY, I took the above snippet and created an instance of @extends that would allow me to re-use it in other places.
The extend snippet looks like this:
%centerElement {
  top: 50%;
  left: 50%;
  transform: translate(-50%, -50%);
}
Now we have an earth that looks like this:

The Aura
Next, I focused on creating the earth aura. My idea behind this was that I could create the basic background with the 'earth-aura' block, and build the other three aura rings with the :before, and :after pseudo-elements.
One important takeaway from the project was how useful the z-index attribute is. The z-index attribute will allow you to defined the 'layers' of the elements. In a nutshell (pun intended), allowing you to decide which element is at the top, bottom, and the middle.
Completing the aura, the earth now looks like this:

The Dark Side of the Earth
This was a tricky bit of code to write, and there are several ways to do it, such as the clip-path. However, I stuck with using a simple div and changing it's overflow to none. The code can be a bit confusing, but it's definitely a useful technique.
The CSS for the earth shadow:
.earth_shadow_container {
  position: absolute;
  left: 50%;
  width: 100%;
  height: 100%;
  overflow: hidden;
}
.earth_shadow {
  position: absolute;
  left: -50%;
  width: 100%;
  height: 100%;
  background: rgba(0,0,0,0.2);
  border-radius: 50%;
  z-index: 1000;
}
Notice the z-index is large, as it will allow the clouds and trees to be under it.
It looks like this:

The Trees
Similar to the earth aura, I used a combination of elements, their pseudo elements, and box-shadow, to create trees.
First, I centered the 'trees' container within the earth block. Following this I coded the trees like so:
.line_1 {
    position: absolute;
    top: 75%;
    left: 20%;
    width: 12vw;
    height: 4vw;
    background: $trees;
    border-radius: 50px;

    &:after {
      content: '';
      position: absolute;
      display: block;
      top: -150%;
      left: 70%;
      width: 8vw;
      height: 3vw;
      background: $trees;
      border-radius: 50px;
    }

    &:before {
      content: '';
      position: absolute;
      display: block;
      top: -200%;
      left: -50%;
      width: 5vw;
      height: 2vw;
      background: $trees;
      border-radius: 50px;
    }

  }
The same process was done for the clouds. Lastly, I touched up the illustration with CSS animations, and added a descriptive header.
The result:


Top comments (0)