Hangfire is an open-source framework that helps you to create, process and manage your background jobs and an easy way to perform fire-and-forget, delayed and recurring jobs inside .NET applications. This post does not cover the basics of Hanfgire so read this article to learn the basics of Hangfire.
This post covers:
- How to config Hangfire to have multiple queues
- How to config worker count
- How to scale Hangfire worker service
I'm going to implement a sample project that contains a producer service that produces and exposes messages via web API and a consumer service which every second fetch messages from the producer service and enqueue messages into Hangfire. Each message has a different priority to process, so we enqueue each message to different queues based on priority and a worker service that processes messages and can be scaled out. You can skip steps 1-10 if you already have experience with Hangfire.
Producer Service
Imagine you need to call an external service and get a substantial amount of messages from that external service and queue messages to process. Our producer service mimics that external service behavior that provides messages.
- Step 1 - Create a class library project and name it
JobQueue.Shared - Step 2 - Add
Messagemodel class to the class library project
public class MessageModel
{
    public Guid MessageId { get; set; }

    public DateTime CreateDate { get; set; }

    public string Category { get; set; }

    public object Payload { get; set; }
}
- Step 3 - Create ASP.NET Core Web API project and name it
JobQueue.ProducerService Step 4 - Reference shared class library project to producer service project
Step 5 - Create message producer
Let's create a message producer class that generates a random message. I used an excellent library Bogus to generate fake data for testing purposes.
internal class MessageGenerator
{
    private static readonly string[] Categories = { "express", "normal" };
    private static readonly Faker<MessageModel> Faker;

    static MessageGenerator()
    {
        var random = new Random();

        Faker = new Faker<MessageModel>()
            .StrictMode(false)
            .RuleFor(p => p.Category, f => f.PickRandom(Categories))
            .RuleFor(p => p.MessageId, f => f.Random.Guid())
            .RuleFor(p => p.CreateDate, f => f.Date.Between(DateTime.Now.AddSeconds(-random.Next(1, 5)), DateTime.Now));
    }

    public static IEnumerable<MessageModel> GenerateMessages()
    {
        return Faker.Generate(100);
    }
}
Let's save generated message in a message store.
internal class MessageStore
{
    private readonly List<MessageModel> _store = new();
    private static readonly MessageStore _instance = new();

    private MessageStore()
    {
    }

    public static MessageStore Instance => _instance;

    public int Count => _store.Count;

    public void AddMessages(IEnumerable<MessageModel> messages)
    {
        _store.AddRange(messages);
    }

    public IEnumerable<MessageModel> GetMessages(int count)
    {
        var message = _store.Take(count).ToList();
        _store.RemoveRange(0, message.Count);

        return message;
    }
}
Let's create a background service that periodically generates messages and save them into messages. I used hosted service in ASP.NET Core to achieve this aim.
internal class MessageProducerHostedService : IHostedService, IDisposable
{
    private Timer _timer;

    public Task StartAsync(CancellationToken cancellationToken)
    {
        _timer = new Timer(SeedData, null, TimeSpan.Zero, TimeSpan.FromSeconds(1));

        return Task.CompletedTask;
    }

    public Task StopAsync(CancellationToken cancellationToken)
    {
        _timer?.Change(Timeout.Infinite, 0);

        return Task.CompletedTask;
    }

    public void Dispose()
    {
        _timer?.Dispose();
    }

    private void SeedData(object state)
    {
        if (MessageStore.Instance.Count > 2000)
            return;

        var messages = MessageGenerator.GenerateMessages();
        MessageStore.Instance.AddMessages(messages);
    }
}
- Step 6 - Create an API to expose messages
[ApiController]
[Route("api/v1/[controller]")]
public class MessagesController : ControllerBase
{
    [HttpGet]
    public IEnumerable<MessageModel> Get()
    {
        return MessageStore.Instance.GetMessages(new Random().Next(50, 200));
    }
}
Consumer Service
Step 7 - Create ASP.NET Core Web API project and name it
JobQueue.ConsumerServiceStep 8 - Install
Hangfire.AspNetCoreandHangFire.Redis.StackExchangenuget packagesStep 9 - Implement a background service that periodically fetches messages from the producer service and enqueue into a queue
public class MessageReceiverHostedService : IHostedService
{
    private readonly CancellationTokenSource _cts;
    private readonly IServiceProvider _serviceProvider;

    public MessageReceiverHostedService(IServiceProvider serviceProvider, ILogger<MessageReceiverHostedService> logger)
    {
        _serviceProvider = serviceProvider;
        _cts = new CancellationTokenSource();
    }

    public async Task StartAsync(CancellationToken cancellationToken)
    {
        await Task.Factory.StartNew(() => FetchMessagesAsync(_cts.Token), cancellationToken);
    }

    public Task StopAsync(CancellationToken cancellationToken)
    {
        _cts.Cancel();

        return Task.CompletedTask;
    }

    private async Task FetchMessagesAsync(CancellationToken cancellationToken)
    {
        while (true)
        {
            using var scope = _serviceProvider.CreateScope();
            var httpClient = scope.ServiceProvider.GetRequiredService<JobHttpClient>();
            var messages = await httpClient.GetJobMessagesAsync(cancellationToken);

            if (!messages.Any())
                continue;

            var categories = messages.GroupBy(m => m.Category).ToList();

            Parallel.ForEach(categories, category =>
            {
                Enqueue(category.Key, category.ToList());
            });

            await Task.Delay(TimeSpan.FromSeconds(5), cancellationToken);

            if (cancellationToken.IsCancellationRequested)
                break;
        }
    }

    private void Enqueue(string queueName, List<MessageModel> messages)
    {
        var client = new BackgroundJobClient();
        var state = new EnqueuedState(queueName);

        foreach (var message in messages.OrderBy(o => o.CreateDate))
        {
            Expression<Action> action = queueName == "express"
                ? () => MessageProcessor.ProcessExpressMessageAsync(message, message.MessageId)
                : () => MessageProcessor.ProcessNormalMessageAsync(message, message.MessageId);
            client.Create(action, state);
        }
    }
}
Each message has a Category property that identifies the priority of it. We have two categories, express and normal and express has a higher priority. We need two queues for express and normal categories.
One more thing I want to mention is that in this background service I didn't use the timer. Read this article to find out more on this case.
- Step 8 - Add new class
MessageProcessortoJobQueue.Sharedproject
public class MessageProcessor
{
    [Queue("express")]
    [DisplayName("JobId: {1}")]
    [AutomaticRetry(Attempts = 3)]
    public static async Task ProcessExpressMessageAsync(MessageModel message, Guid messageId)
    {
        await Task.Delay(TimeSpan.FromSeconds(new Random().Next(1, 4)));
    }

    [Queue("normal")]
    [DisplayName("JobId: {1}")]
    [AutomaticRetry(Attempts = 3)]
    public static async Task ProcessNormalMessageAsync(MessageModel message, Guid messageId)
    {
        await Task.Delay(TimeSpan.FromSeconds(new Random().Next(1, 4)));
    }
}
We have to methods for processing messages from each queue. One limitation of Hangfire is that you cannot use a method to process jobs from multiple queues (or at least I'm not aware of it but it can be done by implementing a custom Queue attribute).
Step 9 - Reference shared class library project to consumer service project
Step 10 - Add Hangfire dashboard to consumer service
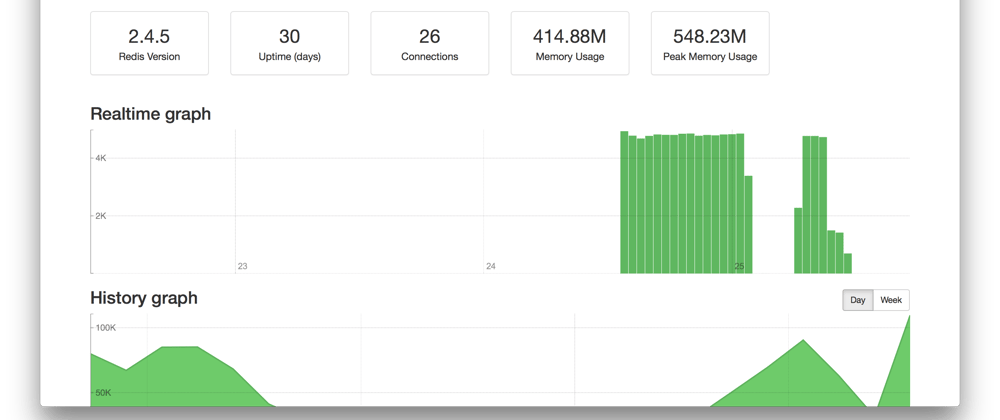
Hangfire has a dashboard that enables you to monitor the jobs and their statuses. It also allows you to manually trigger available jobs.
OpenStartup.csclass and add Hangfire dependencies toConfigureServicesmethod:
public void ConfigureServices(IServiceCollection services)
{
    services.AddControllers();
    services.AddHostedService<MessageReceiverHostedService>();

    services.AddHangfire(configuration => configuration
        .SetDataCompatibilityLevel(CompatibilityLevel.Version_170)
        .UseSimpleAssemblyNameTypeSerializer()
        .UseRecommendedSerializerSettings()
        .UseRedisStorage(_redis));
}
And in configure method:
public void Configure(IApplicationBuilder app, IWebHostEnvironment env)
{
    ...

    app.UseEndpoints(endpoints =>
    {
        endpoints.MapDefaultControllerRoute();
        endpoints.MapHangfireDashboard();
    });
}
Run producer project and navigate to <localhost>/hangfire to view the dashboard.
Worker Service
- Step 11 - Create Worker Service project and name it
JobQueue.WorkerService - Step 12 - Open
appsettings.jsonfile and the following configuration:
"Hangfire": [
  {
    "QueueName": "express",
    "WorkerCount": 5
  },
  {
    "QueueName": "normal",
    "WorkerCount": 2
  }
],
Background jobs are processed by a dedicated pool of worker threads that run inside the Hangfire server subsystem. For each queue, we can config the number of workers.
- Step 13 - Add new class
HangfireQueueSettingto bind configuration:
internal class HangfireQueueSetting
{
    public string QueueName { get; set; }

    public int WorkerCount { get; set; }
}
- Step 14 - Install
Hangfire.AspNetCoreandHangFire.Redis.StackExchangenuget packages - Step 15 - Open
Program.csclass and add Hangfire dependencies
public class Program
{
    private static ConnectionMultiplexer _redis;

    public static void Main(string[] args)
    {
        CreateHostBuilder(args).Build().Run();
    }

    public static IHostBuilder CreateHostBuilder(string[] args) =>
        Host.CreateDefaultBuilder(args)
            .ConfigureServices((hostContext, services) =>
            {
                _redis = ConnectionMultiplexer.Connect(hostContext.Configuration.GetConnectionString("RedisConnection"));

                services.AddHangfire(configuration => configuration
                    .SetDataCompatibilityLevel(CompatibilityLevel.Version_170)
                    .UseSimpleAssemblyNameTypeSerializer()
                    .UseRecommendedSerializerSettings()
                    .UseRedisStorage(_redis));

                var queueSettings = hostContext.Configuration.GetSection("Hangfire").Get<List<HangfireQueueSetting>>();
                foreach (var setting in queueSettings)
                {
                    services.AddHangfireServer(options =>
                    {
                        options.ServerName = $"{Environment.MachineName}:{setting.QueueName}";
                        options.Queues = new[] { setting.QueueName };
                        options.WorkerCount = setting.WorkerCount;
                    });
                }
            });
}
- Step 16 - Reference shared class library project to producer service project
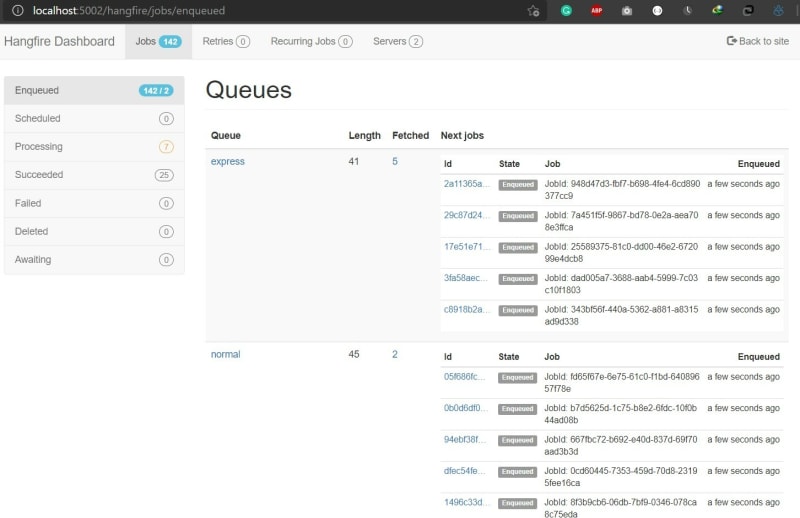
Now run all projects and navigate to Hangfire dashboard and you could see jobs are processing:
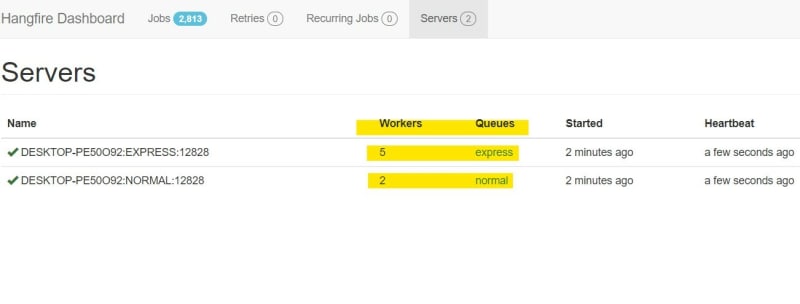
Click on the Servers tab and you can see we have two queues and with different worker count:
Dockerizing Services
version: '3.4'

networks:
  service_network:

services:
  redis:
    image: "redis"
    ports:
      - 6379:6379
    networks:
      - service_network

  consumerservice:
    image: ${DOCKER_REGISTRY-}jobqueueconsumerservice
    container_name: consumerservice
    ports:
      - 9000:80
    networks:
      - service_network
    build:
      context: .
      dockerfile: JobQueue.ConsumerService/Dockerfile
    environment:
      - ConnectionStrings__RedisConnection=redis:6379
      - JobApi__BaseAddress=http://producerservice

  producerservice:
    image: ${DOCKER_REGISTRY-}jobqueueproducerservice
    container_name: producerservice
    build:
      context: .
      dockerfile: JobQueue.ProducerService/Dockerfile
    networks:
      - service_network

  workerservice:
    image: ${DOCKER_REGISTRY-}workerservice
    networks:
      - service_network
    build:
      context: .
      dockerfile: JobQueue.WorkerService/Dockerfile
    environment:
      - ConnectionStrings__RedisConnection=redis:6379
      - Hangfire__0__WorkerCount=10
      - Hangfire__1__WorkerCount=5
We can configure worker count via docker-compose file by passing values through environment:
Hangfire__0__WorkerCount=10
Let's run projects via docker-compose:
- run
docker-compose build - run
docker-compose up -d - run
docker-compose scale workerservice=2 - To access the job dashboard, enter
http://localhost:9000address in the browser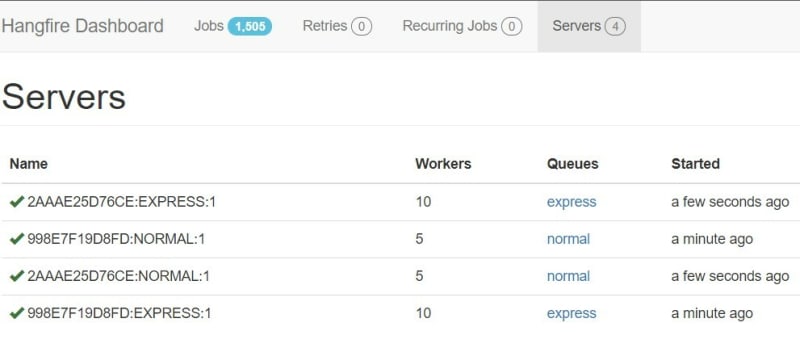
You can find the source code for this walkthrough on Github.


Latest comments (2)
Thanks for sharing.
there is a typo "Hangfir" => "Hangfire"
Thank you, I fixed the typo.