
Table Of Contents
- Introduction
- What is LaTeX?
- Why LaTeX?
- Usage
- Document Preambles
- Adding a Title, Author, and Date
- Adding a Comment
- Adding Bold, Italics, and Underlining
- Creating Lists
- Conclusion
Introduction
Over the last few weeks I have been piecing together my portfolio, anxious to get it completed and sent out to employers. I actually felt like I was completely finished until someone asked the question, is your resume in latex?
And I stood there thinking...is my resume in what?

But, after a quick google search, latex turned into LaTeX, and I realized we were talking tech 😎. If you haven't caught on yet, my resume was definitely not in LaTeX. But it will be!
In this blog post, I am going to discuss LaTeX, it's usage, and how you can apply it to your own resume!
What is LaTeX?
LaTeX is a tool for creating professional-looking documents. Originally based off the WYSIWYM (What You See Is What You Mean) idea, it only focuses on the contents of your document, while the computer will take care of the rest. Instead of spacing out text on a page, or any other formating, used in Microsoft Word, LibreOffice Writer etc.*, users can enter plain text, letting LaTeX do all the work.
Why LaTeX?
LaTex isn't only used for resumes, but all over the world for scientific documents, books, and other various forms of publishing. It simultaneously creates organized typeset documents and allows users to focus on the more complicated parts of typesetting, which can included but is not limited to, inputting mathematics, creating tables of contents, referencing and creating bibliographies, and having a consistent layout across all sections. There are no fine lines when utilizing with Latex due to the huge number of open source packages available. These packages allow users to do more with LATEX, like adding footnotes, draw schematics, create tables, and more.
One reason why people use LaTeX is that it separates the document content from style. This means that we can change the documents appearance with ease after you have the written content. Additionally, you can create one document style which can be used similar to a template for other documents. This allows scientific journals to create templates for submissions. There are hundreds, if not thousands, of templates available online for everything!
Usage
To create a new LaTex project on your own computer, you'll first need to create a new .tex file. If you were making a template for your resume, your file name might be 'resume.tex'. If you are creating .tex files locally, you may need an outside extension to view your formatted file. For an alternative way to create .tex files, check out Overleaf, on online LaTex editor, where there are many templates already available.
Now that you have you .tex file ready to go, let's start formatting! To begin formatting, we're going to use a very basic example, that can be found here in the LaTeX Docs.
\documentclass{article}

\begin{document}

Testing out LaTeX! This is an example using no
extra parameters or packages included.

\end{document}
When formatted, that will appear as:

Not too bad, right?
If you decide to use Overleaf, upon creating a blank project you'll be provided a basic preset template, that might look like:

Now, I know how exciting it must feel to have just unlocked the power to reduce document formatting time significantly. So, before we get too ahead of ourselves, let's take a step back and understand what going on "under the hood".
Document Preambles
In both of the examples you may have noticed the document begin with the begin{document} command. Everything in your .tex file before this point is called the preamble. In the preamble you can define which type of document you are writing, the language you are writing in, the packages you'd like to use, and more. The normal document preamble would look like so:
\documentclass[12pt, letterpaper]{article}
\usepackage[utf8]{inputenc}
Let's break this down.
documentclass[12pt, letterpaper]{article}
This defines the type of document. There are, comma separated, parameters included in the square brackets can be passed. So if you take a look in the example, the parameters set the font size to 12pt, as well as the paper size (letterpaper). You can use any font size, but if none is specified, a default size of 10pt will be used. Regarding paper size other possible parameter values include a4paper and legalpaper; you can research even more values if interested.
\usepackage[utf8]{inputenc}
This line is for encoding for the document. It can be left out or altered to another encoding, but utf-8 is usually what's recommended. Unless you specifically need another encoding, or if you are unsure about it, add this line to the preamble.
If you are using Overleaf chances are all of this will be provided for you. However, it's still a good idea to understand what and where the formatting is deriving from.
Adding a Title, Author, and Date
In many cases, you may want to add a title, author, and date to your project. Thankfully, it can be done in three easy lines in the preamble, NOT the main document body. These lines include:
\title{My Example}
\author{Maxine Meurer}
\date{July 2021}
After you have added and filled in these lines within your document, the information can now be printed on the document with the \maketitle command. This should be included in the body of the document, at the place you want the title to appear. With this code:
\documentclass{article}
\usepackage[utf8]{inputenc}

\title{My Example}
\author{Maxine Meurer}
\date{July 2021}

\begin{document}

\maketitle

You're on your way to creating your \LaTeX{} document!

\end{document}
You should receive a document that looks like this:
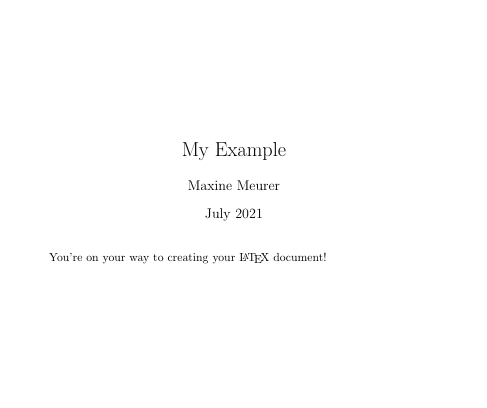
Beautiful, isn't it?
Adding a Comment
Now, we're getting pretty far into our LaTeX document already, so what if we need to make a quick comment to remind ourselves to add something later? To make a comment in LaTeX, just write a % symbol at the beginning of the line like so:
%Let's change the font size again later!
Adding Bold, Italics, and Underlining
Whether you are hand crafting a resume, or piecing together a scientific report, you may want to accentuate some information! In other editors we may be use to the good ol' 'command + b/i/u', but don't worry LaTeX has us covered.
- Bold: Bold text in LaTeX is written with the \textbf{...} command.
- Italics: Italicised text in LaTeX is written with the \textit{...} command.
- Underline: Underlined text in LaTeX is written with the \underline{...} command.
So for the example:
Let's \textbf{bold} some text!
Let's \underline{underline} some text!
let's italicize \textbf{AND} bold \textbf{\textit{some text}
You would see a result of:

Creating Lists
Just as you want to accent your document, you may also want to list out important information. Lists are easy to create in LATEX. You can do so by utilizing different list environments. Environments are sections of our document that you want to present in a different way to the rest of the document. Environments start with a \begin{...} command and end with an \end{...} command. This should look a little familiar...
The two most commonly used types of lists are, ordered lists and unordered lists, each using a different environment.
Unordered Lists
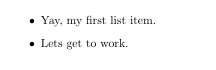
You can create unordered list by using the itemize environment. Each entry must be preceded by the control sequence '\item', refer to the example:
\begin{itemize}
  \item Yay, my first list item.
  \item Lets get to work.
\end{itemize}
This will show as:
Ordered Lists
Ordered list are similar in syntax but instead use the enumerate environment, the same list above would look like:
\begin{enumerate}
  \item Yay, my first list item.
  \item Lets get to work.
\end{enumerate}
Appearing as:

Like unordered lists, each entry must begin with the '\item' command, automatically generating the number labelling the item. The enumerate labels uses sequential numbers starting at one.
Woah there, I didn't realize I was in the presence of a LaTeX pro.😎
Conclusion
So now that you can impress colleagues, employers, and most importantly yourself with your newly gained LaTeX skills, go ahead and put them to use! Utilizing LaTeX to create your own documents shows that you put the extra time and effort into presenting your knowledge on paper, or pdf since it is 2021 and all...
While this blog post covers the basics for creating a LaTeX doc, I highly recommend referring back to the Latex Documentation, which is what I used as the primary source for this blog post, to learn more ways to add to/spruce up your formatting, such as adding images, captions, and more!


Top comments (2)
Thanks for providing this valuable information. Also, I found out this comprehensive guide that explains almost anything that is needed to write a research paper in latex.typeset.io/resources/learn-latex-b...
Interesting - thank you. A good accessible writing style.
Have been pondering using TeX in a couple of ways; including as part of a pipeline from a web server generating an actual document. And that might involve also using GraphViz in the mix; which would be interesting and tricky. Am finding MarkDown good but a bit inflexible; maybe there are pennies yet to drop.
Thanks again.