
This is a follow-up to my previous post about my submission to the DigitalOcean Kubernetes Challenge! I recommend that you at least skim through it for context on Kubegres, the Kubernetes operator we'll be using to deploy Postgres.
Disclaimer: This isn't an intro to any of the technologies mentioned! If you haven't used Terraform with GitHub Actions before, I highly suggest going through this tutorial from HashiCorp itself. I'll mostly be riffing off of it, pointing out important departures throughout.
You will need:
- A GitHub account and a working Git installation
- A Terraform Cloud account and a working Terraform installation
- A DigitalOcean account (the process for other providers is very similar, however)
Brief overview
I had recently deployed a scalable Postgres cluster to DigitalOcean Kubernetes, but I did it manually. The process is straightforward but quite tedious, which makes it a prime candidate for automation.
How it works
- Infrastructure configuration is pushed to the GitHub repo, triggering a GitHub Actions workflow
- GitHub Actions checks out code to a runner
- Runner connects to Terraform Cloud to plan and apply the configuration
- Terraform Cloud connects to the provider (DigitalOcean in this case) to provision the needed resources

The steps
- Set up Terraform Cloud
- Set up the GitHub repository
- Set up the Terraform file
- Push to the repository
- Cleanup!
1. Set up Terraform Cloud
1.1. From your DigitalOcean account, create a personal access token.
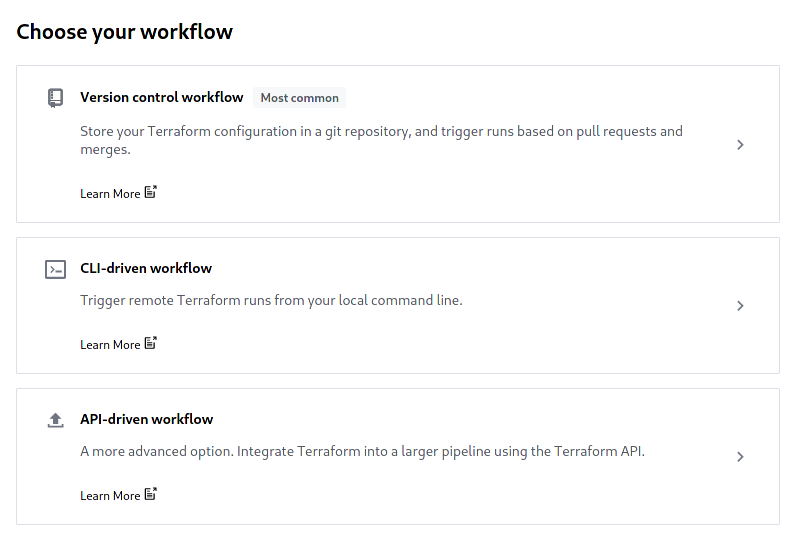
1.2. From your Terraform Cloud account, create a new workspace, selecting API-driven workflow as its type.
1.3. In your newly created workspace, go to the variables tab and make a new workspace variable called DIGITALOCEAN_TOKEN. Select the env variable type and check the Sensitive box.


1.4. From your Terraform Cloud account, go to the User settings page, select Tokens from the sidebar, and generate a new token. We'll need this for GitHub Actions.

2. Set up a GitHub repository
2.1. Create a new repository. Go to the Settings tab and select Secrets from the sidebar.


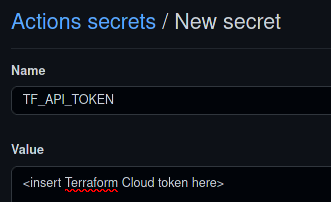
2.2. Create a new secret called TF_API_TOKEN and paste the Terraform Cloud token you just generated.
2.3. Navigate to the Actions tab in your repository and find the Terraform template. Click Set up this workflow.


Refer to the Review Actions workflow section in this tutorial for a breakdown of the workflow steps. The template we're using is slightly different in that it doesn't have the update pull request steps.
2.4. Commit the file. The workflow is going to be triggered but it'll quickly error out because we don't have a Terraform file yet!
3. Set up the Terraform file
Click here to see the Terraform file I used. This section of the tutorial is gonna be a breakdown of the file instead of a sequence of steps. For the experts in the audience: I'm new to Terraform so go easy on me! I tried ordering it in a way conducive to explanation.
terraform {
  backend "remote" {
    organization = "your-org-here"

    workspaces {
      name = "your-workspace-name-here"
    }
  }
This part tells Terraform to use Terraform Cloud to plan, apply, etc. instead of doing it locally. This also means the state of your deployment will be stored remotely and securely.
required_providers {
    digitalocean = {
      source  = "digitalocean/digitalocean"
      version = "~> 2.16.0"
    }

    kubernetes = {
      source  = "hashicorp/kubernetes"
      version = "~> 2.6.0"
    }

    kubectl = {
      source  = "gavinbunney/kubectl"
      version = ">= 1.7.0"
    }
  }
Pretty straightforward. The kubectl provider is super useful for elegantly doing kubectl apply to our cluster (we did a lot of that manually last time). We'll see it in action later.
resource "digitalocean_project" "k8s_challenge" {
  name        = "k8s-challenge"
  description = "Entry for the DigitalOcean Kubernetes Challenge"
  purpose     = "Just trying out DigitalOcean"
  environment = "Development"

  resources = [
    digitalocean_kubernetes_cluster.postgres.urn
  ]
}

resource "digitalocean_vpc" "k8s" {
  name   = "k8s-vpc"
  region = "sgp1"

  timeouts {
    delete = "4m"
  }
}
DigitalOcean uses projects to organize resources. We'll put our cluster in a new one and create a new VPC for it. The delete timeout section in the VPC resource makes sure everything else has been deleted before deleting the VPC (it'll throw an error in the destroy process otherwise; I've found that deletions take a few minutes to register).
data "digitalocean_kubernetes_versions" "prefix" {
  version_prefix = "1.21."
}

resource "digitalocean_kubernetes_cluster" "postgres" {
  name         = "postgres"
  region       = "sgp1"
  auto_upgrade = true
  version      = data.digitalocean_kubernetes_versions.prefix.latest_version

  vpc_uuid = digitalocean_vpc.k8s.id

  maintenance_policy {
    start_time = "04:00"
    day        = "sunday"
  }

  node_pool {
    name       = "worker-pool"
    size       = "s-2vcpu-2gb"
    node_count = 3
  }
}
Here we're finally configuring the cluster itself. We're more or less creating a default one. Notice that we're using the id of the VPC we created. The maintenance policy determines when DigitalOcean will install updates and patches.
provider "kubernetes" {
  host  = digitalocean_kubernetes_cluster.postgres.endpoint
  token = digitalocean_kubernetes_cluster.postgres.kube_config[0].token
  cluster_ca_certificate = base64decode(
    digitalocean_kubernetes_cluster.postgres.kube_config[0].cluster_ca_certificate
  )
}

provider "kubectl" {
  host  = digitalocean_kubernetes_cluster.postgres.endpoint
  token = digitalocean_kubernetes_cluster.postgres.kube_config[0].token
  cluster_ca_certificate = base64decode(
    digitalocean_kubernetes_cluster.postgres.kube_config[0].cluster_ca_certificate
  )
  load_config_file = false
}
Here we're configuring our providers to get credentials from the cluster for adding Kubegres resources.
variable "superUserPassword" {}
variable "replicationUserPassword" {}


resource "kubernetes_secret" "postgres_secret" {
  metadata {
    name      = "mypostgres-secret"
    namespace = "default"
  }

  data = {
    superUserPassword       = var.superUserPassword
    replicationUserPassword = var.replicationUserPassword
  }

  type = "Opaque"
}
This is basically the equivalent of the my-postgres-secret.yaml in the Kubegres tutorial.
Short detour: put these secrets in your Terraform Cloud workspace variables!

data "kubectl_path_documents" "docs" {
  pattern = "./manifests/*.yaml"
}

resource "kubectl_manifest" "kubegres" {
  for_each  = toset(data.kubectl_path_documents.docs.documents)
  yaml_body = each.value
}
Here we're telling the kubectl provider to apply all the manifests in our ./manifests/* directory. We're using kubectl_path_documents instead of kubectl_filename_list because the kubegres.yaml file actually consists of multiple documents defining different resources. I got stuck on this the first time around :^)
See the kubectl provider docs for more details.
Short detour: create a manifests directory in your repo and put the required manifests in it! Also check the previous post for context.

4. Push to the repository
4.1. You should be pretty much done! Push everything to the repository. At the minimum, you should have a main.tf file, a manifests directory, and a .github/workflows directory.
4.2. Look at your Actions tab to see the triggered workflow. You should see something like the following.

A lot of configuration is hidden in that Kubegres manifest. Don't panic if the console throws thousands of lines of output at you.

You can also check the ongoing run in your Terraform Cloud account. The terraform apply part takes a few minutes. Grab a cup of your favorite beverage and sit tight!

After a few minutes:


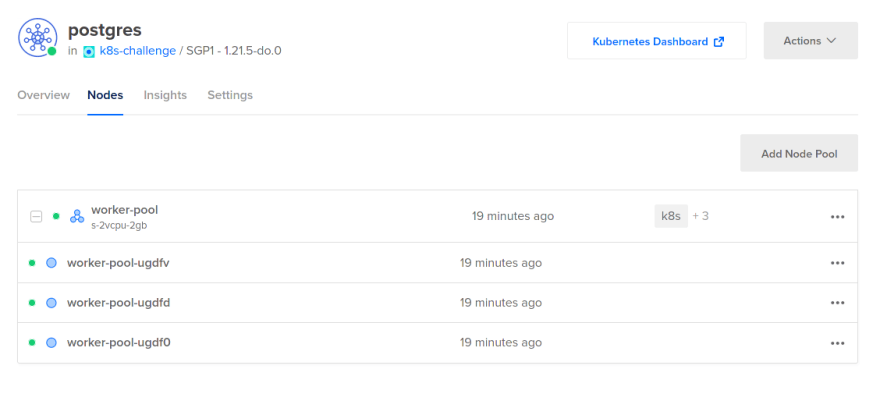
You can also view the cluster in your DigitalOcean control panel.
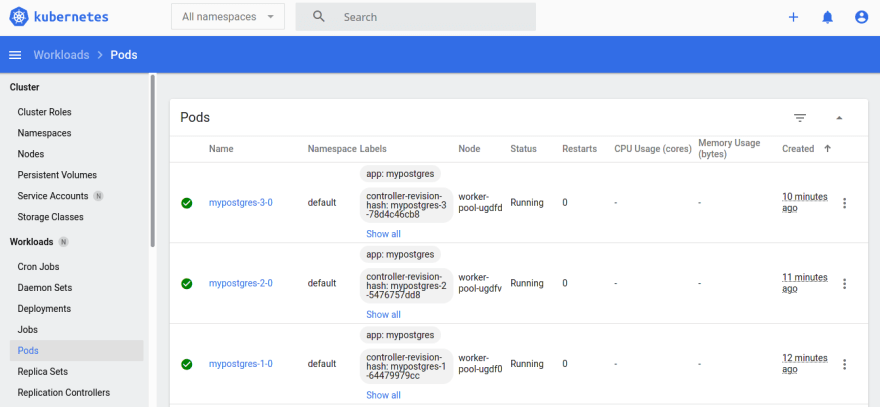
Clusters also come with a dashboard by default.
5. Cleanup!
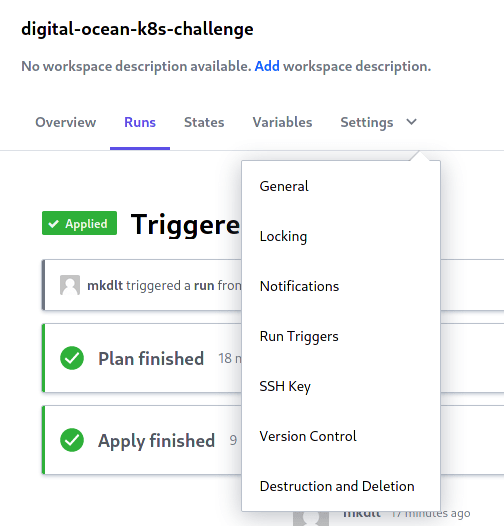
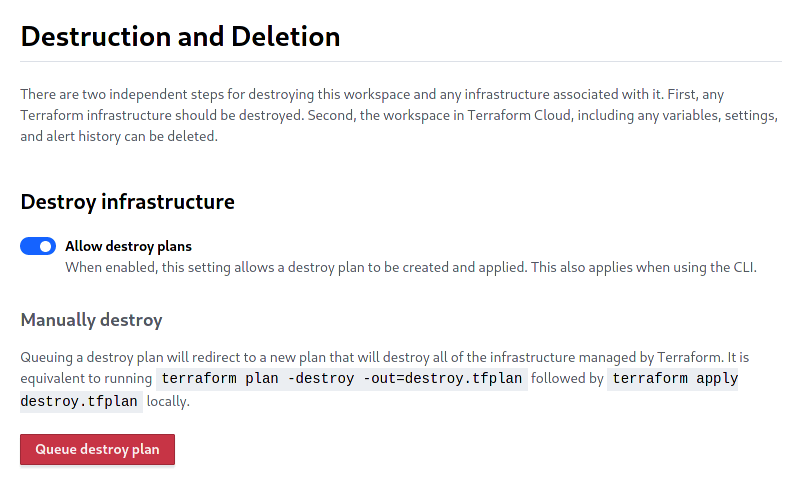
5.1 Since we used Terraform Cloud, we can simply queue up a destroy plan! Just go to your workspace Settings and select Destruction and Deletion. Click the red Queue destroy plan and confirm by entering the name of your cluster.

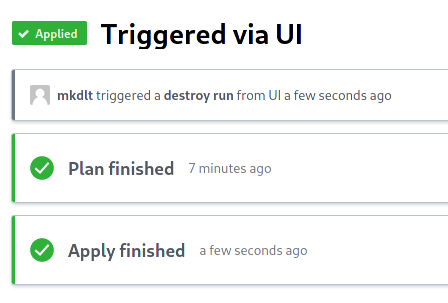
5.2. You should be taken to a new run. Click Confirm & Apply below, add a comment, and click Confirm Plan.

5.3. Wait a few minutes and your cluster should be destroyed! The created DigitalOcean project should also disappear from your control panel shortly.

As you can see, the VPC took some time to get destroyed.
Thank you!
And that's it! I know this tutorial was a bit gisty so feel free to ask questions and ask for debugging help. Thanks to DigitalOcean for organizing the challenge! The repo can be found here.


Top comments (0)