
Introduction
In this tutorial, you'll learn how to integrate Meilisearch with your Rails application database and quickly create a front-end search bar with a search-as-you-type experience using React.
We will create a very basic application; our main focus will be the search. Therefore we won't go into much detail about Rails or React.
Prerequisites
To follow this tutorial, you need:
- Node.js >=16.10
- yarn 1
- Ruby >= 2.7
- Ruby on Rails 7.0
Ideally, you are familiar with Ruby on Rails and have already created a simple RoR app. If that's not the case, you can still follow this tutorial, but as we stated in the introduction, explanations will focus on the search.
Step 1. Installing Meilisearch
There are several ways to install Meilisearch. The easiest is cURL, a tool that allows you to make HTTP requests and transfer data from the command line.
Open your terminal and paste the following lines of code:
# Install Meilisearch
curl -L https://install.meilisearch.com | sh

# Launch Meilisearch
./meilisearch
Step 2. Creating and setting up your Rails app
Now that you've got Meilisearch up and running, let's create our RoR app. We will create a simple recipe app named delicious_meals. Run the following command on the terminal:
rails new delicious_meals -j esbuild
Let's generate our model Recipe. It will have four attributes:
-
title -
ingredients -
directions -
diet
Go into the project folder and run the following command:
bin/rails g model Recipe title:string ingredients:text directions:text diet:string
This command also generates the migration file inside the db/migrate directory. Let's add the null: false option next to each column of the table so that no recipe is saved to the database if a field is empty.
class CreateRecipes < ActiveRecord::Migration[7.0]
  def change
    create_table :recipes do |t|
      t.string :title, null: false
      t.text :ingredients, null: false
      t.text :directions, null: false
      t.string :diet, null: false

      t.timestamps
    end
  end
end
The timestamps column method adds two extra fields to the table: created_at and updated_at.
You can now create the database and run the migration above with the following commands:
# Creates the database
bin/rails db:create

# Runs the migration
bin/rails db:migrate
Next, you need to generate the controller with its index action.
bin/rails g controller Recipes index
We will use the index view to show our recipes and search through them with our search bar. We won't generate the rest of the CRUD actions, as it would exceed the purpose of this tutorial.
Once the controller is created, modify the config/routes.rb file to look like this:
Rails.application.routes.draw do
  # Maps requests to the root of the application to the index action of the 'Recipes controller'
  root "recipes#index"
end
Now, the root route is mapped to the index action of RecipesController. That way, the content of app/views/recipes/index.html.erb will be rendered at the root of your application.
You can check that everything is working as intended by starting the application with the following command:
bin/dev
Open your browser window and navigate to http://127.0.0.1:3000. You should see your index view displaying a message such as:
Recipes#index
Find me in app/views/recipes/index.html.erb
Step 3. Adding Meilisearch to your app
Now that we have the back-end basics of our application, let's connect it to our running Meilisearch instance using the meilisearch-rails gem.
Install it by running the following command:
bundle add meilisearch-rails
👉 When writing this tutorial, the latest version of the gem was 0.7.1. You can check the latest version in the meilisearch-rails GitHub repository or on Meilisearch finds rubygems.
Create a file named meilisearch.rb inside the config/initializers/ folder to setup your MEILISEARCH_HOST and MEILISEARCH_API_KEY:
touch config/initializers/meilisearch.rb
If you have followed step 1 to the letter, your Meilisearch host should be http://127.0.0.1:7700. Since we did not set any API key, we will comment out the line with the meilisearch_api_key field:
MeiliSearch::Rails.configuration = {
    meilisearch_host: 'http://127.0.0.1:7700',
    # meilisearch_api_key: ''
}
👉 You will need a master or a private key in production, you can learn more about it here.
If you did set a master key, you have to update your configuration accordingly before running Meilisearch (see step 1).
Let's open our app/models/recipe.rb file and add the following line inside the Class declaration:
include MeiliSearch::Rails
We also need to add a meilisearch block. Note that the settings inside the Meilisearch block are not mandatory.
class Recipe < ApplicationRecord
    include MeiliSearch::Rails

    meilisearch do
        # all attributes will be sent to Meilisearch if block is left empty
        displayed_attributes [:id, :title, :ingredients, :directions, :diet]
        searchable_attributes [:title, :ingredients, :directions, :diet]
        filterable_attributes [:diet]
    end
end
Let's break down each line of code:
Setting displayed attributes
displayed_attributes [:id, :title, :ingredients, :directions, :diet]
By default, Meilisearch displays all the attributes. Here, we are instructing Meilisearch to only display the specified attributes in the search response, this setting prevents Meilisearch from displaying the created_at and updated_at fields.
👉 You can learn more about displayed attributes in our documentation.
Setting searchable attributes
searchable_attributes [:title, :ingredients, :directions, :diet]
With the above line of code, we are doing two things:
- We first tell Meilisearch to only search among the specified attributes when performing a search query. So it won't try to find matches in the
id,created_atandupdated_atfields. - We are also specifying the order of importance of the attributes. We are telling Meilisearch that a document with a matching query word found in its
titleis more relevant than a document with a matching query word found indirections. The first document is more relevant and is returned first in the search results.
👉 Learn more about searchable fields in our documentation.
Setting filterable attributes
filterable_attributes [:diet]
Finally, we are telling Meilisearch that we want to be able to refine our search results based on the diet type. That will allow us to search only for vegetarian recipes, for instance.
👉 Visit our documentation to know more about filtering.
Step 4. Seeding the database
To test our application, we need some data in our database. The quickest way is to populate the database with dummy data using a gem called faker.
Add the following line to your Gemfile inside the development group, save and run bundle install:
gem 'faker', :git => 'https://github.com/faker-ruby/faker.git', :branch => 'master'
Then open the ./db/seeds.rb file and add the following code to populate your database with 1000 recipes:
# Deletes existing recipes, useful if you seed several times
Recipe.destroy_all

# Creates 1000 fake recipes
1000.times do
    Recipe.create!(
        title: "#{Faker::Food.dish} by #{Faker::Name.unique.name}",
        ingredients: "#{Faker::Food.ingredient}, #{Faker::Food.ingredient}, #{Faker::Food.ingredient}",
        directions: Faker::Food.description,
        diet: ['omnivore', 'pescetarian', 'vegetarian', 'vegan'].sample
    )
end

# Displays the following message in the console once the seeding is done
puts 'Recipes created'
Now, run bin/rails db:seed in the command line.
Step 5. Testing search with the search preview
Meilisearch delivers an out-of-the-box web interface to test it interactively. Open your browser and go to the Meilisearch HTTP address, which should be http://127.0.0.1:7700, unless you specified it otherwise at launch.
👉 Adding documents to an index is an asynchronous operation, don't worry if you don't see the 1000 documents right away. It might take some time for the updates to process. Learn more about asynchronous updates here.
Make sure the Recipe index is selected in the menu located at the top right, next to the search bar.

As you can see, the data has been automatically added to our Meilisearch instance. The only visible and searchable attributes are the ones we specified in our model file inside the meilisearch block. Please note that your search results may be different from those shown in the GIF, since faker randomly generates data.
This is great for testing Meilisearch and some of its features, but it doesn't showcase the filterable_attributes we specified in our block. We need a custom UI for production.
Step 6. Adding React to the Rails app
There are several ways of using ReactJS with Rails. We have chosen the most straightforward one: installing it as a JavaScript dependency in our Rails application.
Run the following command to install ReactJS and its react-dom package for working with the DOM:
yarn add react react-dom
Let's create the folders and files for our React code.
mkdir app/javascript/recipes
touch app/javascript/recipes/index.jsx
touch app/javascript/recipes/App.jsx
Let's open app/javascript/recipes/index.jsx and add the required code to render our React elements:
import React from 'react';
import { createRoot } from 'react-dom/client';
import App from './App';

const container = document.getElementById('app');
const root = createRoot(container);
root.render(<App/>);
Open the app/javascript/application.js and import the file we just created:
import "./recipes"
Step 7. Integrating a front-end search bar
To integrate a front-end search bar, you need to install two packages:
- React InstantSearch: an open-source library that provides all the front-end tools you need to customize your search bar environment
- Instant Meilisearch: the Meilisearch client to establish the communication between your Meilisearch instance and the React InstantSearch library
yarn add react react-dom react-instantsearch-dom @meilisearch/instant-meilisearch
You can now open your app/javascript/recipes/App.jsx file and replace the existing code with the code from the meilisearch-react Getting Started guide. We only need to modify the searchClient with our Meilisearch host and Meilisearch API key, as well as the indexName. It should look like this:
import React from "react"
import { InstantSearch, Highlight, SearchBox, Hits } from 'react-instantsearch-dom';
import { instantMeiliSearch } from '@meilisearch/instant-meilisearch';

const searchClient = instantMeiliSearch(
  "http://127.0.0.1:7700", // Your Meilisearch host
  "" // Your Meilisearch API key, if you have set one
);

const App = () => (
  <InstantSearch
    indexName="Recipe" // Change your index name here
    searchClient={searchClient}
  >
    <SearchBox />
    <Hits hitComponent={Hit} />
  </InstantSearch>
);

const Hit = ({ hit }) => <Highlight attribute="title" hit={hit} />

export default App
Now, go to your views folder and replace the content of the app/views/recipes/index.html.erb with the code below:
<div id="app"></div>
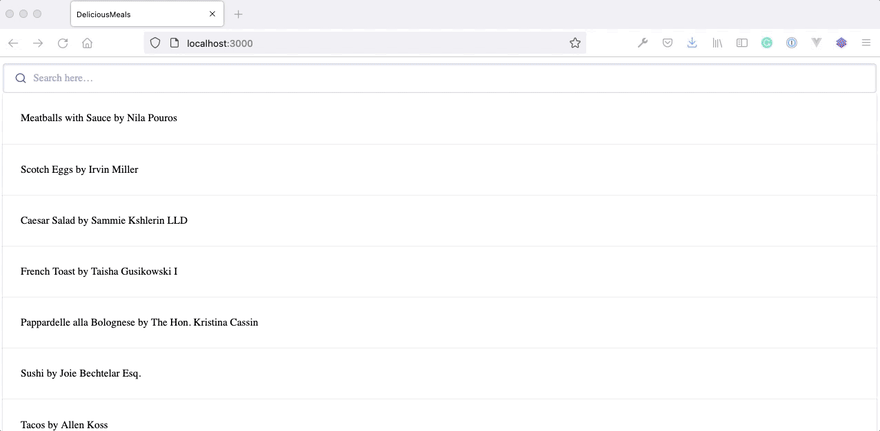
Now you can run the bin/dev command, open your browser and navigate to http://127.0.0.1:3000 and see the result:

Well, the search works, but it's not very pretty. Luckily, InstantSearch provides a CSS theme you can add by inserting the following link into the <head> element of your app/views/layouts/application.html.erb:
<link rel="stylesheet" href="https://cdn.jsdelivr.net/npm/instantsearch.css@7.4.5/themes/satellite-min.css" integrity="sha256-TehzF/2QvNKhGQrrNpoOb2Ck4iGZ1J/DI4pkd2oUsBc=" crossorigin="anonymous">
You can also customize the widgets or create your own if you want to. Check the React InstantSearch documentation for more details.
Let's check the rendering:
Not bad, right? But once again we lack the possibility of filtering the results by type of diet.
Step 8. Adding faceted search
It's as simple as importing the RefinementList widget in your index.js file:
import { InstantSearch, Highlight, SearchBox, Hits, RefinementList } from 'react-instantsearch-dom';
and adding it inside our InstantSearch widget, specifying the attribute we want to filter by:
<RefinementList attribute="diet" />
To make it more aesthetic and practical, let's create two <div> elements to divide our components. On the left, we'll find the filters, and the search bar and results on the right.
You can also add a "Type of diet" heading along with the ClearRefinements widget. It allows you to clear all the filters just by clicking on it, instead of having to uncheck them one by one.
The file should now look like this:
import React from "react"
import { InstantSearch, Highlight, SearchBox, Hits, RefinementList, ClearRefinements } from 'react-instantsearch-dom';
import { instantMeiliSearch } from '@meilisearch/instant-meilisearch';

const searchClient = instantMeiliSearch(
  "http://127.0.0.1:7700",
  ""
);

const App = () => (
  <InstantSearch
    indexName="Recipe" // Change your index name here
    searchClient={searchClient}
  >
    <div className="left-panel">
      <ClearRefinements />
      <h2>Type of diet</h2>
      <RefinementList attribute="diet" />
    </div>
    <div className="right-panel">
      <SearchBox />
      <Hits hitComponent={Hit} />
    </div>

  </InstantSearch>
);

const Hit = ({ hit }) => <Highlight attribute="title" hit={hit} />

export default App
For this to work we need to add some CSS. Let's create a app/assets/stylesheets/recipes.css file and add the following lines of code:
.right-panel {
    margin-left: 210px;
}

.left-panel {
    float: left;
    width: 200px;
}
And just to make it even prettier, let's add some padding and margin to the body and the search bar, and change the font:
/* app/assets/stylesheets/recipes.css */

body {
    font-family: sans-serif;
    padding: 1em;
}

.ais-SearchBox {
    margin: 1em 0;
}

.right-panel {
    margin-left: 210px;
}

.left-panel {
    float: left;
    width: 200px;
}

And tada! 🎉 You have a nice search bar with a search-as-you-type experience ready! 🥳
⚠️ Because we used fake data to seed our database, the recipes' titles, ingredients, directions, and diet type are not necessarily consistent.
Conclusion
We have learned how to synchronize our Ruby on Rails database with Meilisearch and customize our search settings directly on our Rails app, allowing us to search through our data in milliseconds. To top it all off, we have also created a faceted search interface with a search-as-you-type experience using React.
We have achieved all this seamlessly, thanks to Meilisearch Rails and Instant Meilisearch. Meilisearch has integrations for almost every popular language or framework. Take a look at the complete list in the Meilisearch integration guides.
If you have any questions, please join us on Slack; we are always happy to hear from you. For more information on Meilisearch, check out our Github repository and official documentation.


Top comments (0)