In this article, I'm going to explore graph databases/GraphQL by building a proof of concept blog powered by the recently launched Slash GraphQL - a hosted GraphQL backend.
Graphs are a fascinating way to model the information in a system where the relationships (edges) between pieces of data (nodes) are first-class entities of the system. This is a different approach to the more common relational database (RDBMS) model, where the relationships between records are implied. For example, "this user owns this post because user.id == post.user_id".
Graphs are most useful when the relationships among the data are as important as the data itself. For instance:
- Knowledge graphs
- Recommendation engines
- Supply chain management
- Social media
In general, graphs offer more descriptive queries, greater flexibility in adapting your model, and better performance when traversing relationships. _GraphQL _(which we will be working with in this article) is a data manipulation and query language that gives you the power of graph through an API.
Working with graphs can feel a little unfamiliar if you're used to working with RDBMSs, so in this article, I'll try to show you some of the basics. I'm going to build a GraphQL-powered blog. The relationships between Users, Posts, and Comments (user has many posts, post has many comments, user has many comments) highlight the power of GraphQL, as you’ll see below. As usual, I'm not trying to produce finished, production-ready code here—just simple examples to show you the underlying concepts.
You can find all the example code for this article here.
Dgraph
For this article, I'm going to use Dgraph, a native GraphQL database (as opposed to a GraphQL layer on top of a relational datastore) written in Go, and designed for large-scale application with high-availability and transaction support. If you're interested in learning more about the project, there are some good introductory videos on their YouTube Channel. Using a native GraphQL database over a GraphQL layer is usually preferred, as it offers easier data modeling, deep join speed, and solves the n+1 problem.
Rather than installing Dgraph on a server, or running it locally via docker, I'm going to use their hosted GraphQL backend service Slash GraphQL. The platform offers a free trial which will work for this article (then moves to a $9.99/mo flat fee for up to 5GB data).
Let's get started.
Creating a GraphQL Backend on Slash GraphQL
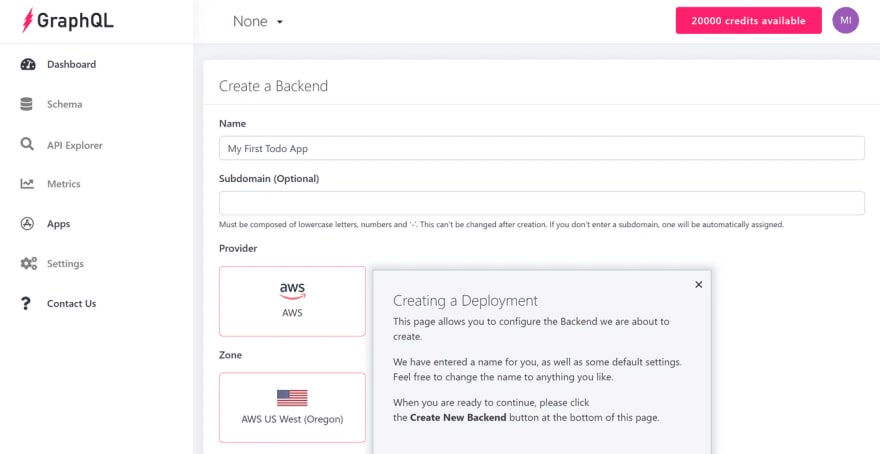
In order to use Slash GraphQL, you need to log in using your GitHub or Google account, and you'll then see the web interface with options to create and manage your backends, as well as many links to tutorials and other documentation, which I recommend exploring.
Dgraph recently released slash-graphql, a hosted GraphQL backend. With a hosted backend, you don't need to manage your own infrastructure, create and manage your own database, or create API endpoints. That's all taken care of for you, so it's a great choice for our project. Because I strongly prefer working on the command-line, I'm going to use that for this article. But you can do everything via the web interface, if you prefer.
You can install the command-line tool by running:
npm install --global slash-graphql
Create a Backend
Using slash-graphql to manage Slash GraphQL backends feels a lot like using the Heroku command-line tool to manage Heroku applications, so if you're comfortable with that, you should find this quite familiar.
To create a Slash GraphQL backend via the command-line, we first have to log in:
slash-graphql login
This will prompt you to confirm that a code on your terminal matches a code shown on the web page that the command will open. Once you have done this, you can issue commands to Slash GraphQL.
Now we can create our GraphQL backend like this:
slash-graphql create-backend blog
This will output the "endpoint" of your backend, which usually takes around 20 seconds to create. This is the URL we will use to interact with our GraphQL database. You'll be using this throughout this article, so please make a note of it.
In my case, my GraphQL endpoint is:
https://anxious-aunt.us-west-2.aws.cloud.dgraph.io/graphql
Please substitute your own endpoint wherever you see this in the code examples.
That's it. In only a few steps, you now have a full-functioning, hosted GraphQL backend.
Define a Schema
Next, we need to define a schema for our blog data. Create a new file called “schema.graphql” with the following contents:
type User {
  email: String! @id
  name: String @search(by: [exact])
  posts: [Post] @hasInverse(field: user)
}

type Post {
  id: ID!
  title: String! @search(by: [fulltext])
  body: String!
  image: String
  user: User!
  comments: [Comment] @hasInverse(field: post)
}

type Comment {
  id: ID!
  body: String!
  user: User!
  post: Post!
}
Let's break that down a little. I'm just going to cover a few highlights here. For details, please have a look at the Slash GraphQL documentation.
Starting with the last entity, we define Comment like this:
type Comment {
  id: ID!
  body: String!
  user: User!
  post: Post!
}
This means we have a node type called Comment, which has several attributes.
id: ID! tells Dgraph to generate its own uid values for this type
body is a required string value
post and user have typesPost and User, and the ! indicates that these are required fields. i.e. every comment belongs to a Post, and also belongs to a User.
The Post type has a comments attribute which is a list of Comment nodes:
comments: [Comment] @hasInverse(field: post)
Similarly, User has many posts.
Note that we're telling our backend what node types exist, and how they relate to each other, but we don't have to define how to make those relationships work—no foreign keys, no joins, and no many-to-many mapping tables.
We can apply this schema to our backend with just one command:
slash-graphql update-schema --endpoint https://anxious-aunt.us-west-2.aws.cloud.dgraph.io/graphql schema.graphql
Here is what this setup looks like in the web interface if you're using that:


Now that we have our schema, we can add some data.
Adding Data with curl
Although the slash-graphql tool has an import-data function, that's designed for restoring a backup rather than adding chunks of data.
The usual way of interacting with a GraphQL database is via HTTP requests, so that's how we're going to add our data using curl, via this script, which we will save as “post.sh”:
#!/bin/bash

FILE=$1

curl --request POST \
  --header "Content-Type: application/graphql" \
  --data "$(cat ${FILE})" \
  ${ENDPOINT}
The script uses curl to make an HTTP POST request (--request POST) to our graphql endpoint ${ENDPOINT}.
The body of the request is the contents of the file ${FILE} (--data $(cat "${FILE})"), and we pass the name of the file as an argument to the script FILE=$1.
We set the Content-Type header to application/graphql (it is also possible to send commands in JSON).
Slash GraphQL says that its queries and mutations are unrestricted by default. You could secure your backend by adding an @auth directive in your schema for Slash GraphQL. This would require you to use an API key and an Authorization header in your requests. To keep it simple here, though, we will leave our backend unrestricted.
By the way, remember to set “post.sh” to be executable with the following command:
chmod u+x post.sh
Now we can set the environment variables we need in our post.sh script:
export ENDPOINT=https://anxious-aunt.us-west-2.aws.cloud.dgraph.io/graphql
Now we can add our data.
Adding the Data
Here is the graphql we're going to send (a mutation is how you alter data), which we’ll save in a file called “addData.graphql”:
mutation {
  addPost(input: [
    {
      user: {
        name: "Burk Dronsfield",
        email: "bdronsfield0@apple.com"
      },
      title: "Scallops - 10/20",
      image: "https://picsum.photos/id/441/600/300",
      body: "Vestibulum ac est lacinia nisi venenatis tristique. Fusce congue, diam id ornare imperdiet, sapien urna pretium nisl, ut volutpat sapien arcu sed augue. Aliquam erat volutpat.\n\nIn congue. Etiam justo. Etiam pretium iaculis justo.",
      comments: [
        {
          body: "First post!",
          user: {
            email: "tgodleman1@chronoengine.com",
            name: "Tamar Godleman"
          }
        }
      ]
    }
  ])
  {
    post {
      id
      title
    }
  }
}
None of those users are real people, it's sample data from mockaroo.
Notice how we're adding two users, a blog post, and a comment, all with a single request to our backend. This is where we can start to see the power of GraphQL databases.
./post.sh addData.graphql | jq
The | jq is optional, but the response to our post will be a JSON document, and piping it through jq makes it easier to read.
Querying the Database
We can query the database in exactly the same way, via an HTTP POST. Here's a query to retrieve users and the titles of any posts they've written, which we’ll save in a file called “queryUser.graphql”:
query {
  queryUser {
    name
    email
    posts {
      title
    }
  }
}
We run this query in exactly the same way as the mutation:
./post.sh queryUser.graphql | jq
The top of the output you get should be something like this:
{
  "data": {
    "queryUser": [
      {
        "name": "Tamar Godleman",
        "posts": []
      },
      {
        "name": "Burk Dronsfield",
        "posts": [
          {
            "title": "Scallops - 10/20"
          }
        ]
      }
    ]
  },
Apollo Middleware Layer
Slash GraphQL affords us a quick and easy way to get a GraphQL backend up and running. Within minutes, we have a native Graph database and an interface for running the most common queries and mutations. By going to the API Explorer for Slash GraphQL, you can see the queries and mutations that have been pre-built and available for you. For developers looking to get started quickly, Slash GraphQL is a great option.
When you’re ready to build public-facing applications, however, you might find it helpful to build a GraphQL server as a thin middleware layer on top of Slash GraphQL. We can use Apollo Server to act as a gateway between the client and Slash GraphQL. There are many reasons why you might choose to do this. Here are a few possibilities:
- Based on the schema you provide, Slash GraphQL provides a standard set of queries and mutations. You may decide that you don’t want all of those queries available to the public, and so choose for your public-facing GraphQL API to have a narrowed-down set of queries.
- You may want your server to accommodate more complex queries or mutations, which your middleware layer then processes and maps to various requests to Slash GraphQL.
- You may want to use the queries provided by Slash GraphQL, but rename them or change the signature or defaults when making them available to your public-facing API.
- You may want your Slash GraphQL backend to be locked down with an API key, but then want your own GraphQL API to be available publicly without the need for that API Key. Your API Key can be stored on your middleware layer and always passed on to Slash GraphQL, without your client or end user ever needing to worry about it.
To accomplish this, let’s spin up a simple Apollo Server, then we can run our queries directly in Apollo Server’s built-in playground.
Create a new folder called “server-layer”. In that folder, we’ll create a new project, add a few packages, and create a new file called “index.js”:
> mkdir server-layer
> cd server-layer
> npm init --yes
> npm install --save apollo-server graphql node-fetch
> touch index.js
To configure Apollo Server, we need to provide two things. First, we need to provide a schema, which we call typeDefs. We can use a slightly modified version of the schema that we sent to Slash GraphQL, but also add a list of queries that we want our server to make available.
Second, we need to provide resolvers, which tell our server how to retrieve data in response to a query from the client. This is where the magic happens. Our resolvers will send authenticated requests to our Slash GraphQL endpoint, and then take the response result and pass that on to the client as our response.
Here are the contents for index.js, which we will go through step by step below:
const { ApolloServer, gql } = require('apollo-server')
const fetch = require('node-fetch')

const ENDPOINT = 'https://anxious-aunt.us-west-2.aws.cloud.dgraph.io/graphql'

const typeDefs = gql`
  type User {
    email: String!
    name: String
    posts: [Post]
  }


  type Post {
    id: ID!
    title: String!
    body: String!
    image: String
    user: User!
    comments: [Comment]
  }


  type Comment {
    id: ID!
    body: String!
    user: User!
    post: Post!
  }


  type Query {
    getUser(email: String!): User
    getAllUsers: [User]
    getAllPosts: [Post]
  }
`

const method = 'POST'
const headers = {
  'Content-type': 'application/graphql'
}

const argsToString = (args) => {
  if (typeof args === 'object') { let argStrings = []
      Object.keys(args).forEach((key) => {
      argStrings.push(`${key}:"${args[key]}"`)
    })
    if (argStrings.length) {
      return `${argStrings.join(', ')}`
    }
  }
  return ''
}

const sendQuery = async({ name, args, fields }) => {
  let body = `
query {
  ${name} (${argsToString(args)}) {
    ${fields}
  }
}`
  const fetchResult = await fetch(ENDPOINT, {
    method,
    headers,
    body
  })
  const result = await fetchResult.json()
  return result.data[name]

}

const resolvers = {
  Query: {
    getAllUsers: async () => sendQuery({ name: 'queryUser', fields: 'name posts { id title }' }),
    getUser: async (_parent, args) => sendQuery({ name: 'getUser', args, fields: 'name email posts { id title }' }),
    getAllPosts: async () => sendQuery({ name: 'queryPost', fields: 'id title body image user { name } comments { id body user { name } }' })
  }
}

const server = new ApolloServer({
  typeDefs,
  resolvers,
})

server.listen().then(({ url })=> {
  console.log(`Server ready at at ${url}`)
})
By the way, remember to change the ENDPOINT to match up to the endpoint you have for your Slash GraphQL account.
Let’s step through what we’ve done here.
First, we included the packages we needed (most importantly, ApolloServer) and defined a few constants.
Next, we defined our typeDefs, which is our schema along with the signature for any queries that we want our server to make available. You’ll note that the schema used here looks very similar to the one we used with Slash GraphQL. The only difference is that we have removed any of the @ directives which we used with Slash GraphQL. Those directives were specific to Slash GraphQL and Dgraph, and Apollo Server won’t know what to do with them. We still have the functionality of these directives at the Slash GraphQL level, and so we don’t lose anything by not including them here.
In our typeDefs, you’ll also see the queries that we will be accepting:
  type Query {
    getUser(email: String!): User
    getAllUsers: [User]
    getAllPosts: [Post]
  }
You should notice a few things here. First of all, while Slash GraphQL gives us queries like getComment or queryPost (again, reference the API Explorer at Slash GraphQL), perhaps we’ve decided that we don’t want our public-facing API to allow those queries. We only want to allow the above two queries.
Also, you’ll notice that we have a query called getAllUsers—we’re going to map this through our resolver to Slash GraphQL’s queryUser query. Perhaps we’re required, because of an existing API spec, to use the name getAllUsers for this query. Building this middleware layer allows us to do this kind of renaming. We do the same for getAllPosts.
Before we get to resolvers, we have a few convenience methods that we’ve written to make our job easier. Ultimately, our resolvers will send an HTTP request to our Slash GraphQL endpoint, and then respond with the result that we get from Slash GraphQL. The next few methods help us to do that.
sendQuery uses node-fetch to send an HTTP request to the Slash GraphQL ENDPOINT. This will look quite similar to the curl calls that we made above. We set our method to be POST, and we set our headers properly.
Then, we do some string concatenation work (in argsToString and sendQuery) to piece together the body of our fetch request to Slash GraphQL. We take in the request as Apollo Server receives it, then we build the proper request body.
Now, let’s take a look at our resolvers. The resolvers we write should match up with the queries we defined in typeDefs. Our Apollo Server accommodates a getUser query which resolves by sending a very similar query on to Slash GraphQL. Meanwhile, our getAllUsers query resolves by sending the equivalent queryUser query on to Slash GraphQL, and getAllPosts behaves similarly. By the way, you may have noticed that we also restrict which fields can be returned. In getAllUsers and getAllPosts, for example, we query for name, but not email. While Slash GraphQL may allow for us to query for an email, we’ve decided that our public facing GraphQL API will not allow users to retrieve emails when getting a list of users. As an alternative, we could also have modified our typeDefs for the Apollo GraphQL Server such that the type User definition doesn’t include email. Though our Slash GraqhQL backend includes an email, we can decide, for all intents and purposes, that the public facing Apollo GraphQL Server should not.
To see this in action, we can start up our server and then open our browser to view Apollo Server’s built-in playground:
> node index.js
Server ready at http://localhost:4000/...
Open up your browser and go to http://localhost:4000.

Let’s perform a getUser query to look for the user with the email bdronsfield0@apple.com:

And here’s the result we get:

Our thin middleware is up and running! Now, with Apollo Server acting as a proxy between our client and Slash GraphQL, we can build in some extra control and fine-tune what queries are available, and how we want those queries structured.
Viewing Our Blog in a Web Client
Lastly, what good would a server that serves up blog posts be, if we didn’t have a front end client to display those posts? Just to demonstrate this end-to-end, we’ll spin up a small Vue.js web client to display our blog post.
This github repository contains a very simple Vue.js client. To run it, just do the following:
> git clone https://github.com/alvinslee/slash-graphql-blog.git
> cd slash-graphql-blog/vue-client
> npm install
> npm run serve
Then, open your browser to http://localhost:8080/. To keep it simple, our Vue.js client is just one page with a PostList component. This component populates itself by making the getAllPosts query request to our local Apollo GraphQL Server (at http://localhost:4000 - make sure it’s also running!).
We can take a quick peek at what’s happening under the hood of our PostList component, by opening up src/components/PostList.vue. In particular, let’s look at the fetchData method:
fetchData: async function () {
  const body = {
    query: 'query { getAllPosts { id title body image user { name } comments { id body user { name } } } }'
  }
  const sendFetch = await fetch('http://localhost:4000', {
    method: 'POST',
    headers: {
      'Content-Type': 'application/json'
    },
    body: JSON.stringify(body)
  })
  this.posts = (await sendFetch.json()).data.getAllPosts
}
This method crafts a GraphQL query and sends it as a POST request to our Apollo Server at http://localhost:4000. The data in the response that comes back is what the component uses to populate the page, which looks like this:

Nice!
Now, you might be wondering: Why did we bother with the Apollo GraphQL Server? Couldn’t I have set up my client to query the Slash GraphQL endpoint directly? The answer is: Yes, you could have, but:
- If you had set up Slash GraphQL only to be accessible by a client API Key, then you would need to make that key available here in your client, so that it could make requests of Slash GraphQL. For security reasons, you might not want to do that. It’s safer to keep that key hidden within the Apollo GraphQL server.
- If someone were to poke around in the client code, they can see the endpoint and the query that is being sent. With that information, they could try out some queries of their own. Perhaps a malicious user would try to access a blog post author’s
emailfield, when you don’t want that data to be publicly accessible. By having Apollo GraphQL server act as a gateway, you’re able to restrict what can go in and out of Slash GraphQL.
Conclusion
We've talked briefly about the difference between a graph database and a traditional RDBMS, and we've gone through the process of setting up a hosted GraphQL backend with Slash GraphQL, creating a schema, and using mutations and queries to manipulate your data. We built a thin Apollo GraphQL Server layer to act as a gateway between our end-user and Slash GraphQL, in order to restrict what kinds of queries can go through. Finally, we put together a very basic web interface as a proof of concept for a GraphQL-powered blog.
I've barely scratched the surface of what you can do with Slash GraphQL and a GraphQL database in this article, but I hope it inspires you to dive in and learn more.


Top comments (0)