WordPress themes are a great because you can set up an elegant website, within minutes, almost effortlessly. Because it abstracts away most of the styling and all of the backend work, WordPress is the go-to solution to put up a website. If you are just getting started in the web development world, this guide is for you.
Step 1 - Set up your AWS account
AWS offers a free tier to get free hands-on experience with its services, for new sign-ups. The free tier is sufficient for this guide.
Step 2 - Follow this AWS Tutorial to set up a WordPress website.
This tutorial is well written to guide newcomers. Yet, if it is still confusing (which is okay), leave a comment to get some help. The above guide is only meant for those who want to deploy a mostly static, simple, experimental blog. It is not meant for production level solutions.
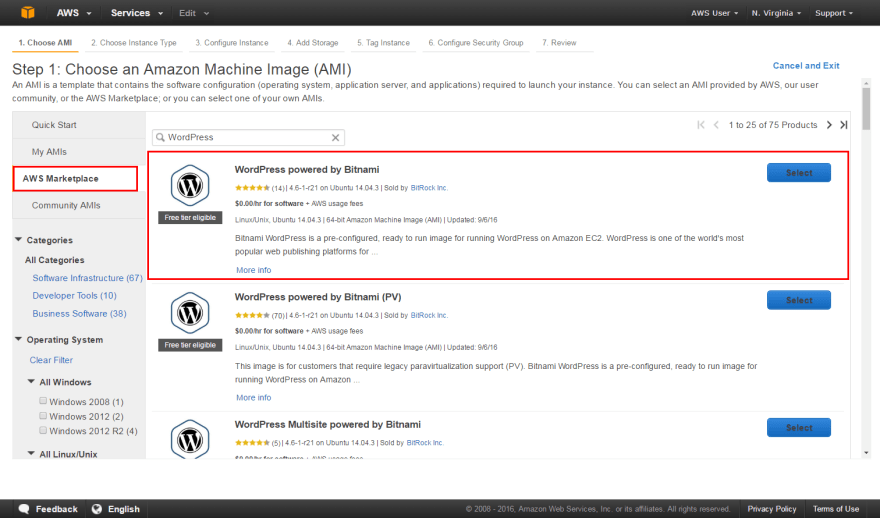
AWS EC2 is a virtual server in the cloud, and an Amazon Machine Image (AMI) provides the configuration information to this server so it can host your Wordpress website. When you select "Wordpress powered by Bitnami" and click next you get that done in ONE click. Ability to launch one-click solutions is one of the many benefits of modern cloud computing.
Step 3 (Optional) - Configure your EC2 instance's security configurations
If you can access your EC2 instance's public IP on your browser, you can ignore this step.
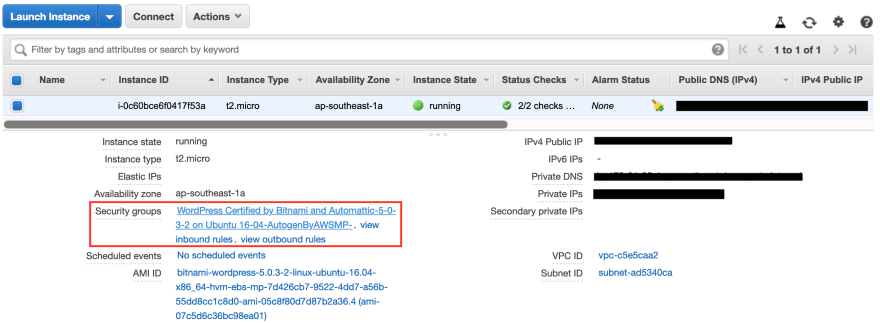
Security configurations are usually created automatically when you set up your EC2 instance, to protect your virtual server from external attacks. Check your security configurations by selecting your instance and then viewing its associated security group, under the "Description" tab. You should see something like the image below. Then go to your instance's security group, by clicking on it.
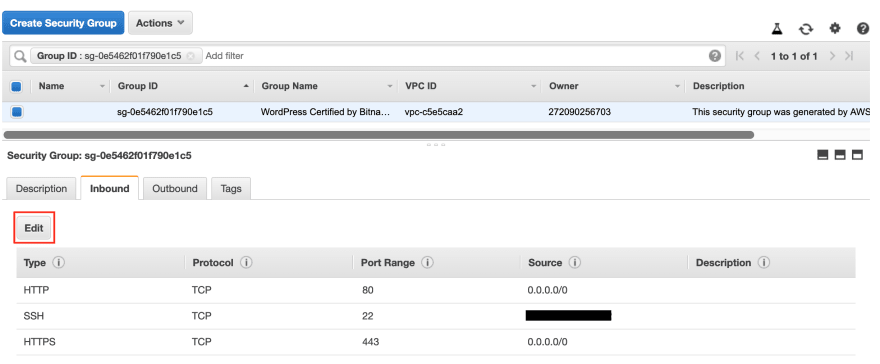
If you successfully created your instance but can't access it using your browser, then maybe you haven't allowed any incoming connections to your instance. Edit your security group's inbound rules to allow incoming traffic. These rules describe the type and source of incoming web traffic that is allowed by your instance. The image below shows my rules.
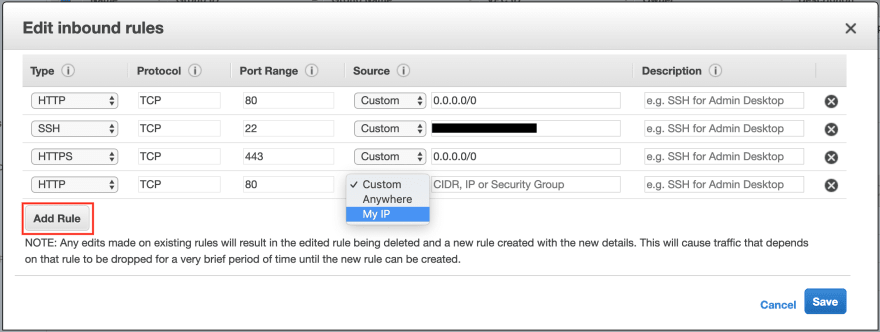
I allow HTTP and HTTPS traffic from all IP addresses because I'm hosting a website, but I only allow SSH traffic (SSH is used to remotely connect to my server) from my IP. Configuring security rules, is easy and intuitive on AWS Console.
If you do not have inbound rules that allow HTTP or HTTPS traffic then you cannot view your site using a browser (nor can anyone else). So go ahead and add a rule, choose HTTP/HTTPS for type, and for source, add either your ip address or leave it blank to allow all incoming connections. If you're interested in learning more about security groups in AWS, the official documentation is a good place to start.
Now go check if you can visit your instance's public IP using a browser. There you go, you just used AWS to deploy a Wordpress Website.
Let me know what you thought about this article in the comments. I want to improve my writing and help others learn to love tech, the way I did.


Top comments (0)