
This is the second part of the article, to go to the first one just click here
Welcome back to everyone, in this second part as I said at the end of the last article we will download Docker and the SonarQube image, so let's go.
We should start going to Docker Desktop and the website will show something like:

In my case the downloaded version will be the mac with an apple chip (arm architecture) because I'm using the m1 processor, if you're using a different O.S is just change go to Docker for windows or Docker for linux and proceed with the installation in mac after download just move the docker app to Applications folder like the image below:

When the installation process is done you have to open the docker application and probably should see something like:

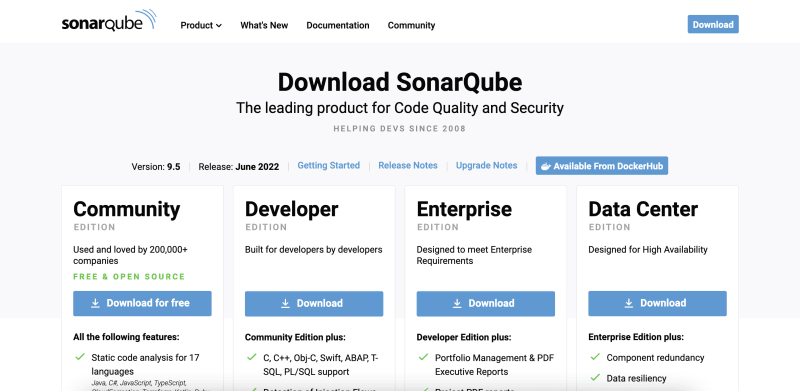
Now we have a Flutter project created and the Docker downloaded, the next step is to download the SonarQube software, in this tutorial will be used the image to containerize, and for that, we have to open the SonarQube Download page, with that open you will see:
Now to download the image to use with docker just click on the Available From DockerHub button to move to the next page, when the load is finished move down a little bit until seeing something like the image below:
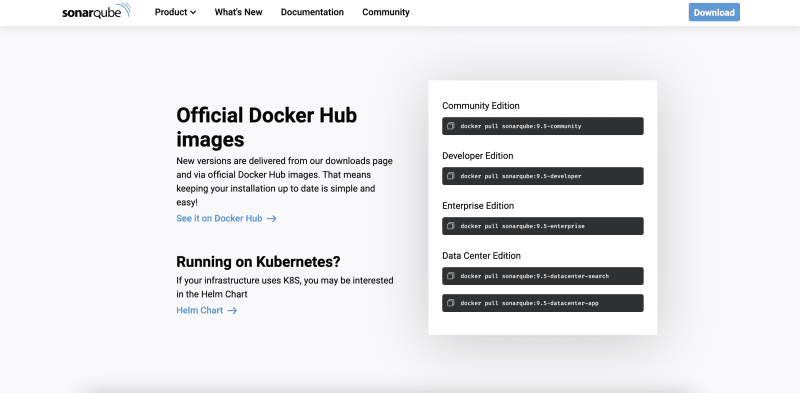
When reached this part I have some notes to give, first of all, we will use the community edition because is open source and is enough for this tutorial proposal, the second point, users with a processors like Intel and AMD just need to type docker pull sonarqube:9.5-community and download the official version, for users like me who use an ARM processor there is not an official version and for that, we have some trusted options to keep moving this tutorial, just type docker pull mwizner/sonarqube, with that you should be able to download an image of version 9.4 who was made to this specific processor type.
With the image downloaded, we go back to Docker and in the Images option we can see that like:
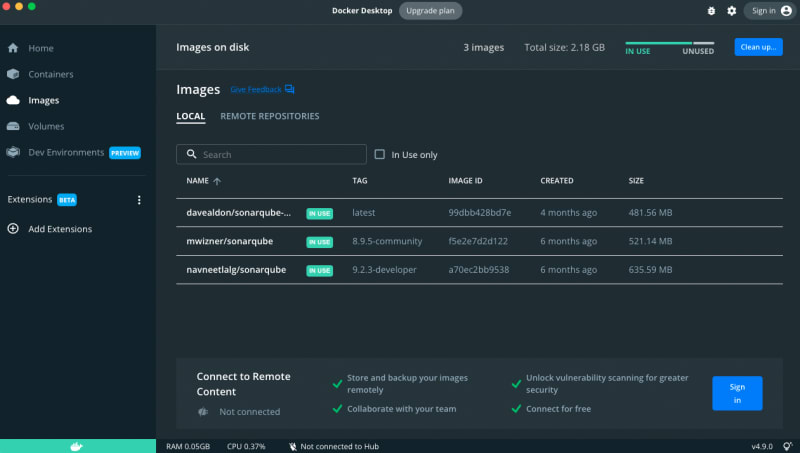
We can also check type in terminal docker images, and see something like:
REPOSITORY                                    TAG               IMAGE ID       CREATED        SIZE
mwizner/sonarqube                             8.9.5-community   f5e2e7d2d122   5 months ago   521MB
Probably you will see just one image, and that's the option you chose, right now we should create a container with this image, and for that, we need to type in terminal:
docker create --name sonarqubeapp -p 9000:9000 f5e2e7d2d122
Where in parameter --name we can give a name for our container in -p we pass the 9000 port and finally, we should pass the image id, in that case, f5e2e7d2d122, after running this command we can move to container option in Docker Desktop and see something like this image:

In this option you will notice that now we have a container created with the SonarQube image, now just run the container to start the software, for that we can just click the start button in the container created or just type docker start sonarqubeapp in the terminal, where sonarquebeapp should be the name of the container.
While the container is opening you can open your browser and type http://localhost:9000/, after starting you will be able to see the login page:

By default to log in for the first time, just type admin in the login and password fields, you will be redirected to the home page and will see that:

At that point I have to give a note, Dart and Flutter are not supported officially by SonarQube yet, so for that reason, we need to download a plug-in that will do the work we need, to do that we have to open this repository and go to releases page to download the last version, until this article date the version is 0.4.0. after downloading the .jar we move to the download folder in terminal type:
docker cp sonar-flutter-plugin-0.4.0.jar sonarqubeapp:/opt/sonarqube/extensions/plugins
With this command we copy the .jar file to our container, after that we need to restart to see the changes, just type docker restart sonarqubeapp and wait for it.
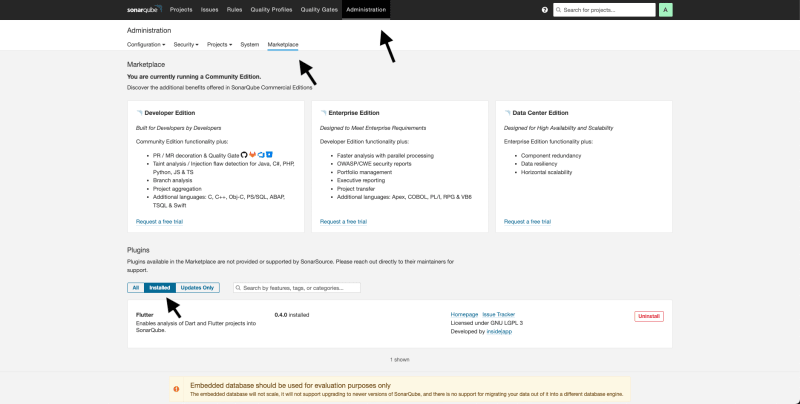
Log in again and to check if the plug-in was correctly installed click on the administration tab, later click on the Marketplace tab inside the admin options, and finally in Plugins click on Installed to see the page like:
With all that set up we now have to download the last thing (i promise this will be the last 😅), this will be the scanner to show our reports locally, to do that go to Sonar Scanner Download, after download unzip the file in any folder you want, I recommended to do that in your home folder.
Now you will have to add the path in your .bash_profile or .zshrc (or in environment variables in windows), it depends on what kind of terminal you use, type: export PATH="$HOME/sonar-scanner-4.7.0.2747-macosx/bin:$PATH".
To finish now we have to set up our flutter project to export the reports to Sonar, to start the configuration we open our project and then create a file on root called sonar-project.properties, and inside that you should put:
# Project identification, either hardcode it or use Environment variables
sonar.projectKey=my-project-key
sonar.projectName=Project Name
sonar.login=my-long-token

# The host URL
sonar.host.url=http://localhost:9000

# Source code location.
# Path is relative to the sonar-project.properties file. Defaults to .
# Use commas to specify more than one folder.
sonar.sources=lib
sonar.tests=test

# Encoding of the source code. Default is default system encoding.
sonar.sourceEncoding=UTF-8

# exclude generated files
sonar.exclusions=test/**/*_test.mocks.dart,lib/**/*.g.dart
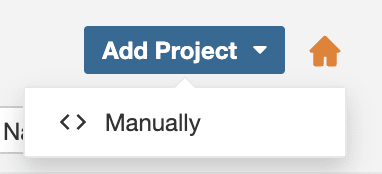
With this file created, go back to the SonarQube home page, and let's create a project manually, to do that just click on Button Add Project and the click the Manually option:
Next, we give a project key and a display name to the project and click on the setup button, next page the Sonar will ask you to generate a token, so create a name for your token and click in generate, this will show you a token, you need to copy and go back to sonar-project.properties file and fill the projectKey, projectName and token with what was provided.
With this file created and configured, we run some commands to store the tests and report to Sonar:
flutter test --machine --coverage > tests.output
sonar-scanner
When finishing this, you can refresh your SonarQube page to see the app insights:

In your homepage will have a banner and when you click on then you can see more feedback about your project like the image below:

With all this configured you will be able to get all the information needed to improve your code, with this part finished, hope you enjoy it, and feel free to comment.
Bonus: I will make a new article to level up this integration using pipelines in the remote repository and ngrok, as soon as I post I will put the link here, for now, that's all, thanks for everyone.


Oldest comments (0)