
Please refer to my previous posts regarding creating your cloud service like digital ocean or google cloud. Part 1 and Part-2 and Part-3 . Also most important listening your VMs on external IPs here -4
In Part-3 we have also seen how to install opennebula. Opennebula is an alternative to openstack/ cloudstack.
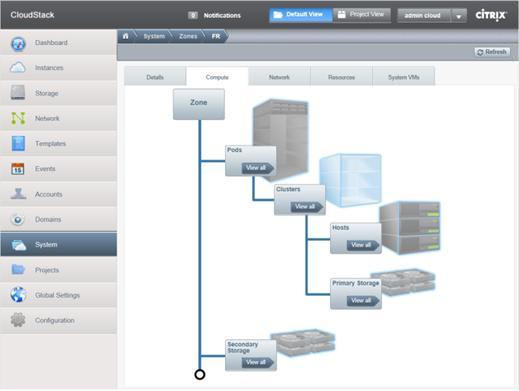
what is Cloud Stack?
Apache CloudStack is open source software designed to deploy and manage large networks of virtual machines, as a highly available, highly scalable Infrastructure as a Service (IaaS) cloud computing platform. CloudStack is used by a number of service providers to offer public cloud services, and by many companies to provide an on-premises (private) cloud offering, or as part of a hybrid cloud solution.
Easy Installation
This is a build your own IaaS cloud guide on setting up a Apache CloudStack based cloud on a single Ubuntu 18.04 (LTS) host that is also used as a KVM host.
Please refer to my previous post for different types of hypervisors and how to find they are enabled.
sudo apt-get install software-properties-common
sudo add-apt-repository universe
1-
ENSURE :Ensure that the universe repository is enabled in /etc/apt/sources.list.
Universe is enabled by default so you usually don't need to do this. You could edit the sources file from the terminal:
sudoedit /etc/apt/sources.list
And then uncomment the universe sections of the following lines
#deb http://us.archive.ubuntu.com/ubuntu/ precise universe
#deb http://us.archive.ubuntu.com/ubuntu/ precise-updates universe
2:
apt-get install openntpd openssh-server sudo vim htop tar -y
3:
apt-get install intel-microcode
3.1
apt-get install bridge-utils
4:
netplan generate
netplan apply
5.
sudo apt-get install libmysql-java
6.
apt-key adv --keyserver keys.gnupg.net --recv-keys BDF0E176584DF93F

echo deb http://packages.shapeblue.com/cloudstack/upstream/debian/4.11 / > /etc/apt/sources.list.d/cloudstack.list
apt-get update -y
apt-get install cloudstack-management cloudstack-usage mysql-server -y
7.
systemctl restart mysql
https://vitux.com/how-to-install-and-configure-mysql-in-ubuntu-18-04-lts/
8. cloudstack-setup-databases cloud:
`cloud@localhost --deploy-as=root:manishfoodtechs@gmail.com -i '
9.
apt-get install nfs-kernel-server quota
10.
echo "/export  *(rw,async,no_root_squash,no_subtree_check)" > /etc/exports

mkdir -p /export/primary /export/secondary

exportfs -a
11.
sed -i -e 's/^RPCMOUNTDOPTS="--manage-gids"$/RPCMOUNTDOPTS="-p 892 --manage-gids"/g' /etc/default/nfs-kernel-server

sed -i -e 's/^STATDOPTS=$/STATDOPTS="--port 662 --outgoing-port 2020"/g' /etc/default/nfs-common

echo "NEED_STATD=yes" >> /etc/default/nfs-common

sed -i -e 's/^RPCRQUOTADOPTS=$/RPCRQUOTADOPTS="-p 875"/g' /etc/default/quota

service nfs-kernel-server restart
12. TYPE THIS COMMAND TOGETHER:
wget http://packages.shapeblue.com/systemvmtemplate/4.11/systemvmtemplate-4.11.3-kvm.qcow2.bz2

/usr/share/cloudstack-common/scripts/storage/secondary/cloud-install-sys-tmplt \

          -m /export/secondary -f systemvmtemplate-4.11.3-kvm.qcow2.bz2 -h kvm \

          -o localhost -r cloud -d cloud
13.
apt-get install qemu-kvm cloudstack-agent -yes
14.
sed -i -e 's/\#vnc_listen.*$/vnc_listen = "0.0.0.0"/g' /etc/libvirt/qemu.conf
15.
sed -i -e 's/.*libvirtd_opts.*/libvirtd_opts="-l"/' /etc/default/libvirtd
16.
echo 'listen_tls=0' >> /etc/libvirt/libvirtd.conf

echo 'listen_tcp=1' >> /etc/libvirt/libvirtd.conf

echo 'tcp_port = "16509"' >> /etc/libvirt/libvirtd.conf

echo 'mdns_adv = 0' >> /etc/libvirt/libvirtd.conf

echo 'auth_tcp = "none"' >> /etc/libvirt/libvirtd.conf

systemctl restart libvirtd
17.
apt-get install uuid -y
18.
UUID=$(uuid)

echo host_uuid = \"$UUID\" >> /etc/libvirt/libvirtd.conf

systemctl restart libvirt
18.1
iptables -A INPUT -s 213.136.92.0/24 -m state --state NEW -p udp --dport 111 -j ACCEPT
iptables -A INPUT -s 213.136.92.0/24 -m state --state NEW -p tcp --dport 111 -j ACCEPT
iptables -A INPUT -s 213.136.92.0/24 -m state --state NEW -p tcp --dport 2049 -j ACCEPT
iptables -A INPUT -s 213.136.92.0/24 -m state --state NEW -p tcp --dport 32803 -j ACCEPT
iptables -A INPUT -s 213.136.92.0/24 -m state --state NEW -p udp --dport 32769 -j ACCEPT
iptables -A INPUT -s 213.136.92.0/24 -m state --state NEW -p tcp --dport 892 -j ACCEPT
iptables -A INPUT -s 213.136.92.0/24 -m state --state NEW -p tcp --dport 875 -j ACCEPT
iptables -A INPUT -s 213.136.92.0/24 -m state --state NEW -p tcp --dport 662 -j ACCEPT
iptables -A INPUT -s 213.136.92.0/24 -m state --state NEW -p tcp --dport 8250 -j ACCEPT
iptables -A INPUT -s 213.136.92.0/24 -m state --state NEW -p tcp --dport 8080 -j ACCEPT
iptables -A INPUT -s 213.136.92.0/24 -m state --state NEW -p tcp --dport 9090 -j ACCEPT
iptables -A INPUT -s 213.136.92.0/24 -m state --state NEW -p tcp --dport 16514 -j ACCEPT
18.1
apt-get install iptables-persistent-y
19.
ln -s /etc/apparmor.d/usr.sbin.libvirtd /etc/apparmor.d/disable/

ln -s /etc/apparmor.d/usr.lib.libvirt.virt-aa-helper /etc/apparmor.d/disable/

apparmor_parser -R /etc/apparmor.d/usr.sbin.libvirtd

apparmor_parser -R /etc/apparmor.d/usr.lib.libvirt.virt-aa-helper
20.
ufw enable -y
21.
ufw allow mysql

ufw allow proto tcp from any to any port 22

ufw allow proto tcp from any to any port 1798

ufw allow proto tcp from any to any port 16509

ufw allow proto tcp from any to any port 16514

ufw allow proto tcp from any to any port 5900:6100

ufw allow proto tcp from any to any port 49152:49216
22.
cloudstack-setup-management
23. Check your cloud logs:
systemctl status cloudstack-management

tail -f /var/log/cloudstack/management/management-server.log
ctrl+c to stop the logs
24.
After management server is UP, proceed to http://192.168.1.10(cloudbr0-IP):8080/client and log in using the default credentials - username admin and password password.
25.
If you have public IP then you can use IP tables to listen http://192.168.1.10:8080 on your http://PiblicIP:Port as detailed in my previous post here
26
Listen Rasputin. Enjoy Rasputin, as I am while writing this post. :)
I hope you people like the above article and learned something.
You are most welcome to join my team form for joining .
Contact email: Manishfoodtechs@gmail.com.
If you have any problem, our team is also engaged in professional consultancy and delivery.
Don't forget to Follow, like or tag me :).


Top comments (0)