In this tutorial, you'll learn how to set up AWS EKSCLI to create a Kubernetes cluster so that you can focus on your code instead of managing your infrastructure.
Requirements
If you don't have an AWS account, you can use a free Tier account.
Creating an admin user
Create an admin user before creating a Kubernetes cluster. If you have an admin user, you can sign in to the AWS console to set up your cluster.
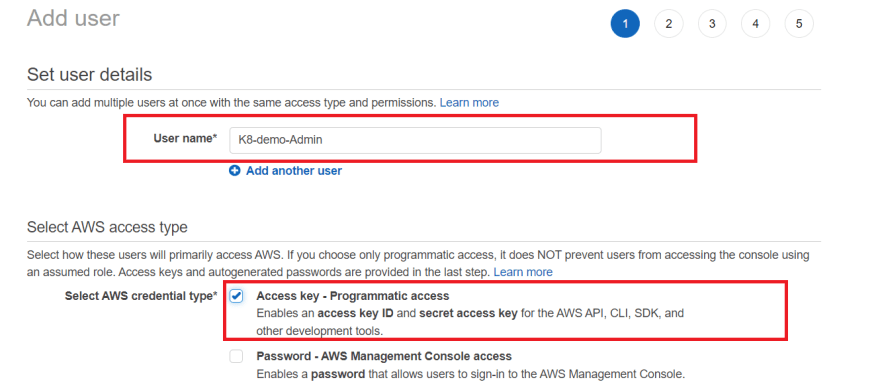
- Sign in to the AWS console and go to your IAM dashboard. Click Users —> Add User to initialize the addition of users, as shown below.

- Then enter your user name in the Username field. K8-demo-Admin is used here. Select the
Access Key-Programmatic Accessoption and click Next: Permissions.
Select the Access Key-Programmatic Access option because it is accessible programmatically. As a result, you can use your application to communicate directly with AWS about the actions you want to perform.
- Click the
Attach existing policydirectly option, review the AdministratorAccess policy, and click Next: Tag.
The AdministratorAccess policy allows the user (K8-demo-Admin) full access to AWS, etc.
- Makes CloudFormation available to users.
- Create EC2 instances and CloudWatch logs
- Configure ElasticLoadBalancer.

- Click Next: Review to skip adding tags.
- Finally, review the user details and click Create User to finish creating the admin user.

When you have finished creating the admin user, you will see a success message at the top of the screen that looks like this. Make a note of the access key ID and secret access key, as you will use these keys to log in later.

Launching an EC2 instance
Now that you've created your K8 administrator, you're ready to create your first EC2 instance. Use this instance as a master node to execute commands to create a cluster.
- Go to the EC2 dashboard, click EC2, and click
Launch Instancesat the far right of the page. This will redirect your browser to a page where you can select an Amazon Machine Image (AMI).

- Then click Select the Amazon Linux 2 AMI (HVM) from the list, as shown below.

Amazon Linux 2 AMI (HVM) provides Linux kernel 5.10 optimized for optimal performance of the latest hardware generation. This AMI also has many features needed for a production-level Kubernetes cluster.
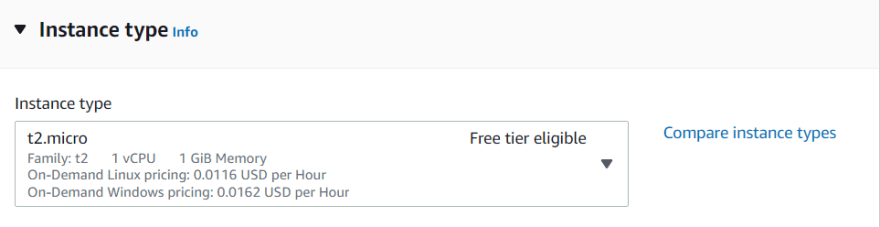
- Keep the default value for the instance type (t2.micro).
- Configure the key pair as follows:
Select RSA as the key pair type. Please enter the desired key pair name. However, in this tutorial, the key pair name is set to demo-keypair.

Click Create Key Pair,
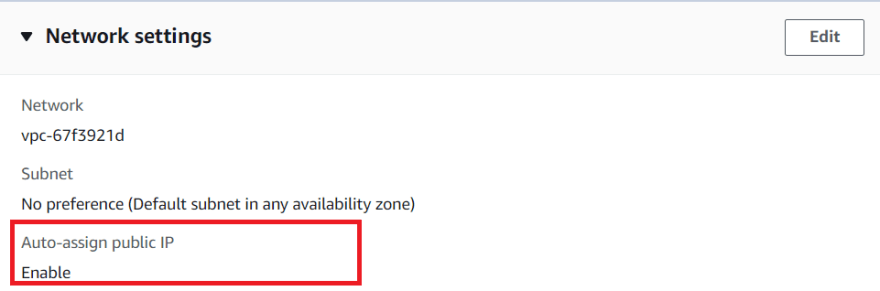
- Enable the Automatically assign public IP. This option gives each container access to the public IP of the Kubernetes masternode and EC2 instance.
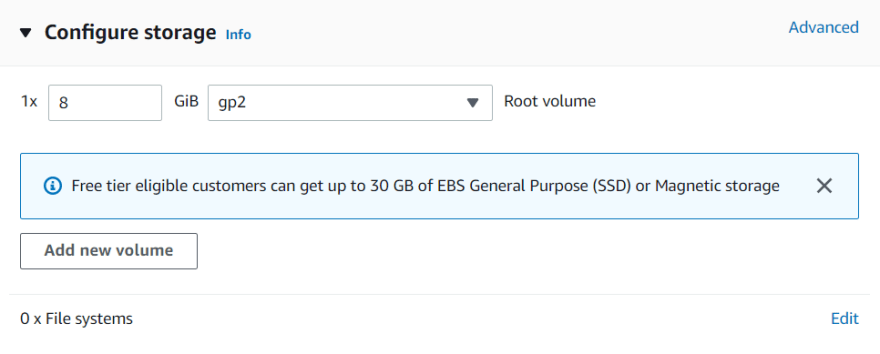
- On the Storage settings, keep the default settings (root). You need a root volume to read and write data within your instance.
- Keep the default security group values as shown below and click Review and Launch.

- Review the details of launching the instance and click Start to launch the instance. It may take a minute or two for the instance to fully launch. When the instance is run, it will appear in the EC2 dashboard as shown below.

Set up AWS CLI tools
Now that the instance has run, configure the command line tools. Using CLI tools in combination with your AWS account is essential to creating a Kubernetes cluster.
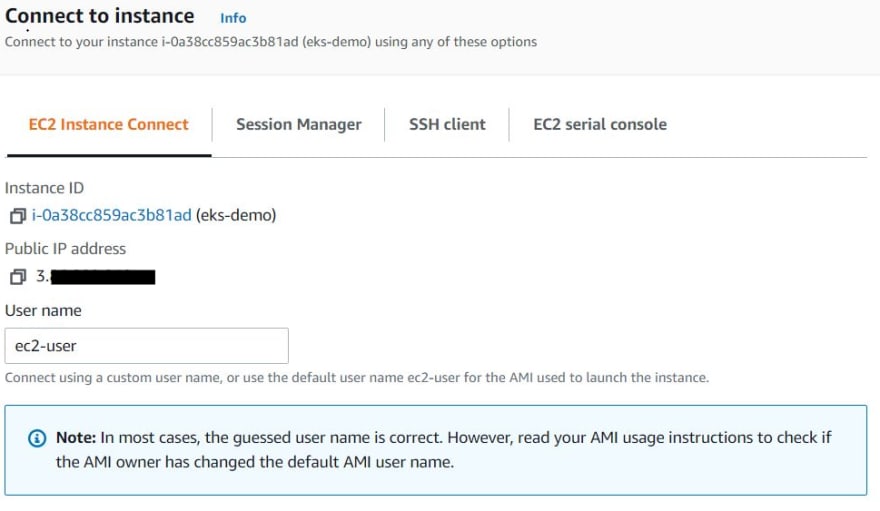
- From the EC2 dashboard, select the check box and select an instance as shown below. Click
Connectto initialize the connection to your instance.

- Then click the Connect button to connect to the instance you selected earlier. When you connect to your EC2 instance, your browser will be redirected to the interactive terminal shown below as a
temporary SSH sessionwith your EC2 instance.
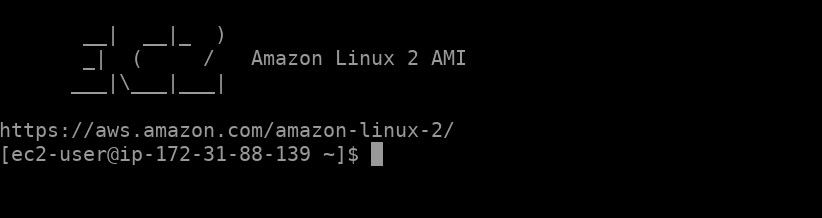
You can use an interactive terminal to connect to the command line and run management commands on the new instance.
- Run the following aws command to check the CLI version.
aws --version
As you can see from the following output, I'm running version 1.18.147 on an Amazon Linux 2 instance, which is out of date.
![]()
You must download and install AWS CLI version 2+ to be able to access all Kubernetes features.
- Then run the following curl command to download the CLI tool v2 + and save it in a zip file named awscliv2.zip.
curl "https://awscli.amazonaws.com/awscli-exe-linux-x86_64.zip" -o "awscliv2.zip"

- Run the following command to unzip the downloaded file and verify the location where the legacy AWS CLI is installed.
unzip awscliv2.zip
As you can see from the following output, the legacy AWS CLI is installed in /usr/bin/aws.

You need to update this path with the updated version.
- Run the following command to update the AWS CLI installation path for your instance:
sudo ./aws/install --bin-dir /usr/bin --install-dir /usr/bin/aws-cli --update
- Install the updated AWS CLI tools on your Amazon Linux2 instance (sudo ./aws/install).
- Set the directory where you want to install the CLI tools (--install-dir /usr/bin/aws-cli).
- This allows you to push the updated AWS CLI to other instances without having to reinstall the CLI tools.
- If your environment has a new AWS CLI toolpath, use it to update (--update) your current shell environment.

- Run the following aws --version command again to verify that the updated AWS CLI is installed correctly. The version of the AWS CLI installed is 2.7.14, as shown below.
aws --version

At the time of writing, the latest AWS CLI version is 2.7.14.
Next, run the aws configure command to configure your instance using the new AWS CLI tool.
aws configure
Enter the appropriate values for the prompts, as described below.
- AWS Access Key ID [None] - Enter the access key ID you noted in the previous section "Creating an admin user".
- AWS Secret Access Key [None] - Enter the secret access key you wrote down in the previous section, Creating an Admin User.
- Default Region Name [None] - Select a supported region. Example: us-east-1.
-
Default output format [None] - Enter
jsonbecause the JSON format is the recommended standard for use with Kubernetes.

Install kubectl binaries using curl on Linux
- Download the latest version using the following command:
curl -LO "https://dl.k8s.io/release/$(curl -L -s https://dl.k8s.io/release/stable.txt)/bin/linux/amd64/kubectl"

- Install the kubectl
sudo install -o root -g root -m 0755 kubectl /usr/local/bin/kubectl
- Test to make sure you have the latest installed version:
kubectl version --client
Amazon EKS command line tool settings
Since our goal is to create a Kubernetes cluster using the AWS EKS CLI, you also configure the Amazon EKS (eksctl) command-line tool. This tool allows you to create and manage Kubernetes clusters on Amazon EKS.
- Run the following curl command to get the latest eksctl version from GitHub as a .tar.gz file in the /tmp directory and extract the contents of the archive into the /tmp directory. Run the following command to run:
curl --silent --location "https://github.com/weaveworks/eksctl/releases/latest/download/eksctl_$(uname -s)_amd64.tar.gz" | tar xz -C /tmp
sudo mv /tmp/eksctl /usr/bin
- Get the latest eksctl version from GitHub (--location) as a .tar.gz archive ("(uname -s) _amd64.tar.gz").
- Extract the contents of the archive to the /tmp directory (tar xz -C /tmp) while suppressing the command progress output using the --silent flag.
- Move the eksctl binaries (/tmp/eksctl) to the path where you installed the AWS CLI (/usr/bin) (sudo mv).
- Finally, run the following command to verify that eksctl was successfully installed. The following output confirms that eksctl was successfully installed.
eksctl version

EKS cluster provisioning
Once you configure eksctl, you can use the eksctl command to deploy your first EKS cluster.
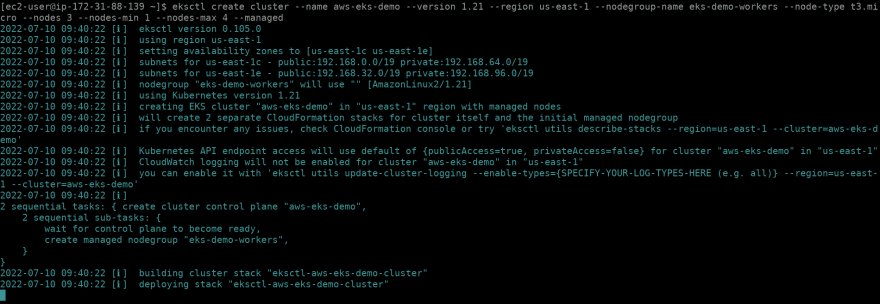
- Run the following eksctl command to create and run the first cluster. Create a 3-node Kubernetes cluster named
aws-eks-demowith a node type of t3.micro and a region of us-east-1.
eksctl create cluster --name aws-eks-demo --version 1.21 --region us-east-1 --nodegroup-name eks-demo-workers --node-type t3.micro --nodes 3 --nodes-min 1 --nodes-max 4 --managed
Define a minimum of one node (--nodes-min 1) and a maximum of four nodes (--nodes-max 4) for this EKS managed node group. The name of the node group is eks-demo-workers. Create a node group named eks-demo-workers and select the machine type for the eks-demo-workers node group.
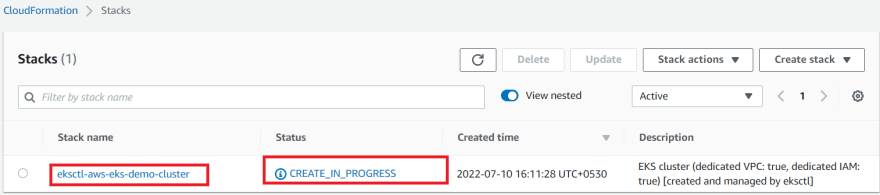
- Go to the CloudFormation dashboard to see the actions taken by the command. The eksctl create cluster command uses CloudFormation to provision the infrastructure for your AWS account.
A eksctl-aws-eks-demo-cluster CloudFormation stack is created as shown below. This process can take 15 minutes or more.
- Now when you go to the EKS dashboard, you'll see a cluster called aws-eks-demo provisioned.

- Go to the EC2 dashboard and you'll see that there are 4 nodes running. Three worker nodes and one master node.

- Finally, run the following command to update the kubectl configuration (update-kubeconfig) with the cluster endpoint, certificate, and credentials.
aws eks update-kubeconfig --name aws-eks-demo --region us-east-1

Deploy the application to the EKS cluster
In this demo, we will deploy an NGINX application to take advantage of an EKS cluster.
- Run the following yum command to install Git, automatically accepting all prompts (-y) during the installation.
sudo yum install -y git

- Then run the following git clone command to clone the configuration file from GitHub repository to your current directory.
git clone https://github.com/MakendranG/aws-eks-cli.git

Use these files to create an NGINX deployment in your pod and create a load balancer (ELB).
- Run the following command to change the directory aws-eks-cli and create a NGINX (./nginx-svc-demo.yaml) service.
# Change directory to aws-eks-cli
cd aws-eks-cli
# Apply the configuration in ./nginx-svc-demo.yaml to a pod
kubectl apply -f ./nginx-svc-demo.yaml

- Next, run the kubectl get service to check the status of the NGINX service.
kubectl get service
The service type is load balancer, as shown below, and Kubernetes created a service that represents an NGINX deployment.

You can also display the external DNS host name of the load balancer created by EKS in the External IP column. Make a note of the load balancer's external DNS host name, as you will need it later to test the load balancer.
- Run the following kubectl command to deploy the NGINX pod.
kubectl apply -f ./nginx-deployment-demo.yaml
![]()
- Check the status of your NGINX deployment and NGINX pod by running the following kubectl get command.
kubectl get deployment
kubectl get pod
As you can see in the output below, the deployment has three pods, all running.

- Next, run the kubectl get node command to check the status of the worker node.
kubectl get node

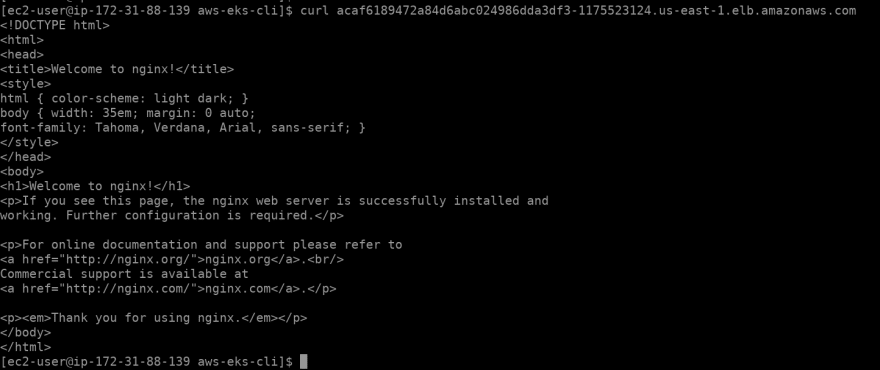
- Next, run the following curl command to test the load balancer. Replace with the DNS name you wrote down earlier.
curl "<LOAD_BALANCER_DNSNAME>"
The NGINX welcome page for the NGINX service built by EKS is displayed, as shown below. The following output confirms that the load balancer is working properly and that you can access the NGINX pod.
- Finally, copy the load balancer's DNS name and paste it into a new browser tab for double checking.
From NGINX, you will also see a welcome page indicating that your application is working.
In this tutorial, you learned how to create an EKS cluster, deploy NGINX services from a container. At this point, you should have a good understanding of how to create an EKS cluster in your AWS environment.
Gratitude for perusing my article till end. I hope you realized something unique today. If you enjoyed this article then please share to your buddies and if you have suggestions or thoughts to share with me then please write in the comment box.
The above blog is submitted as part of 'Devtron Blogathon 2022' - https://devtron.ai/
Check out Devtron's GitHub repo - https://github.com/devtron-labs/devtron/ and give a ⭐ to show your love & support.
Follow Devtron on LinkedIn - https://www.linkedin.com/company/devtron-labs/ and Twitter - https://twitter.com/DevtronL/, to keep yourself updated on this Open Source project.


Oldest comments (2)
Nice article. To deploy an EKS cluster in a straightforward way you might consider using Qovery and the Terraform provider.
Disclaimer: I am working at Qovery
Thanks @rophilogene for suggestions. Will check it out.