
Flask is a micro web framework written in Python meant for easy and quick development of web apps. It can be used to create small web apps and is easy to use. It is meant for server side scripting and uses the Jinja2 templating engine for rendering web pages.
Deploying Flask web apps on Heroku can be quite a tricky task, especially when the official docs are outdated. On Heroku, when it comes to deploying web apps written with Flask, it requires you to download the Heroku CLI and then proceed further. Well, there's another way to do it as well and that is by installing dependencies on the go and deploying the Flask app by connecting the GitHub repository to your Heroku app.
Here, is a sure short way of successfully deploying a web app on Heroku.
Steps to deploy a new app
1) Create a new repository and add a .gitignore file for Python under the drop down menu while creating it
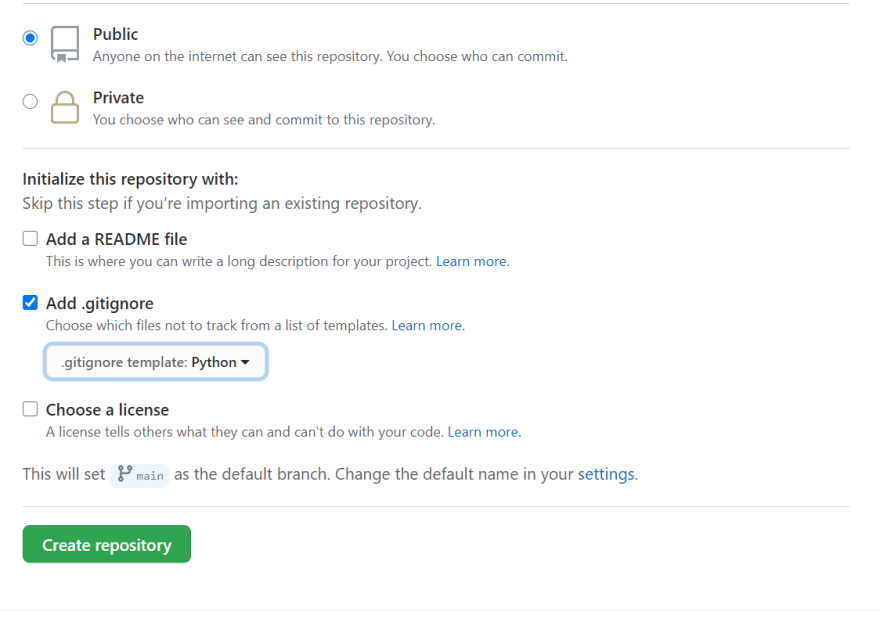
To add the .gitignore file to a pre-existing repository, go to the repository settings and add it.
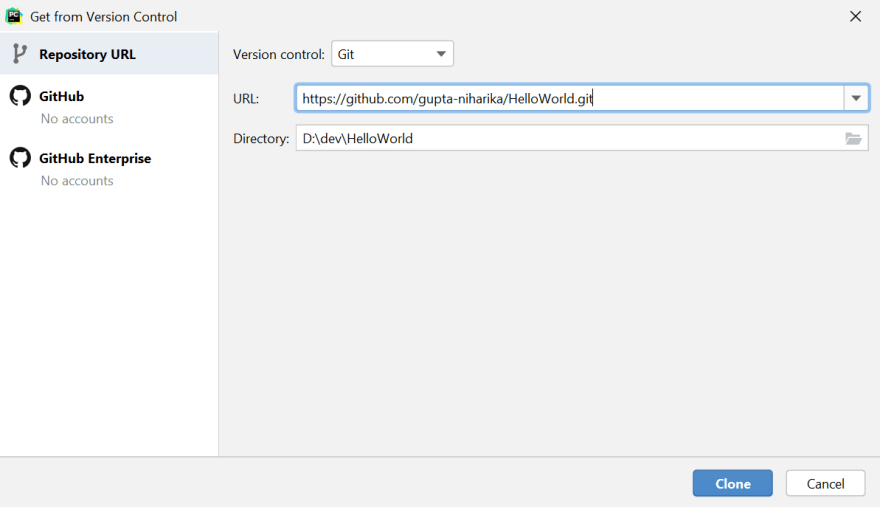
2) Copy the link to the repository

3) In the IDE clone the repository. I've used PyCharm where I have cloned my GitHub repository using 'Get from Version Control' option in PyCharm. It helps you to create a new folder and save your code here so it will be easy to commit and push any changes in the code to your GitHub
4) Now move all the existing code to the new folder you just created or simply create a new file and write your code. This folder also contains the .gitignore file
5) Now create a virtual environment using python -m venv env in the folder where you want to keep the project. Activate it using env\Scripts\activate.
If you're on mac use source venv/bin/activate

6) Install all the needed dependencies, including gunicorn which is a WSGI HTTP server, using pip install gunicorn and test your app locally, in the virtual environment you created
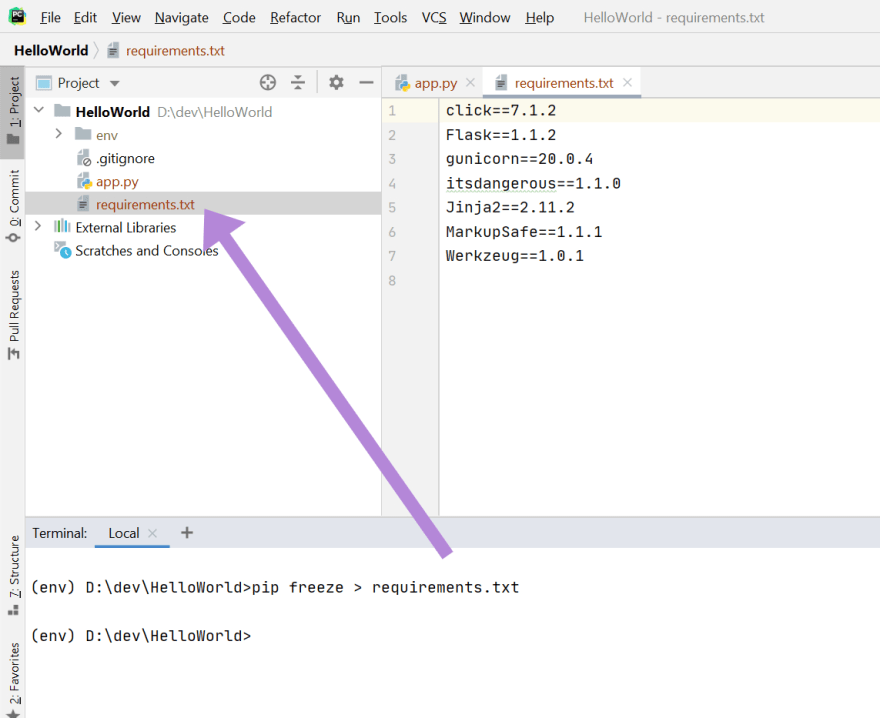
7) Now create the requirements file by typing this command in the terminal pip freeze > requirements.txt. This file contains all the dependencies you installed to run this app
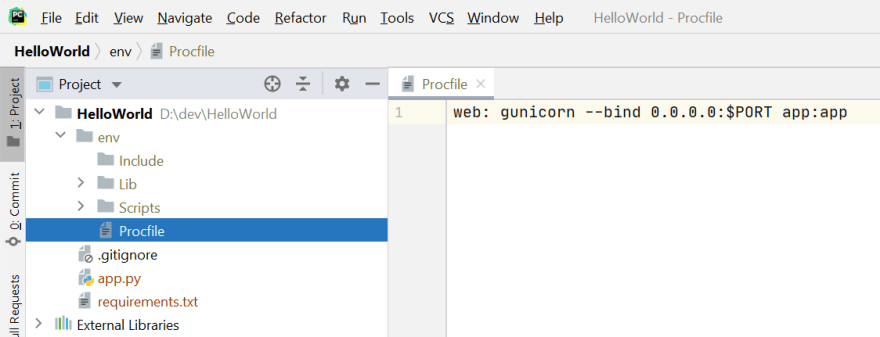
8) Now create a new file, name it Procfile and type web: gunicorn --bind 0.0.0.0:$PORT app:app. Here app will be your app (main file) name
A Procfile is a text file (named Procfile) placed in the root of your app that lists the process types in the app. Heroku apps include a Procfile that specifies the commands that are executed by the app on startup.
9)Commit the changes and push the files to your GitHub repository

10) Now got to Heroku, login and create a new app

11) Set the mode of deployment as GitHub and connect it to your GitHub repository.

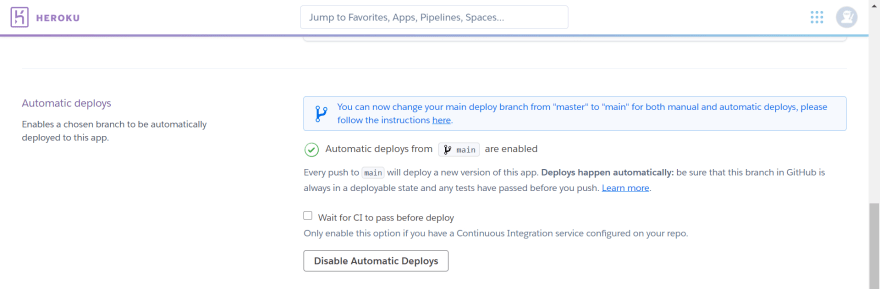
12) Choose the option for automatic deploys. This enables your code to be automatically deployed every time you make changes on the selected branch. Hit deploy and watch the magic

13) Click on 'View' to view your deployed app

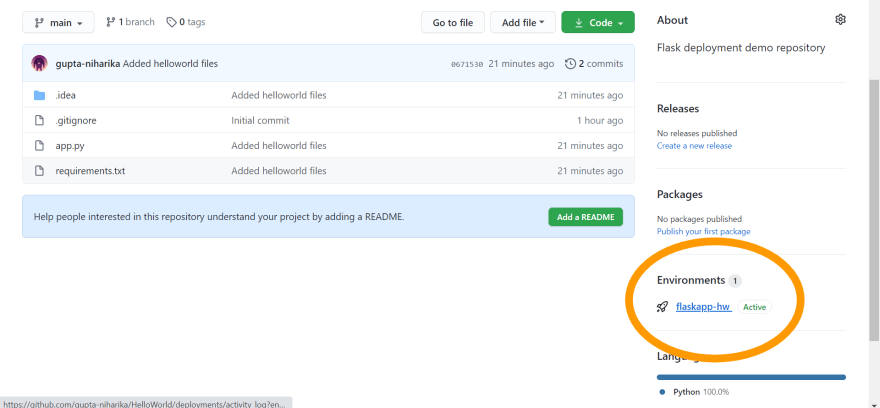
You can now be able to access the active deployment under the Environments section of your GitHub repository
And that’s the easiest way of deploying a Flask app on Heroku by connecting it to your GitHub repository! :)


Top comments (1)
The easiest way to host a Flask app today is still PythonAnywhere.