
Written by Elijah Asaolu✏️
Nine years ago, the Electron team revolutionized how we create desktop applications by introducing a framework that allows us to quickly build one with basic HTML, CSS, and JavaScript knowledge. Barring its valid criticisms, Electron gets the job done, and we've seen it used by a number of companies, including Slack, WhatsApp (desktop), and even the developer community's favorite text editor, VS Code. Recently, however, Tauri was introduced as an alternative to Electron.
In this article, we’ll explore Tauri, the new shiny desktop application framework. We'll look at how to get started using it, how it works, how it compares to Electron, and what migrating an existing Electron project to Tauri would look like.
Here’s what we’ll cover in detail:
What is Tauri?
Tauri is a relatively new framework that allows you to quickly create cross-platform applications by leveraging basic web technologies as well as the Rust programming language.
Tauri is built on Rust, is secure and performant by design, is compatible with any front-end framework, and lets you create executable applications for all major desktop platforms, including macOS, Windows, and the Linux operating system.
How Tauri works
Each Tauri app contains a core process that serves as the application's entry point and is the only component with full access to the operating system. The core process, however, does not render the actual application interface; instead, it launches subprocesses that use WebView libraries provided by the operating system, making it possible to build Tauri apps with web technologies.
Unlike Electron, which packages and renders your applications using the Chromium engine regardless of the underlying operating system, Tauri uses the operating system's WebView libraries. The advantage of the Tauri approach is that the WebView libraries are not included in the final executable but are dynamically linked at runtime, which greatly reduces the size and performance of the bundled app.
Tauri pros
As previously stated, Tauri apps are much lighter than Electron apps due to their webview approach. In fact, a sample application built with Electron that weighs more than 52MB would weigh much less, around 3MB, when built with Tauri.
Some other major benefits of the Tauri framework include:
- Better performance: Tauri apps also outperform Electron apps in terms of performance, launch time, and memory consumption
- Self-updater: Tauri includes a self-updater feature that you could quickly integrate into your application without relying on any third-party libraries
- Cross-platform: And, of course, you can generate executables for all major desktop operating systems
Tauri’s major drawbacks
- Browser compatibility: One major drawback of Tauri is that you’ll have to worry about browser compatibility. There are some web APIs that work with macOS WebView and might not work with Windows, and vice versa. Furthermore, the design of web elements such as inputs, buttons, and so on slightly varies depending on the operating system WebView. You’ll want to keep these differences in mind
- Resources and ecosystem: Tauri is still pretty new, as are its resources and ecosystem. Unlike how you can quickly find plugins and StackOverflow answers for most Electron issues, Tauri does not have that yet. However, this will undoubtedly change in the future
- Rust knowledge: When working with Tauri, you won't need Rust for the most part. However, you might have to learn it as you get deeper into advanced stuff, such as having to make higher-order operating system calls with Rust if Tauri's JavaScript plugins don't support them
Creating Tauri apps
Before you can get started with creating Tauri applications, you must first install some prerequisite dependencies/packages — most notably Microsoft Visual Studio C++ build tools and WebView 2 on Windows, CLang and Xcode development dependencies for macOS, and Rust regardless of OS. You can find instructions on how to set up all of this on their prerequisite page (instructions for different Linux distros are also included).
After you have installed all of the prerequisites, you can create a new Tauri app with:
npm create tauri-app
Running this command will ask you to choose your app name, the window name, and your preferred recipe, i.e., if you'd prefer to use the basic HTML, CSS, and JavaScript or other JavaScript frameworks like React, Vue, and Svelte. For the sake of this tutorial, we’ll go with the create-react-app > create-react-app (JavaScript) recipe.
Once the process is completed, you can run the app with the following command:
npm run tauri dev
Running this command for the first time will take a couple of seconds, and once it's completed, you should see your new desktop app pop up in a new window, like the preview below: 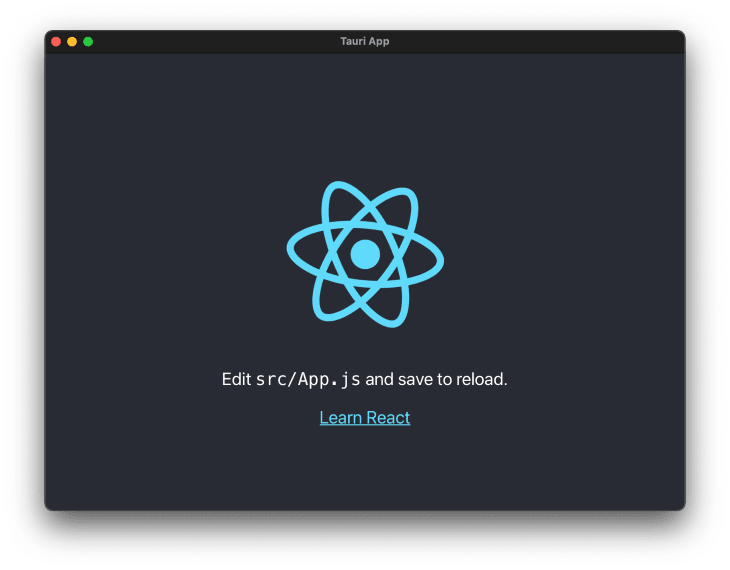
And, of course, hot reloading is supported, which means that we can make changes to our code and they will be reflected in our application immediately.
File structure
If you open the new app folder in your favorite text editor, you should see the following files and directories: 
The /public and /src directories are React’s defaults. What's pretty new here is the /src-tauri folder. Let's quickly explore the important files inside this directory:
-
src/main.rs— This rust file is our Tauri application's entry point; it basically contains the code for bootstrapping our application. Here, we could also include custom Rust functions that we can call directly via JavaScript, as we’ll see later -
Cargo.toml— This file is similar to a PWAmanifest.jsonand contains our application's metadata -
target/— After running the build command, this folder will contain our application executables - tauri.conf.json — This file lets you configure and customize various aspects of your Tauri application, such as the app's name and the list of allowed APIs
Rust?
Yes. In addition to running your normal web-related (HTML, CSS, and JavaScript) code, Tauri provides a useful feature called Command. It basically lets you create custom Rust functions and invoke them via JavaScript. This is particularly useful if you need to handle heavy processing or make operating system calls in much more performant Rust code.
To get started with using this feature, we’ll need to define our function in the src-tauri/src/main.rs file while annotating it with #[tauri::command]. Here’s an example:
#[tauri::command]
fn sample_command() {
  println!("Rust code invoked from JavaScript!");
}
After that, we’ll provide a list of all the commands we’ve created in the builder function, as shown below:
fn main() {
  tauri::Builder::default()
    // Commands list here 👇
    .invoke_handler(tauri::generate_handler![sample_command])
    .run(tauri::generate_context!())
    .expect("error while running tauri application");
}
With all this, the full code for our main.rs file should look like this;
#![cfg_attr(
  all(not(debug_assertions), target_os = "windows"),
  windows_subsystem = "windows"
)]

#[tauri::command]
fn sample_command() {
  println!("Rust code invoked from JavaScript!");
}

fn main() {
  tauri::Builder::default()
  // Commands list here
  .invoke_handler(tauri::generate_handler![sample_command])
    .run(tauri::generate_context!())
    .expect("error while running tauri application");
}
Now, we can simply make a call to this function by using Tauri's inbuilt invoke() function like below:
import { invoke } from "@tauri-apps/api/tauri";
invoke("sample_command");
And after running this code in our project, we should see the output “Rust code invoked from JavaScript!” printed on our console.
The command feature allows you to do a lot more, such as passing parameters, running async rust functions, managing states, and so on. More information on the Tauri command functions can be found here.
Desktop API
Tauri includes methods for gaining access to desktop functions such as the file system, clipboard, dialog, shell, and many more, which you can easily import and use anywhere in your application. Here's an example of how to use the clipboard's writeText() method to copy text:
import { writeText } from "@tauri-apps/api/clipboard";

const copyToClipboard = async () => {
  await writeText("Sample Text");
};
If you're also familiar with the Rust programming language, you can write custom Rust methods that call operating system functions and invoke them through JavaScript, as we did earlier.
Building the app
Packaging your Tauri project as a standalone desktop application is fairly straightforward, but first, you’ll need to change the tauri.bundle.identifier in the tauri.config.json file from com.tauri.dev to your preferred unique identifier. After that, you can proceed by running the following command:
npm run tauri build
Running the build command, Tauri will automatically detect your operating system and generate the standalone executable app accordingly.
Migrating from Electron
Migrating the basic user interface of an existing electron project to Tauri should be fairly simple. The complications will arise when you need to start working with desktop APIs, windows, and menus. However, let's quickly compare the differences so as to help ease the migration process.
The entry point of an Electron project is the main script file (e.g., main.js), which would usually contain a BrowserWindow() function that's responsible for loading static web pages and rendering them as a desktop application. And in this same function, you are also able to customize the desktop default options, such as its default size, position, optional styling, as well as custom events.
In the case of Tauri, while the app entry point is the src/main.rs file, all the equivalent customization mentioned above can simply be done in the tauri.conf.json file.
To asynchronously communicate across applications, Electron includes an ipcMain module for emitting and handling custom events. The counterpart in Tauri is the event module, which is also pretty straightforward to use.
Finally, the use and integration of desktop APIs are also similar in both libraries, and can quickly be pulled out from their respective documentation pages.
Conclusion
This post has covered the fundamentals of Tauri, how it works in comparison to how Electron works, how to get started with it, as well as a guide on migrating an existing Electron project.
Tauri is still in its early stages, but it already offers a lot of amazing features, with even more on the way, such as support for bundling binaries for all major mobile operating systems.
Do you think Tauri would be an Electron killer? Let's hear your thoughts below.
Thanks for reading!


Top comments (0)