
Written by Ebenezer Don ✏️
If you’ve used React to build a web application, chances are you’ve had major challenges with state management. For too long, we relied on Redux for state management, but because of its complexity and excessive amount of code, we eventually turned to other solutions like RxJS/React Hooks and the React Context API. We’ve also seen Redux Toolkit solve the Redux boilerplate problem — and I can argue that it’s the simplest of all the tools I just mentioned.
Then there’s React’s useState Hook for local state management. If you’ve worked with it before, then you might have wondered why global state management can’t be just as easy. Why do we still need so much boilerplate to manage state with the Context API? What if we don’t want to be constrained by opinionated tools like Redux Toolkit or forced to use actions and reducers in our React applications?
This is where Hookstate comes in. Hookstate is not just another state management solution. Apart from being feature-rich, fast, and flexible, the library takes the idea of simplifying state management in React apps to a whole new level.
Hookstate works almost exactly like the React useState Hook. In fact, with Hookstate, creating a global state is just as easy as creating a local state with the useState Hook. In addition to its simplicity, Hookstate also extends our created state instance with other useful features.
In this article, we’ll introduce Hookstate as a simple and efficient state management solution for React applications by building a demo chat app. The only prerequisite you’ll need to follow along with this article is knowledge of React.
Hookstate and its features
As its name suggests, Hookstate is a fast and flexible state management tool based on the React state Hook. It’s a small library packed with features that include both global and local states, as well as partial state updates and asynchronously loaded states.
Our focus for this article is on the @hookstate/core package, but Hookstate has several optional plugins that enable us to extend or customize our state Hooks — and the library’s documentation is well-written and packed with good demos. Below are some noteworthy plugins:
-
@hookstate/persistenceenables us to persist our state to the browser’s local storage, which is useful for offline apps or if you’d like a user to retain their state data after reloading the page -
@hookstate/validationcan be very useful for form fields because it enables validation and error/warning messages for a state -
@hookstate/broadcastedis a very useful tool if you want to enable synchronization of your state across different browser tabs
Let’s explore some of the core features in Hookstate that make it a good choice for state management in React applications. We’ll do this by building a chat app. Here’s what our app should look like by the end of the article:

Our chat app will have two components that will be able to interact with each other by sending and receiving data from our global Hookstate store.
Building our app with React and Hookstate
Let’s start by using the create-react-app package to generate a new React application. We’ll run the following command in our terminal:
npx create-react-app hookstate-chat
Next, we’ll cd into our new hookstate-chat directory and install Hookstate:
cd hookstate-chat
npm install --save @hookstate/core
Setting up our chat box components
Now that we have Hookstate installed, let’s install react-custom-chat. I created this npm package for this article so that we can focus on Hookstate and not have to bother ourselves with the design of our chat app, but you can use or build another, if you like:
npm install --save react-custom-chat
With react-custom-chat installed, let’s go over to the ./src directory and create a JSX file for our first chat component. We’ll name it FirstPerson.
Next, we’ll add the following code to our ./src/FirstPerson.jsx file:
import ChatBox from 'react-custom-chat'

const FirstPerson = () => {
  return (
    <ChatBox
      messageList={[]}
      onSendMessage={newMessage => {}} // do something with newMessage
      settings={{
        position: 'left',
        navColor: 'green',
        navText: 'Mycroft'
      }}
    />
  )
}

export default FirstPerson
In our FirstPerson component, we started by importing ChatBox from the react-custom-chat package. The ChatBox component has a messageList prop, which will contain an array of our message objects. Each message object will contain:
- A
textproperty of typestring, which represents the message text - A
personproperty of typestring, which can either be “primary” or “secondary”
The person property helps the ChatBox component to determine how to style each message.
The onSendMessage prop expects a function that’ll tell it what to do whenever a message is sent.
Lastly, we added a settings prop to define the look of our chat boxes. In this case, we want the FirstPerson chat box to be positioned on the left of our page.
Let’s do the same thing for our SecondPerson chat box. We’ll create a JSX file named SecondPerson in our ./src directory and paste the following code in it:
import ChatBox from 'react-custom-chat'

const SecondPerson = () => {
  return (
    <ChatBox
      messageList={[]}
      onSendMessage={() => {}}
      settings={{
        position: 'right',
        navColor: 'blue',
        navText: 'Cortana'
      }}
    />
  )
}

export default SecondPerson
Notice how we changed the position, navigation color, and text for our SecondPerson chat box. You can find other custom settings for the ChatBox component in the react-custom-chat documentation.
Putting our chat components to use
With our chat components successfully created, we can now import and use them in our ./src/App.js file. Let’s replace what’s currently there with the following code:
import FirstPerson from './FirstPerson'
import SecondPerson from './SecondPerson'

const App = () => {
  return (
    <>
      <FirstPerson />
      <SecondPerson />
    </>
  );
}

export default App
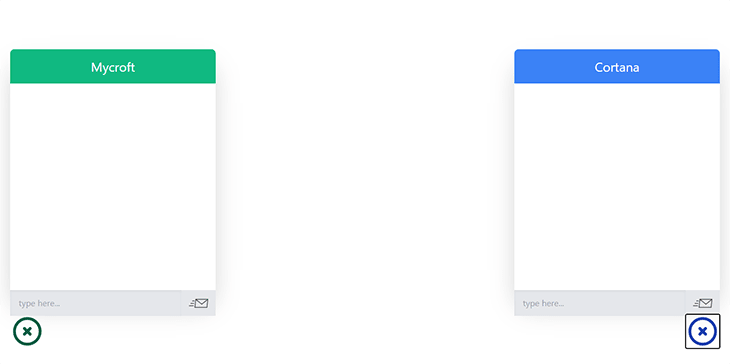
We can go ahead and start our application by running npm start on our terminal. We should see a page that looks like this when we open our application in the browser:

Clicking on the chat icons should open up our chat windows:
Creating our global store with Hookstate
Now that we’ve successfully created our chat components, let’s use Hookstate to set up and manage our application’s message functionality. We’ll start by creating a new JavaScript file named store.js in the ./src directory, which will house our application’s global state.
Hookstate doesn't have any restrictions on where you can create global states, as long as any component that needs it is able to successfully import it.
Inside our ./src/store.js file, we’ll use the createState method from Hookstate to create our state:
import { createState } from '@hookstate/core'

const store = createState({
  firstPersonMessageList: [],
  secondPersonMessageList: []
})

export default store
Alternatively, we can create our FirstPerson and SecondPerson states individually:
...
const firstPersonMessageList = createState([])
const secondPersonMessageList = createState([])
...
Either option will work fine for our app because Hookstate enables us to create as many states as we want, and also provides us with the ability to easily update nested state properties. For the purposes of our tutorial, we’ll go with the first approach.
We’ve also provided the createState method with an initial object state that contains the properties firstPersonMessageList and secondPersonMessageList.
With our state successfully created, we can go ahead and access it with the useState Hook from Hookstate. Since it’s a React Hook, we’ll need to call it inside our React components. Our returned state from the useState Hook will have:
- A
get()method we can use to get the state data - A
set()method for setting a new value for our state - A
merge()method for adding data to our state
There are also other methods like attach() and batch(), but we won’t need them for our demo app.
Accessing and updating our global store
Let’s see how we can access and update our store from the individual components. We’ll go over to the ./src/FirstPerson.jsx file and import the useState Hook from Hookstate. We’ll also import our store from the store.js file:
import { useState } from '@hookstate/core'
import store from './store'
...
We can now use the useState Hook to access our store. Since useState is a React Hook, we’ll need to use it inside the body of our FirstPerson component. Let’s create a variable named globalState and call the useState Hook with our imported store as its value.
...
const FirstPerson = () => {
  const globalState = useState(store)
  ...
}

export default FirstPerson
The globalState variable should contain the initial state we provided to our store. We can also directly destructure the firstPersonMessageList and secondPersonMessageList properties when using the useState Hook to access our store. Let’s change our globalState variable declaration to the following line of code:
const { firstPersonMessageList, secondPersonMessageList } = useState(store)
Now, we can use firstPersonMessageList and secondPersonMessageList as individual states.
This is a powerful Hookstate advantage because our nested properties also have the state methods that our globalState variable would have had. We can now equally use the get() , set(), and merge() methods in our destructured properties.
Handling the user sendMessage event
Next, let’s create our function for handling the user sendMessage event. We’ll name it handleSendMessage:
...
const handleSendMessage = newMessage => {
  firstPersonMessageList.merge([{text: newMessage, person: 'primary'}])
  secondPersonMessageList.merge([{text: newMessage, person: 'secondary'}])
}
In the above block, we’ve created a function named handleSendMessage and have provided it with a parameter named newMessage. Our newMessage parameter represents whatever our user types into the chat input field. For every new primary message we add to the firstPersonMessageList, we’re also making a corresponding secondary addition to the secondPersonMessageList. We’ll do the reverse when we get to the SecondPerson component.
Notice how easy it is to update our state with the merge() method. If we were using the set() method or React’s built-in useState Hook, our function would look similar to this:
const handleSendMessage = newMessage => {
  firstPersonMessageList.set([...firstPersonMessageList, {text: newMessage, person: 'primary'}])
  secondPersonMessageList.merge([...secondPersonMessageList, {text: newMessage, person: 'secondary'}])
}
Our second function definitely looks more complex than the first. With the merge() method, if the current state value and the argument are both arrays, Hookstate will do the job of concatenating the current value with the value of the argument and setting it to the state. You can see other ways to use the merge() method in the Hookstate documentation.
Just for aesthetics, let’s delay the secondPersonMessageList state update by 500 milliseconds:
...
const handleSendMessage = newMessage => {
  firstPersonMessageList.merge([{text: newMessage, person: 'primary'}])
  setTimeout(() => {
    secondPersonMessageList.merge([{text: newMessage, person: 'secondary'}])
  }, 500)
}
...
We can now supply the handleSendMessage function as our ChatBox onSendMessage prop value. We’ll also use the get() method from our firstPersonMessageList to access our state, and then use it as the value for our ChatBox messageList prop:
...
<ChatBox
  messageList={firstPersonMessageList.get()}
  onSendMessage={handleSendMessage}
  settings={{
    position: 'left',
    navColor: 'green',
    navText: 'Mycroft',
    isOpen: true
  }}
/>
...
Our FirstPerson.jsx file should now look like this:
import { useState } from '@hookstate/core'
import ChatBox from 'react-custom-chat'
import store from './store'

const FirstPerson = () => {
  const { firstPersonMessageList, secondPersonMessageList } = useState(store)

  const handleSendMessage = newMessage => {
    firstPersonMessageList.merge([{text: newMessage, person: 'primary'}])
    setTimeout(() => {
      secondPersonMessageList.merge([{text: newMessage, person: 'secondary'}])
    }, 500)
  }

  return (
    <ChatBox
      messageList={firstPersonMessageList.get()}
      onSendMessage={handleSendMessage}
      settings={{
        position: 'left',
        navColor: 'green',
        navText: 'Mycroft'
      }}
    />
  )
}

export default FirstPerson
Let’s do the same thing in our SecondPerson.jsx file. Since we’ve already explained the steps in detail, we can go ahead and paste the following code in our file:
import { useState } from '@hookstate/core'
import ChatBox from 'react-custom-chat'
import store from './store'

const SecondPerson = () => {
  const { firstPersonMessageList, secondPersonMessageList } = useState(store)

  const handleSendMessage = newMessage => {
    secondPersonMessageList.merge([{text: newMessage, person: 'primary'}])
    setTimeout(() => {
      firstPersonMessageList.merge([{text: newMessage, person: 'secondary'}])
    }, 500)
  }

  return (
    <ChatBox
      messageList={secondPersonMessageList.get()}
      onSendMessage={handleSendMessage}
      settings={{
        position: 'right',
        navColor: 'blue',
        navText: 'Cortana'
      }}
    />
  )
}

export default SecondPerson
In the handleMessage function for our SecondPerson component, we’ve done the reverse of what we did in the FirstPerson component: whenever a message is sent, it gets added as primary to the secondPersonMessageList and as secondary to the firstPersonMessageList.
Now, when we open up our application in the browser, we should be able to send messages across our two components via the Hookstate tool:
Conclusion
We’ve learned how to use Hookstate for state management in React applications. We’ve also seen why Hookstate is not just another state management solution, but a tool that takes the idea of simplifying state management in React apps to a whole new level.
I’ve not used it in a large-scale app yet, but so far, it’s proven to be an efficient library. Here are links to the codebase for our react-custom-chat package and our demo app. If you want to keep in touch, consider subscribing to my YouTube channel and following me on GitHub. Keep building!
Further reading
- RxJS with React Hooks for state management
- React Reference Guide: Context API
- Smarter Redux with Redux Toolkit
Full visibility into production React apps
Debugging React applications can be difficult, especially when users experience issues that are difficult to reproduce. If you’re interested in monitoring and tracking Redux state, automatically surfacing JavaScript errors, and tracking slow network requests and component load time, try LogRocket.


LogRocket is like a DVR for web apps, recording literally everything that happens on your React app. Instead of guessing why problems happen, you can aggregate and report on what state your application was in when an issue occurred. LogRocket also monitors your app's performance, reporting with metrics like client CPU load, client memory usage, and more.
The LogRocket Redux middleware package adds an extra layer of visibility into your user sessions. LogRocket logs all actions and state from your Redux stores.
Modernize how you debug your React apps — start monitoring for free.


Top comments (0)