
Written by Harsh Patel✏️
Working on a large-scale project and managing its codebase can be a big challenge for teams. Though micro-frontends have been in the picture for a while now, they are getting increasingly popular because of their unique features and usability.
Micro-frontends are particularly helpful because multiple teams can work on individual modules of the same project without worrying about other modules. With micro-frontends, it doesn’t matter how many modules will be added to a current system.
In this article, we’ll cover the basics of what a micro-frontend is and how to implement it using Next.js. We’ll also discuss the advantages of using micro-frontends in your applications.
- Introduction to micro-frontends
- Implementing a micro-frontend with Next.js
- Advantages of micro-frontends
Introduction to micro-frontends
For starters, micro-frontends don’t follow any particular structure and have no fixed boundaries.
So how small is a micro-frontend? This is still unanswered. The bottom line is that you should split your project up so that the user experience won’t be disturbed. This process may be painful because it’ll likely include multiple whiteboard revisions.
Your project will likely evolve as time passes and you may need to revise your micro-frontend as you go along.  Image source:
React is a popular frontend tech stack known for its usefulness and features. Using micro-frontends with React is a cherry on top! And that’s where Next.js comes in.
Next.js has a wide number of benefits, including:
- Inbuilt router support. No extra package needed
- Inbuilt CSS and TypeScript support
- Automatically set, page-based routes
- Easily built for production
- Image optimization and internationalized SDKs
- Inbuilt serverless functions (API routes)
So now let’s see how to create a micro-frontend with Next.js!
Implementing a micro-frontend with Next.js
We will use module federation, which is technically a webpack v5 feature. It allows multiple builds of a single application and runs as a monolith.
Some people may think module federation is a new JavaScript feature, but it’s actually just an architecture principle that dynamically loads code from other builders. This is great if you want to add a new micro-frontend to the existing system; you can do so quickly without affecting what’s currently there.
Prerequisites
Assuming you already have Node installed on your machine, we’re going to build three Next.js micro-frontends. We will expose a component in the first micro-frontend and expose a common function in the second. We will then use those exposed items in our third micro-frontend, essentially making it the consumer of each exported module.
Your Next.js app should be v10.2 or later in order to support webpack 5. Otherwise, you need to use an external package in order to support module federation. For this tutorial, I’m using Next.js v12.2.0.
Setting up the micro-frontends
First, create three frontends in a single directory by running the given command:
 mkdir next_microfrontend
> npx create-next-app fe1
> npx create-next-app fe2
> npx create-next-app fe3
In the first frontend, or fe1, we will create a Header component that will be exposed. We’ll do this in the file src/component/Header.jsx:
import * as React from 'react'

const Header = () => {
  return (
    <div
      style={{
        background: 'black',
        width: '100%',
        height: '100px',
        color: 'white',
        textAlign: 'center',
        display: 'flex',
        justifyContent: 'left',
        alignItems: 'center',
        fontSize: '24px',
        paddingLeft: '15px'
      }}>
      Name
    </div>
  );
};

export default Header;
Now, to make it work, we need to add it to the index.js page:
import styles from '../styles/Home.module.css'
import Header from '../src/component/Header'

export default function Home() {
  return (
    <div className={styles.container}>
      <main className={styles.main}>
        <Header />
      </main>
    </div>
  )
}
If you want to see an output, run npm run dev and visit http://localhost:3000/. It should look like this: 
Now, we have to expose our component to make it globally available for another micro-frontend. To do so, we need to change next.config.js as follows:
/** @type {import('next').NextConfig} */
const nextConfig = {
  reactStrictMode: true,
  webpack5: true, // Need to make it true for some versions of Next JS
  distDir: 'build', // Defined build directory
  webpack: (config, options) => { // webpack configurations
    config.plugins.push(
      new options.webpack.container.ModuleFederationPlugin({
        name:"fe1",
        filename: "remoteEntry.js", // remote file name which will used later
        remoteType: "var",
        exposes: { // expose all component here.
          "./header": "./src/component/Header"
        },
        shared: [
          {
            react: {
              eager: true,
              singleton: true,
              requiredVersion: false,
            }
          },
          {
            "react-dom": {
              eager: true,
              singleton: true,
              requiredVersion: false,
            }
          },
        ]
      })
    )
    return config
  }
}

module.exports = nextConfig
When we build fe1, you can find the JavaScript file used in another micro-frontend at the location http://localhost:[PORT]/build/remoteEntry.js.
Great, we’ve created components in fe1 and in fe2! We’ll now create a common function to expose.
Let’s create one function in fe2:
// utils/getSquareRoot.js
const squareRoot = (number) => {
  return Math.sqrt(number)
}

export default squareRoot;
Now let’s configure next.config.js for the same:
/** @type {import('next').NextConfig} */
const nextConfig = {
  reactStrictMode: true,
  distDir: 'build',
  webpack: (config, options) => {
    config.plugins.push(
      new options.webpack.container.ModuleFederationPlugin({
        name:"fe2",
        filename: "remoteEntry_2.js",
        remoteType: "var",
        exposes: {
          "./squareRoot": "./utils/getSquareRoot"
        },
        shared: [
          {
            react: {
              eager: true,
              singleton: true,
              requiredVersion: false,
            }
          },
          {
            "react-dom": {
              eager: true,
              singleton: true,
              requiredVersion: false,
            }
          },
        ]
      })
    )
    return config
  }
}

module.exports = nextConfig
Once we build it, http://localhost:[PORT]/build/remoteEntry_2.js will be ready to use.
Let’s treat fe3 as a consumer. We will use the exported component of fe1 and the function of fe2.
First, let’s configure next.config.js:
/** @type {import('next').NextConfig} */
const path = require('path');
const nextConfig = {
  reactStrictMode: true,
  distDir: 'build',
  webpack: (config, options) => {
    config.plugins.push(
      new options.webpack.container.ModuleFederationPlugin({
        name:"fe3",
        filename: 'static/consumerFile.js'
        remoteType: "var",
        remotes: {
            fe1: options.isServer ? path.resolve(../fe1/build/remoteEntry.js) : 'fe1',
            fe2: options.isServer ? path.resolve(../fe1/build/remoteEntry_2.js) : 'fe2',
        },
        shared: [
          {
            react: {
              eager: true,
              singleton: true,
              requiredVersion: false,
            }
          },
          {
            "react-dom": {
              eager: true,
              singleton: true,
              requiredVersion: false,
            }
          },
        ]
      })
    )
    return config
  }
}

module.exports = nextConfig
Here, you can see that we defined remote in the webpack configuration. The job of remote is to consume from the given URL and make content available for that app. It will accept remote or local dependencies based on the condition that we specified.
To use that file, we need to update the _document.js file listed under pages:
import { Html, Head, Main, NextScript } from 'next/document'

export default function Document() {
  return (
    <Html>
      <script src="http://localhost:3000/build/remoteEntry.js" />
      <script src="http://localhost:3001/build/remoteEntry_2.js" />
      <Head />
      <body>
        <Main />
        <NextScript />
      </body>
    </Html>
  )
}
Let’s import that module into the index.js file and use it.
import Head from 'next/head'
import Image from 'next/image'
import styles from '../styles/Home.module.css'

// Importing modules
const Header = (await import('fe1/header')).default;
const squareRoot = (await import('app1/getSquareRoot')).default;

export default function Home() {
  return (
    <div className={styles.container}>
      <Head>
        <Header />
      </Head>
      <main className={styles.main}>
        <h1 className={styles.title}>
           Square root of 4: {squareRoot(4)}
        </h1>
      </main>
    </div>
  )
}
Execution and results
Now it’s time to check whether it’s working or not. First, build and start fe1 and fe2. Start fe3 by running npm start dev and go to its respective URL to check the output. 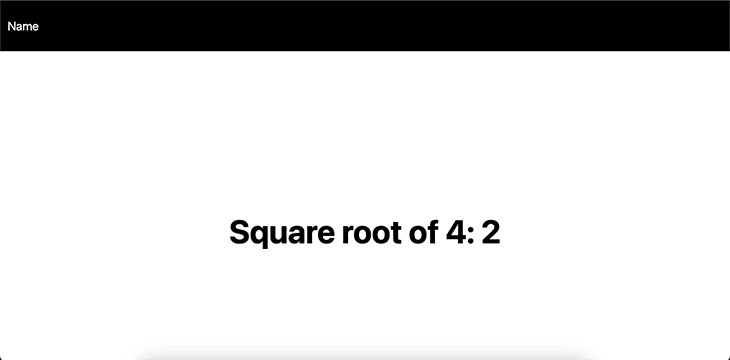
Woah! We just consumed the content of two frontend codes into our main frontend!
🚀 Let’s do some magic.
Go to fe1 → src → component and change the value from name to name updated. Then, rerun f2.
You can see the new code that was updated in fe1 without doing anything. Amazing, right?
Advantages of micro-frontends
Simply put, micro-frontends make web applications more maintainable. If you’ve ever been part of a large application, you know it’s very tedious to manage everything.
Micro-frontends work similarly to the divide and conquer rule. Now, let’s understand the most important and valuable aspects of working with micro-frontends.
Deployment and security
A significant advantage of micro-frontend architecture is that you can separate a single body into individual pieces that can be deployed independently. When deploying alone, you can maintain and build without working on other pieces.
Vercel supports an individual repo of different frontends, irrespective of language and framework to deploy them together. Apart from that, you can use deployment services like Netlify. Once it’s deployed, you can use it as an individual frontend only.
When the frontend is used by a large audience, it needs to be secure and robust. To make it safe, you can use an SSL Certificate like Wildcard or a single domain, multi-domain, or SAN SSL Certificate. One SAN or multi-domain SSL Certificate can secure multiple sites and subdomains.
Scalability
There are multiple frameworks built with JavaScript, but if you want to align developers with different backgrounds on the same project, will it even be possible? The answer is yes with micro-frontends!
You can combine React, Vue, and Angular on a single project by taking advantage of micro-frontend architecture. It generates the best result in the end in my opinion.
Faster development
Now you know that your team can work independently. Great, no more unnecessary chaos!
Your team can develop and deploy their frontend whenever they want. Releases can be done quickly because there are zero dependencies associated with individual modules.
The main goal of defining the micro-frontend is faster iterations.
Easy testing
It’s better to test individual pieces of an application before jumping into integration testing. That can be achieved here!
Teams will test the micro-frontend before testing the application, thus decreasing the chances of bugs going into the real system.
Apart from that, other advantages are a small code base that’s easily maintainable and the ability to quickly add or remove any module from the system.
Conclusion
In this article, we discussed the concept of micro-frontends and gave examples. Hopefully, now you know that it’s easy to adopt and has some great features!
Next.js is pretty clean and follows simple micro-frontend architecture. I’m excited to see what Next brings in the future regarding microarchitecture and server-side rendering with micro-frontend.
Personally, I like the micro-frontend coding style because it’s easily maintained among teams. Apart from that, frontend building and security are also managed pretty elegantly. It’s a very exciting opportunity for a team because in the future, this concept will likely grow beyond limitations!
Later, you won’t find any differences between a micro-frontend and single skeletal system.
LogRocket: Full visibility into production Next.js apps
Debugging Next applications can be difficult, especially when users experience issues that are hard to reproduce. If you’re interested in monitoring and tracking Redux state, automatically surfacing JavaScript errors, and tracking slow network requests and component load time, try LogRocket.

LogRocket is like a DVR for web and mobile apps, recording literally everything that happens on your Next app. Instead of guessing why problems happen, you can aggregate and report on what state your application was in when an issue occurred. LogRocket also monitors your app's performance, reporting with metrics like client CPU load, client memory usage, and more.
The LogRocket Redux middleware package adds an extra layer of visibility into your user sessions. LogRocket logs all actions and state from your Redux stores.


Top comments (0)