
Written by Mayowa Ojo✏️
APIs are the driving force behind virtually every application you’ll build as a developer, serving as a channel of communication between two or more software components.
However, the consequence of this type of system is that the failure of one component can have a significant impact on the other components that depend on it. Therefore, it's crucial to test your APIs extensively to ensure the correctness and predictability of your application.
There are many different ways you can test your APIs, and whichever method or combination of methods you choose will ultimately depend on your current business needs, available resources, and implementation details.
In this article, we’ll explore how to write automated functional and integration tests for your APIs that will run in a CI/CD pipeline.
- Why should you automate your API tests?
- Writing API tests with Postman
- Setting up requests
- Building the API server
- Running manual tests on Postman
- Automating your API tests
- Integrating Newman with GitHub Actions
- Bringing it all together
- Limitations of Postman for API testing
Why should you automate your API tests?
Writing tests helps to ensure the predictability and correctness of your applications at any given time. Therefore, you should run tests as often as your codebase changes. Repetitive tasks like this are often good candidates for automation.
Automated tests give you the confidence to make changes and add new features to your application because you can always rely on your tests to point out bugs that you might have introduced.
Writing API tests with Postman
Postman is a platform that provides a complete set of tools for building, testing, documenting, and mocking APIs. As a developer, you've most likely used Postman to make requests to your backend application while developing locally, but you can do even more with it.
Setting up Postman
To follow along with this tutorial, you’ll need a Postman account. If you don’t already have one, create a free account. Then, navigate to your Postman workspace to get started.
We’ll create a new collection called Delivery-API Tests where we’ll write some functional and integration tests for a delivery API that we’ll create later in this section. A functional test checks the behavior of a single API endpoint and ensures that the request-response cycle conforms to the expectation. On the other hand, integration tests check specific flows that can be made up of two or more endpoints to determine if the different components involved in a user flow work as expected.
At this point, your workspace should show the collection in the left panel: 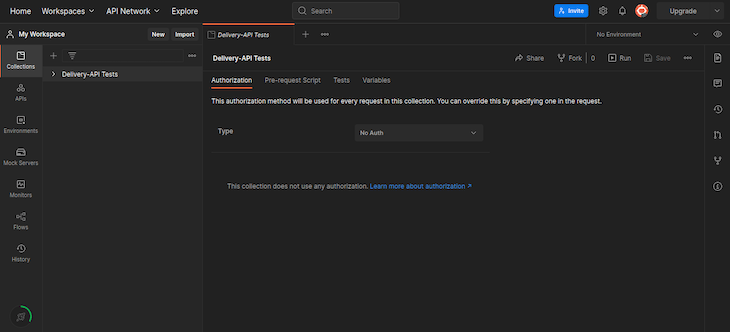
Setting up requests
Next, we'll need to create requests that will hold our tests. A request will represent an API endpoint. On the Delivery-API Tests collection, click on the menu button that appears on the right.
Select Add request and name the request that is created Search Deliveries. Create three more requests named Select Delivery, Confirm Pickup, and Complete Delivery.
Now, we need to write the tests for each request. Postman has a built-in testing tool that allows you to write tests using the JavaScript syntax. Tests are executed immediately after a request is run, and you can access the response returned from the request in the test script.
In the Delivery-API Tests collection, select the Search Deliveries request and select the Tests tab. Paste the following code block into the editor:
const responseJson = pm.response.json()

pm.test("response status", function() {
    pm.response.to.have.status(200)
})

pm.test("data contains results", function() {
    pm.expect(responseJson).to.haveOwnProperty("data")
    pm.expect(responseJson.data).to.be.an("array")
    pm.expect(responseJson.data[0]).to.haveOwnProperty("status")
})

pm.collectionVariables.set("SELECTED_DELIVERY_ID", responseJson.data[0].id)
In the code above, we get the response in JSON format by calling pm.response.json(). Note that pm is a global object available in all request scripts. We then defined two test cases using pm.test.
If you’re familiar with testing in JavaScript, then the syntax here should be straightforward. Postman supports syntax from the Chai assertion library, so you can write tests in the same way you already do in JavaScript.
In the test cases, we’re checking for the correct status code, the type of data returned, and some additional required fields. These are simple tests, but the goal is to understand the concept of testing in Postman.
Note that in the last line of the code block, we’re setting a collection variable called SELECTED_DELIVERY_ID. Collection variables are an intuitive way to share data across requests.
Next, we want to write tests for the other requests. Paste the following code blocks into the corresponding requests:
// Select Delivery
const responseJson = pm.response.json()

pm.test("response status", function() {
    pm.response.to.have.status(200)
})

pm.test("data contains result", function() {
    pm.expect(responseJson).to.haveOwnProperty("data")
    pm.expect(responseJson.data).to.be.an("object")
    pm.expect(responseJson.data).to.haveOwnProperty("status")
    pm.expect(responseJson.data.status).to.eql("QUEUED")
})

// Confirm Pickup
const responseJson = pm.response.json()

pm.test("response status", function() {
    pm.response.to.have.status(200)
})

pm.test("data contains result", function() {
    pm.expect(responseJson).to.haveOwnProperty("data")
    pm.expect(responseJson.data).to.be.an("object")
    pm.expect(responseJson.data).to.haveOwnProperty("status")
    pm.expect(responseJson.data.status).to.eql("PICKED_UP")
})

// Complete Delivery
const responseJson = pm.response.json()

pm.test("response status", function() {
    pm.response.to.have.status(200)
})

pm.test("data contains result", function() {
    pm.expect(responseJson).to.haveOwnProperty("data")
    pm.expect(responseJson.data).to.be.an("object")
    pm.expect(responseJson.data).to.haveOwnProperty("status")
    pm.expect(responseJson.data.status).to.eql("COMPLETED")
})
The test cases for other requests are identical except for the assertion on the status field. Now that we have tests for our requests, let's run them. We'll need to create a backend server that will handle the API requests. You can implement the backend server in any language or framework as long as it is REST compliant, but in this article, we’ll build a simple Node.js server using Koa.
Building the API server
In your terminal, create a folder and initialize a Node.js project with either Yarn or npm:
$ mkdir delivery-api
$ cd delivery-api
$ yarn init -y
Now, create a file called app.js and install the necessary dependencies:
$ touch app.js
$ yarn add koa @koa/router
In your package.json file, add the following script:
//...
  "scripts": {
    "start": "node app.js"
  },
//...
Koa is a lightweight HTTP middleware framework for Node.js that is similar to Express. Let’s initialize a Koa server and define the route handlers that correspond to the requests we set up in Postman. In your app.js file, paste the code block below:
const Koa = require("koa");
const Router = require("@koa/router");
const app = new Koa();
const router = new Router();

app.use(router.routes());

const deliveries = [
   {
      id: "1",
      pickupAddress: "1000 4th Ave, Seattle, WA, 98104",
      pickupPhoneNumber: "+14148928000",
      dropoffAddress: "1201 3rd Ave, Seattle, WA, 98101",
      dropoffPhoneNumber: "+14148928000",
      instructions: "",
      status: "CREATED",
   },
   {
      id: "2",
      pickupAddress: "1000 4th Ave, Seattle, WA, 98104",
      pickupPhoneNumber: "+14148915000",
      dropoffAddress: "1201 3rd Ave, Seattle, WA, 98101",
      dropoffPhoneNumber: "+14148915000",
      instructions: "",
      status: "CREATED",
   },
];

router.get("/deliveries", (ctx) => {
   ctx.body = {
      status: "00",
      message: "successs",
      data: deliveries,
   };
});

router.get("/deliveries/:id/select", (ctx) => {
   const id = ctx.params["id"];
   const delivery = deliveries.find((obj) => obj.id === id);
   if (!delivery) {
      ctx.body = {
         status: "01",
         message: "not found",
         data: null,
      };
   }
   ctx.body = {
      status: "00",
      message: "successs",
      data: { ...delivery, status: "QUEUED" },
   };
});

router.get("/deliveries/:id/confirm-pickup", (ctx) => {
   const id = ctx.params["id"];
   const delivery = deliveries.find((obj) => obj.id === id);
   if (!delivery) {
      ctx.body = {
         status: "01",
         message: "not found",
         data: null,
      };
   }
   ctx.body = {
      status: "00",
      message: "successs",
      data: { ...delivery, status: "PICKED_UP" },
   };
});

router.get("/deliveries/:id/complete", (ctx) => {
   const id = ctx.params["id"];
   const delivery = deliveries.find((obj) => obj.id === id);
   if (!delivery) {
      ctx.body = {
         status: "01",
         message: "not found",
         data: null,
      };
   }
   ctx.body = {
      status: "00",
      message: "successs",
      data: { ...delivery, status: "COMPLETED" },
   };
});

app.listen(8000);
There’s a lot going on here, so let’s break it down. First, we initialize a new Koa app and a new Router object. Using the router instance, we define four routes with paths that match the requests we created in Postman. Finally, we start the server by calling app.listen().
In summary, this simple API server is trying to simulate the process of delivering an order for a food delivery app. Now, start the server by running yarn start in your terminal.
Running manual tests on Postman
Now, we have everything set up to run the tests. If you’re using Postman on the web, you won’t be able to connect to localhost. However, there are two ways to get around this. You can either download the Postman desktop app or use ngrok as a tunnel to expose your localhost port to the internet.
If you decide to use ngrok, all you need to do is install it and start a tunnel pointing to your server. Open another terminal instance, then run the following command and copy the URL displayed:
$ ngrok http 8000
The URL should be similar to https://3d43-154-130-109-210.ngrok.io. Navigate to Postman, either on the web or desktop, select the Delivery-API Tests collection, and open the variables tab.
Add a variable with the API_BASE_URL key and set the value to http://localhost:8000 or the ngrok URL if you’re not using Postman desktop. Be sure to click Persist All when adding a new variable to ensure that external services can access it: 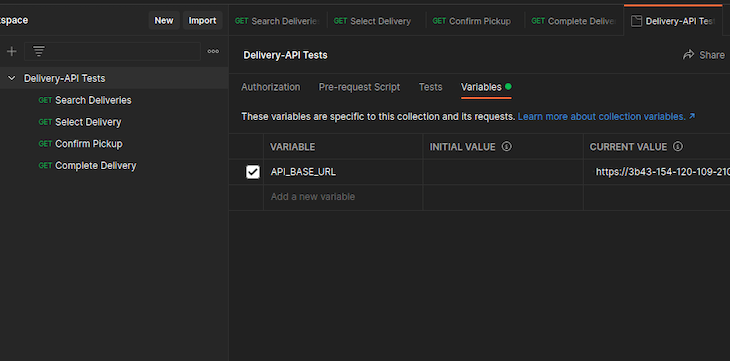
Now, we can use the collection variable for each request. Update the URL field for each request to the following values:
-
Search Deliveries:{{API_BASE_URL}}/deliveries?page=1&count=20 -
Select Delivery:{{API_BASE_URL}}/deliveries/:id/select -
Confirm Pickup:{{API_BASE_URL}}/deliveries/:id/confirm-pickup -
Complete Delivery:{{API_BASE_URL}}/deliveries/:id/complete
We can run our tests manually using one of two methods. The first is to run the requests individually, allowing the test script for each request to be executed. Alternately, we can run the collection all at once using the collection runner. We’ll use the collection runner in the next section, but you can temporarily run each request manually by clicking the Send button.
When you run a request, you’ll see the response in the bottom panel, but you can also see the test results by clicking on the Test Results tab in the bottom panel: 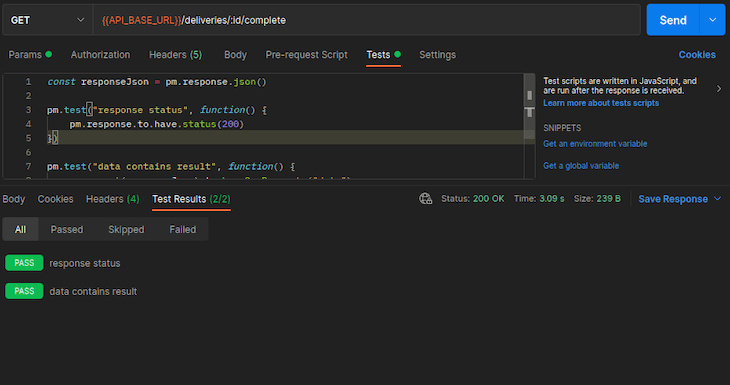
That’s all you need to do to run a test in Postman. However, it feels unintuitive to visit your Postman workspace and run tests whenever you make changes to your codebase. This approach does not align with the development workflow, so let's improve upon it.
Automating your API tests
In this section, we’ll make the testing process more intuitive and less time consuming by automating the workflow. The optimized development workflow involves making local changes and pushing new features to source control, where they are picked up by the CI/CD pipeline, triggering some build or deployment tasks.
Postman provides a command line tool called Newman that lets you run collections from the CLI. It also offers seamless integration with CI/CD environments, meaning we can set up our tests to run during a deployment step. This greatly simplifies the testing process, preventing us from constantly having to run tests in the workspace.
Integrating Newman with GitHub Actions
We can set up Newman in many continuous integration services. In this article, we’ll use GitHub Actions. Let’s start by defining a workflow for Newman. In your delivery-api project, run the following commands:
$ mkdir .github
$ mkdir .github/workflows
$ touch .github/workflows/postman-tests.yml
Add the following workflow definition to the postman-tests.yml file:
# postman-tests.yml
name: Newman Run
on:
  push:
    branches:
      - main
  # types: [closed]
jobs:
  newman:
    name: Postman-tests
    runs-on: ubuntu-latest
    steps:
      - name: Checkout
        uses: actions/checkout@v2
      - name: Install Node
        uses: actions/setup-node@v3
        with:
          node-version: 14
      - name: Install Newman & Reporter
        run: |
          npm install -g newman
          npm install -g newman-reporter-htmlextra
      # Make directory for test results in workspace
      - name: Make Directory
        run: mkdir -p newman-results
      # Run newman cli
      - name: Run Newman
        env:
          POSTMAN_API_URL: 'https://api.getpostman.com'
          POSTMAN_API_KEY: ${{ secrets.POSTMAN_API_KEY }}
          POSTMAN_COLLECTION_UID: ${{ secrets.POSTMAN_COLLECTION_UID }}
        run: |
          newman run "${{env.POSTMAN_API_URL}}/collections/${{env.POSTMAN_COLLECTION_UID}}?apikey=${{env.POSTMAN_API_KEY}}" \
          -r htmlextra,cli --reporter-htmlextra-export newman-results/htmlreport.html
      # Upload test results to workspace
      - name: Upload Results
        uses: actions/upload-artifact@v3
        with:
          name: Postman_Test_Reports
          path: newman-results
The code above is a simple workflow that runs when we push to the repository, specifically on the default main branch. We define a job for the Postman tests with a series of steps.
First, we run the checkout action, then we install Node.js using a pre-defined action actions/setup-node@v3. Next, we install Newman and newman-reporter-htmlextra. The reporter is a plugin for Newman that generates a summary of the tests in HTML format. We then run the Newman CLI tool with some arguments, including the Postman API URL for our collection.
Note that we‘ve defined some environment variables. The POSTMAN_API_KEY and POSTMAN_COLLECTION_UID are being pulled from GitHub Action secrets. Before setting these secrets, we’ll need to create a repository. Finally, after running Newman, we use the pre-defined action actions/upload-artifact@v3 to upload the HTML file generated by the reporter to a location we can later access.
Bringing it all together
Finally, we need to push the project to GitHub and see the workflow run. Navigate to your GitHub account, create a new repository called delivery-api, and copy the remote URL. Next, we’ll initialize Git in the project, add the remote URL, commit our changes, and push the changes:
$ git init -b main
$ git remote add origin <your-remote-url>
$ git add .
$ git commit "<message>"
$ git push -u origin main
If you open the Actions tab in your GitHub repository, you should either see the workflow running or having failed. This is because we haven’t added the secret keys.
To resolve this, we need to generate an API key on Postman and also fetch the collection UID. Navigate to your Postman workspace; at the top menu bar, click on your profile and select Settings. Select API Keys from the side navigation, then generate an API key and copy the value.
Next, make a GET request to the URL https://api.getpostman.com/collections and set a header with the key x-api-key and a value equal to the API key you generated. Your response should contain a list of your collections: 
Go to your GitHub repository and add the POSTMAN_API_KEY and POSTMAN_COLLECTION_UID in the GitHub Action secrets. The POSTMAN_COLLECTION_UID is the uid field in your Delivery-API Tests collection object. 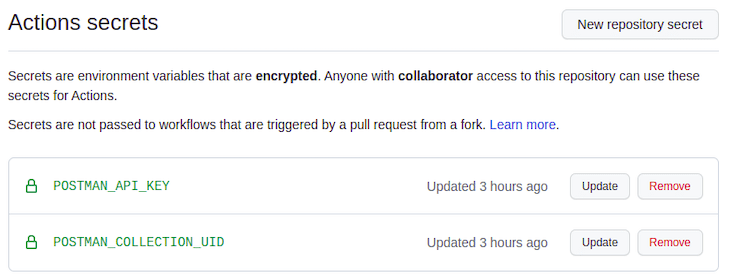
Now, go to your Actions tab again and try to rerun the failed jobs. If everything worked fine, you should see a file in the Artifacts panel, which is the generated report from the workflow. You can download and open the HTML file in your browser. 
And that’s it! We've successfully automated our API tests. Every time we make changes and push to the upstream branch, it’ll trigger the workflow, running our tests. Ideally, we want to run this workflow after a deployment has been made, but to keep it simple, we defined just the Postman tests’ workflow.
Limitations of Postman for API testing
Postman is a great tool for API testing, however it comes with its own limitations. Like everything else in software, you'll want to consider your unique project's needs to determine the right tool for the job. The first thing to consider is the scope and complexity of your tests. If you need to write tests that depend on some external service, you might not be able to easily automate that.
Another limitation is flexibility. Because you’re writing tests in a different environment from where your application logic lives, it’s difficult to share and reuse pieces of code. This can be especially frustrating when you want to test an API endpoint against multiple different request parameters. Postman remains a great tool for testing, and it’s up to you as a developer to make informed decisions about using it for testing.
Conclusion
In this article, we reviewed why testing the APIs in your application is important. We explored testing our APIs using Postman, including setting up Newman and GitHub Actions. Finally, we reviewed some of Postman's limitations for testing. Overall Postman is a great tool for building, testing, documenting, and mocking APIs. I hope you enjoyed this tutorial, and happy coding!
LogRocket: Debug JavaScript errors more easily by understanding the context
Debugging code is always a tedious task. But the more you understand your errors the easier it is to fix them.
LogRocket allows you to understand these errors in new and unique ways. Our frontend monitoring solution tracks user engagement with your JavaScript frontends to give you the ability to find out exactly what the user did that led to an error.

LogRocket records console logs, page load times, stacktraces, slow network requests/responses with headers + bodies, browser metadata, and custom logs. Understanding the impact of your JavaScript code will never be easier!


Top comments (1)
Very thorough explanation, good stuff!
Regarding the limitations mentioned, completely agreed that to each project its own solution. There is a way to run Postman tests closer to the code though using Newman (the CLI collection runner for Postman), you can also re-use tests by putting them at folder or collection level which avoids repeating them for each request!