
Written by Sai Krishna✏️
When I first encountered Open Graph (OG) images, I thought they were simply a decorative protocol that comes when we share links. It didn’t take long for me to realize that OG images have a lot of impact on generally any resource or website that’s shared on public platforms.
When the image is combined with title and description metadata, they provide quick information about the resource shared. For instance, when we share a link on Twitter, the metadata is parsed and a preview card generates.
On a quick glance, the preview card provides information about the resource shared even before visiting the link. Now, if no metadata is available, no preview generates, and the link gets truncated, leaving no useful information about the resource.

However, creating OG images for many pages or blogs is time-consuming. A better approach would be to have a few templates designed for respective categories and dynamically create the images with a simple image generator service.
In this post, we will set up a simple server with the /ogimage endpoint that responds with dynamically generated images from provided query parameters. The primary objective is to reduce the manual effort when creating OG images.
For the sake of this post, we will use Node.js and Express to set up the server and use a couple of npm packages to handle the dynamic image generation. Please feel free to use the tools that suit your preferences.
So, without further ado, let’s get started…
What is Open Graph?
Let’s first understand what the OG protocol is. According to opg.me, “The Open Graph protocol enables any web page to become a rich object in a social graph. It provides enough information to richly represent any web page within the social graph.”
Individual pieces of information that are socially shareable are defined via meta tags. These tags are then grouped by the OG mechanism to provide a preview of the shared resource on social media.
In this post, we will focus more on og:image to learn more about the other meta tags (such as og:title or og:description) and the Open Graph protocol itself, please refer to this insightful article.
Below are the steps required to build a Node.js powered OG image generator:
- Setting up the
ogimageendpoint - Creating an image template
- Generating an image with Puppeteer
- Saving and serving the image as a response
Setting up the ogimage endpoint
To begin, let’s create a simple Node.js and Express app with a single GET endpoint, /ogimage. All the data that goes into ogimage is from query parameters from the URL:
# Create a new directory and cd into it
mkdir og-imager
cd og-imager

# initialize npm
npm init
# or use "npm init -y" to initialize with default values

# add express
npm install express
Next, create an index.js file and add the below snippet. This imports and initializes an Express app, sets up a GET /ogimage endpoint, and listens for requests:
// Import and initialize the express app
const express = require('express');
const app = express();
const port = process.env.PORT || 3000;

// setup GET endpoint
app.get('/ogimage', (req, res) => {
  res.send('OG Imager!');
});

// Listen for requests
app.listen(port, () => {
  console.log(`app listening at ${port}`)
});
We can now add the start script to package.json to start the app. Use nodemon for local development purposes to autoreload the Node server when changes are made:
# add nodemon as dev-dependency
npm install nodemon -D
# add start scripts
"scripts": {
  "start": "node index.js",
  "dev": "nodemon index.js"
},
Start the server (npm run start/npm run dev) and we should see the OG Imager! on the browser when http://localhost:3000/ogimage loads.
Creating an image template
An image template is a simple HTML markup with a few placeholders and CSS to style. The placeholders are in Handlebars syntax, {{placeholder}}, but we will discuss this more in the next section.
In simpler terms, we want to create a simple HTML page and capture the page as an image with respective dimensions. Below is the markup for an example template that we can use. Please feel free to modify the HTML and CSS as you see fit for your own blogs/apps:
const templateHTML = `
<!DOCTYPE html>
<html lang="en">
  <head>
    <meta charset="utf-8">
    <meta name="viewport" content="width=device-width, initial-scale=1, shrink-to-fit=no">
    <style>{{styles}}</style>
  </head>
  <body id="body">
    <main>
      <div class='logo'>
        {{#if logoUrl}}
          <img src="{{logoUrl}}" alt="logo" />
        {{else}}
          <span>Example Logo</span>
        {{/if}}
      </div>
      <div class="title">{{title}}</div>
      <div>
        {{#if tags}}
          <ul class="tags">
          {{#each tags}}
            <li class="tag-item">#{{this}}</li>
          {{/each}}
          </ul>
        {{/if}}
        {{#if path}}
          <p class="path">{{path}}</p>
        {{/if}}
      </div>
    </main>
  </body>
</html>
`;
Now, let's add the styles for the template. Similar to HTML, the CSS will have placeholders for dynamic content, such as a background image or title font size:
const templateStyles = `
@font-face {
  font-family: Source Code Pro;
  src: url(https://fonts.googleapis.com/css2?family=Source+Code+Pro:wght@500&display=swap);
}
* {
  box-sizing: border-box;
}
:root {
  font-size: 16px;
  font-family: Source Code Pro, monospace;
}
body {
  padding: 2.5rem;
  height: 90vh;
  background: #042f7d;
  {{#if bgUrl}}
  background-image: url({{bgUrl}});
  background-position: center;
  background-repeat: no-repeat;
  background-size: cover;
  {{else}}
  background: linear-gradient(to right, #042f7d, #007eff);
  color: #00ffae;
  {{/if}}
}
main {
  height: 100%;
  width: 100%;
  display: flex;
  flex-direction: column;
  justify-content: space-between;
}
.logo {
  width: 15rem;
  height: 3rem;
}
.logo img {
  width: 100%;
  height: 100%;
}
.logo span {
  font-size: 2rem;
  color: yellow;
  font-style: italic;
  text-decoration: wavy;
  font-variant: unicase;
}
.title {
  font-size: {{fontSize}};
  text-transform: capitalize;
  margin: 0.25rem 0;
  font-weight: bold;
}
.tags {
  display: flex;
  list-style-type: none;
  padding-left: 0;
  color: #ff00d2;
  font-size: 1.5rem;
}
.tag-item {
  margin-right: 0.5rem;
}
.path {
  color: #6dd6ff;
  font-size: 1.25rem;
}
`;
Now that we have the template ready, the next step is to generate an image from it.
Generating an image with Puppeteer
To generate an image from an HTML template on a server, spin up a headless browser to load a page with the HTML and CSS from a template on the desired viewport dimensions. Then, the loaded page is captured and saved/served as an image.
We will use Puppeteer to spin up the headless browser and take a screenshot of a page loaded from the template we created above. We will also need Handlebars to compile the templated HTML and CSS and replace placeholders with dynamic values:
npm install puppeteer handlebars
Compile templated HTML with Handlebars
Before launching the browser and capturing the page, let’s compile the template HTML that must be loaded into the page:
const Handlebars = require("handlebars");

// Get dynamic font size for title depending on its length
function getFontSize(title="") {
  if (!title || typeof title !== 'string') return "";
  const titleLength = title.length;
  if (titleLength > 55) return "2.75rem";
  if (titleLength > 35) return "3.25rem";
  if (titleLength > 25) return "4.25rem";
  return "4.75rem";
}

// compile templateStyles
const compiledStyles = Handlebars.compile(templateStyles)({
  bgUrl: req.query.bgUrl,
  fontSize: getFontSize(req.query.title),
});

// compile templateHTML
const compiledHTML = Handlebars.compile(templateHTML)({
  logoUrl: req.query.logoUrl,
  title: req.query.title,
  tags: req.query.tags,
  path: req.query.path,
  styles: compiledStyles,
});
Note that Handlebars will escape unsafe HTML. So, passing the query string value directly is safe as long as our placeholders are with {{double-stash}}. The resulting HTML and styles will have the dynamic values that a query string receives.
Load HTML and capture with Puppeteer
Next up is to spin up the browser and take a screenshot of the page with Puppeteer. Puppeteer sets the viewport to 800x600 by default (at the time of writing this article). However, this can be overridden by the defaultViewport property sent with launching the method:
 const puppeteer = require('puppeteer');
// ...
app.get('/ogimage', async (req, res) => { // Note the async
  // ...
  const browser = await puppeteer.launch({
    headless: true,
    args: ["--no-sandbox"],
    defaultViewport: {
      width: 1200,
      height: 630,
    }
  });
  const page = await browser.newPage();
  // ...
});
1200x630 are the most common dimensions for OG images. The viewport size can also be dynamically controlled by using page.setViewport to set values from request parameters:
await page.setViewport({ width: Number(req.query.width), height: Number(req.query.height) });
Next, set the compiled HTML as page content and wait until there are zero network requests for at least 500ms by setting waitUntil property to networkidle0. This wait ensures all images and content loads:
await page.setContent(compiledHTML, { waitUntil: 'networkidle0' });
Wait a minute, setting networkidle0 means it will wait 500ms every time. How do we fix this?
In pursuit of the answer, I landed on a framework for building Open Graph images from GitHub.
In the article, Jason Etcovitch writes, “We changed waitUntil to [domcontentloaded](https://developer.mozilla.org/en-US/docs/Web/API/Window/DOMContentLoaded_event) to ensure that the HTML had finished being parsed, then passed a custom function to [page.evaluate](https://pptr.dev/#?product=Puppeteer&version=v8.0.0&show=api-pageevaluatepagefunction-args).
“This [runs] in the context of the page itself, but pipes the return value to the outer context. This meant that we could listen for image load events and pause execution until the Promises have been resolved.”
The below snippet is directly taken from this blog post to fix this issue:
 // Set the content to our rendered HTML
 await page.setContent(compiledHTML, { waitUntil: "domcontentloaded" });

 // Wait until all images and fonts have loaded
 await page.evaluate(async () => {
   const selectors = Array.from(document.querySelectorAll("img"));
   await Promise.all([
     document.fonts.ready,
     ...selectors.map((img) => {
       // Image has already finished loading, let’s see if it worked
       if (img.complete) {
         // Image loaded and has presence
         if (img.naturalHeight !== 0) return;
         // Image failed, so it has no height
         throw new Error("Image failed to load");
       }
       // Image hasn’t loaded yet, added an event listener to know when it does
       return new Promise((resolve, reject) => {
         img.addEventListener("load", resolve);
         img.addEventListener("error", reject);
       });
     }),
   ]);
 });
So, we can take a screenshot of the body element (the visible content wrapper) on the loaded page with page.screenshot and send the omitBackground: true property to ignore the browser background, only taking a screenshot of the loaded content.
However, if there is no background property set, the resulting screenshot will have a transparent background rather than the white browser default background:
const element = await page.$('#body');
const image = await element.screenshot({ omitBackground: true });
await browser.close();
And that’s it; we have an image generated and one last step is to serve the image.
Save/serve the image as a response
To save/serve the image, we must first set the Content-Type header to indicate that the ogimage endpoint responds with an image so no additional logic is required to handle the response.
We can directly use the endpoint as an image URL and set the Cache-Control headers for caching purposes:
app.get('/ogimage', (req, res) => {
  // Compile Template HTML & CSS with Handlebars
  .....
  // Load the template and take a screenshot with Puppeteer
  .....

  res.writeHead(200, {
    'Content-Type': 'image/png',
    'Cache-Control': `immutable, no-transform, s-max-age=2592000, max-age=2592000` // 30 days cache
  });
  res.end(image);
});
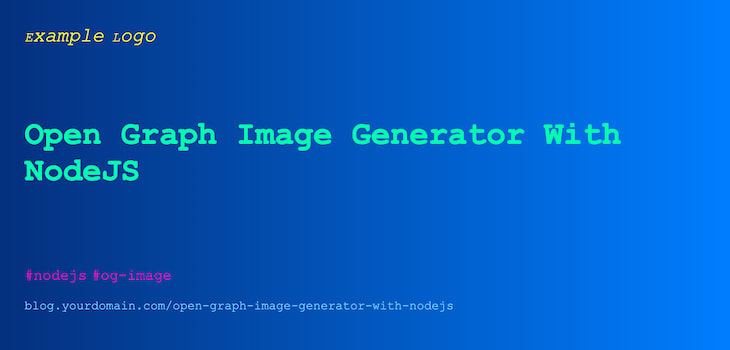
To load the image preview locally, open your browser and visit the ogimage endpoint at localhost:3000/ogimage with query parameters. This sends a GET request to the service and displays the image response in the browser:
http://localhost:3000/ogimage?title=Open%20Graph%20Image%20Generator%20with%20NodeJS&tags[]=nodejs&tags[]=og-image&path=blog.yourdomain.com/open-graph-image-generator-with-nodejs
The image preview looks something like below:
And here is the final code:
// index.js
const express = require('express');
const puppeteer = require('puppeteer');
const Handlebars = require("handlebars");

const app = express();
const port = process.env.PORT || 3000;

const templateStyles = `...`;

const templateHTML = `...`;

// Get dynamic font size for title depending on its length
function getFontSize(title="") {
  if (!title || typeof title !== 'string') return "";
  const titleLength = title.length;
  if (titleLength > 55) return "2.75rem";
  if (titleLength > 35) return "3.25rem";
  if (titleLength > 25) return "4.25rem";
  return "4.75rem";
}

app.get('/ogimage', async (req, res) => {
  // compiled styles
  const compiledStyles = Handlebars.compile(templateStyles)({
    bgUrl: req.query.bgUrl,
    fontSize: getFontSize(req.query.title),
  });
  // compiled HTML
  const compiledHTML = Handlebars.compile(templateHTML)({
    logoUrl: req.query.logoUrl,
    title: req.query.title,
    tags: req.query.tags,
    path: req.query.path,
    styles: compiledStyles,
  });
  // Launch Headless browser and capture creenshot
  const browser = await puppeteer.launch({
    headless: true,
    args: ["--no-sandbox"],
    defaultViewport: {
      width: 1200,
      height: 630,
    }
  });
  const page = await browser.newPage();
  // Set the content to our rendered HTML
  await page.setContent(compiledHTML, { waitUntil: "domcontentloaded" });
  // Wait until all images and fonts have loaded
  await page.evaluate(async () => {
    const selectors = Array.from(document.querySelectorAll("img"));
    await Promise.all([
      document.fonts.ready,
     ...selectors.map((img) => {
        // Image has already finished loading, let’s see if it worked
        if (img.complete) {
          // Image loaded and has presence
          if (img.naturalHeight !== 0) return;
          // Image failed, so it has no height
          throw new Error("Image failed to load");
        }
        // Image hasn’t loaded yet, added an event listener to know when it does
        return new Promise((resolve, reject) => {
          img.addEventListener("load", resolve);
          img.addEventListener("error", reject);
        });
      }),
    ]);
  });

  const element = await page.$('#body');
  const image = await element.screenshot({ omitBackground: true });
  await browser.close();

  res.writeHead(200, { 'Content-Type': 'image/png', 'Cache-Control': `immutable, no-transform, s-max-age=2592000, max-age=2592000` });
  res.end(image);
})

app.listen(port, () => {
  console.log(`app listening at ${port}`)
});
You can also find the complete code on GitHub. Feel free to fork it and extend beyond the template to fit your needs.
A good tip for development is to comment out the Puppeteer and Content-Type header code followed by sending the compiledHTML in response instead of the generated image, res.status(200).send(compiledHTML):
// compiled HTML
  const compiledHTML = ...;

  // Comment out puppeteer, browser, page stuff
  // const browser = ...;
  // ...
  // await browser.close();

  // instead of image as response, send compiledHTML itself
  // res.writeHead(200, { 'Content-Type': 'image/png', 'Cache-Control': `immutable, no-transform, s-max-age=2592000, max-age=2592000` });
  // res.end(image);
  res.status(200).send(compiledHTML);
This bypasses image generation and renders the resulting HTML in your browser for a faster development process by quickly iterating on the UI for the template(s).
Linking in the meta tag
To link within the meta tags, add the meta image tags with the dynamic URL as content. This URL will resolve to an image in the preview when loaded.
og:image is the primary meta tag for the OG image. You can also add Twitter, Instagram, and any other social media-specific tags along with your target platforms:
<meta property=”og:image” content=”https://{{your_domain.com}}/ogimage?title=Open%20Graph%20Image%20Generator%20with%20NodeJS&tags[]=nodejs&tags[]=og-image&path=blog.yourdomain.com/open-graph-image-generator-with-nodejs&logoUrl={{your_logo_url}}”>
Note that you may need to URL escape the query string; you can use [encodeURI](https://developer.mozilla.org/en-US/docs/Web/JavaScript/Reference/Global_Objects/encodeURI).
Conclusion
There we go, we have our own OG image generator service that dynamically creates images for each page/blog post.
You can also pick the pieces (templates, Handlebars compilation, Puppeteer screenshot) of this service to put together a serverless function or use it as a utility during the build process in any frontend app.
This post is one of many approaches to achieve this. In general, the context remains the same; it’s the syntax/language that changes 😛.
Furthermore, the generated image can be stored in AWS S3, GCS, or any service that suits your needs, and can serve from the storage on subsequent requests to save generation time. You can also use an in-memory cache with cache invalidation for every certain length of days.
Thank you for reading. I hope you found this post helpful, and please share it with those who might benefit from it. Ciao!
Full visibility into production React apps
Debugging React applications can be difficult, especially when users experience issues that are hard to reproduce. If you’re interested in monitoring and tracking Redux state, automatically surfacing JavaScript errors, and tracking slow network requests and component load time, try LogRocket.

LogRocket is like a DVR for web and mobile apps, recording literally everything that happens on your React app. Instead of guessing why problems happen, you can aggregate and report on what state your application was in when an issue occurred. LogRocket also monitors your app's performance, reporting with metrics like client CPU load, client memory usage, and more.
The LogRocket Redux middleware package adds an extra layer of visibility into your user sessions. LogRocket logs all actions and state from your Redux stores.
Modernize how you debug your React apps — start monitoring for free.


Top comments (0)