
Written by Rose Chege✏️
What is WooCommerce?
WooCommerce is one popular platform that you can use to set up your own ecommerce store. It does this without you having to code the whole application, which is made possible by the use of content management systems (CMS) such as WordPress. WordPress helps you create beautiful online shops that are well-streamed, from displaying products, managing carts, and ordering and finalizing the checkout process. You can use plugins and other resources to set up everything quickly and effortlessly.
WordPress can run as a monolith; your back end and front end are integrated. However, WordPress can also run as a headless CMS, in which the backend and frontend are decoupled and run individually. This gives the developers the flexibility power to decide how to showcase their services.
WordPress WooCommerce allows developers to generate RESTful APIs to consume an ecommerce store in different channels. This means you can create an interactive mobile application that lets users interact with the same WooCommerce data set in your WordPress sites.
The advantage of this is that you consume the data without re-authoring your initial content. This also allows you to enhance the performance of the delivery channel. You chose the fast, efficient, scalable, and more accessible channels that best fit the content delivery.
In this article, we will build a React Native shopping app that displays a list of products from a WordPress WooCommerce back end. We will also integrate cart functionalities using the React Native context API as the state management tool.
Contents
- Setting up WooCommerce in WordPress
- Generating the WooCommerce REST API
- Testing the REST API
- Setting up a Node.js microservice
- Setting up the React Native application
- Implementing drawer navigation
- Setting up application context
- Displaying products
- Displaying and removing items from the cart
- Showing a specific product
Prerequisites
To follow along with this tutorial, make sure you have the following:
- Node.js and Postman installed
- A React Native development environment
- Working knowledge of React Native
- A fully setup WordPress blog; you can follow this guide to set one up
Ensure your WordPress domain is SSL enabled. Check this guide and learn how to set up SSL for WordPress sites. However, for development purposes, and in case your WordPress is running locally or lacks SSL, we will create a tiny Node.js microservice that lets you access the WooCommerce WordPress with no SSL.
Setting up WooCommerce in WordPress
Once your WordPress site is ready and running, navigate to your WordPress admin panel. Search WooCommerce in the Add New page under the Plugins menu. Then install and activate it.
WooCommerce has no products on install, so we will add new products that fit the application we want to build. Navigate to the WordPress sidebar menu and access the Products, then All Products tabs.
You can choose to add new custom products of your own. In this case, we will import a list of products. You can access them from this page and download the CSV file. Or, if you have an existing list of products, you can import them as well.
Once you import the file, click continue to import all the column mappings. Then, run the importer and wait until WooCommerce processes the items for you. You can now go ahead and view your products.
Generating the WooCommerce REST API
Let's now generate an API to consume this product using React Native. Go to the WordPress sidebar and navigate to the WooCommerce settings.
Navigate to Advanced and click on the REST API setup.

Proceed to Add key. This will generate keys that allow you to access your store outside WordPress. Go ahead and add the key description and permission. In this tutorial, we want to read the products from WooCommerce, so ensure the Read permission is selected.
Once this is done, click the Generate API key button. This will generate a Consumer key and a Consumer secret for your store. Ensure you copy these keys and save them in a secure place.
Finally, we need to enable the legacy REST API. Navigate to WooCommerce Advanced settings and click on the Legacy API, enable it, and save the changes as shown below.

Testing the REST API
Before we proceed to set up the whole React Native application, it's advisable first to test if the API is working. To do this, we will make basic requests to localhost using Postman.
Here we will send a basic GET request that should respond with a list of products list set up in WordPress WooCommerce. To do this, we will use the URL wp-json/wc/v2/products and map it to the domain running the WordPress app. For example, https://logrocket.com/wp-json/wc/v2/products. So go ahead and modify your URL endpoint based on your server or domain name.
Open Postman and send a GET request to the URL endpoint
Once you send the request, it will require you to add the authorization details. To do so, navigate to the Authorization tab and choose Basic Auth. Enter your WooCommerce consumer key as the username and consumer secret key as the password.
Also, to avoid any connection issues, ensure you disable Postman SSL verification. You can do this in Postman settings and check that the SSL certificate verification is turned off.
Once done, send GET your request to your endpoint. This will give you a response with the list of products on the WordPress WooCommerce store.
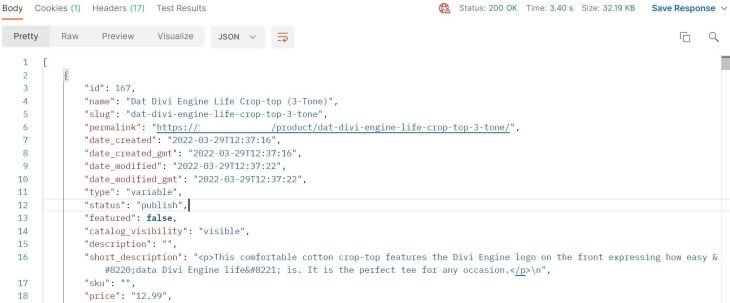
The WooCommerce is ready, and the REST API is working. We can now dive in and build an ecommerce mobile app with React Native and WooCommerce.
Setting up a Node.js microservice
As we explained earlier, we need to create a basic Node.js microservice for processing requests on non-SSL-enabled sites.
First, create a directory where you want your application the live. Inside that directory, create a different directory and name it woo_commerce_server_api. Open the command line and change the directory to the woo_commerce_server_api. Then, initialize the Node.js project with default configurations by running the below command:
npm init -y
The microservice will handle fetching the data from the WooCommerce store. Therefore, we will need to install two dependencies:
- Axios, to send the request to WooCommerce to get data
- dotenv, for loading the environmental variables
Install them by running the following command:
npm i axios dotenv
Create an index.js, and a .env file inside the project directory. Inside the .env file, add the following:
consumer_key = "your_consumer_key"
consumer_secret = "your_consumer_secret"
Inside the index.js file, import the necessary dependencies:
const http = require('http');
const https = require('https');
const axios = require('axios');
require("dotenv").config();
Next, instantiate an agent to avoid SSL certificate verification:
const agent = new https.Agent({
    rejectUnauthorized: false
});
Define a port on which to run the application:
const PORT = process.env.PORT || 5000;
Then, create the HTTP server and define the functionalities of fetching the products from the store on the specific URL:
const app = http.createServer((req, res) => {
    if (req.url == "/products" && req.method == "GET") {
        // get the token
        let token = `${process.env.consumer_key}:${process.env.consumer_secret}`;
        // get the base 64 encoded string.
        let basic_auth = Buffer.from(token).toString('base64');
        // Send request to get the data.
        axios.default.get('https://18.117.135.240/wp-json/wc/v2/products?per_page=20', {
            httpsAgent: agent,
            headers: {
                'Content-Type': 'application/json',
                'Authorization': 'Basic ' + basic_auth
            }
        })
            .then((response) => {
                // Successful response
                console.log("Successful request");
                res.statusCode = response.status;
                res.writeHead(200, { 'Content-Type': 'application/json' });
                res.end(JSON.stringify(response.data));
            })
            .catch((error) => {
                // Unsuccessful response
                console.log("Unsuccessful request");
                let message = new Error(error.message);
                res.statusCode = 500;
                res.end(JSON.stringify(message));
            })
    }
});
Next, start the server on the specified port:
app.listen(PORT, () => console.log(`App started on PORT ${PORT}`));
On the package.json file, under the scripts section, add the following command:
"scripts": {
    "start": "node index.js"
},
Start the development server. At this point, your microservice is up and running. You can test the functionality by sending a GET request to http://localhost:5000/products via browser or Postman.
Setting up the React Native application
Open the terminal that points to your project directory and run the following command to initialize the application:
npx react-native init woocommerceshop
After the process is done, proceed to the newly created directory:
cd woocommerceshop
If you are running on windows, navigate to the android folder, create a local.properties file, and key in the sdk directory as follows:
sdk.dir = relative_path_to_your_sdk
Finally, start the development server:
npm run android
The default app will be launched on the debugging device you are using, either a real device or an emulator.
Implementing drawer navigation
First, stop the running development server and install the following dependencies:
npm i @react-native-masked-view/masked-view @react-navigation/drawer @react-navigation/native react-native-gesture-handler react-native-reanimated react-native-safe-area-context react-native-screens
On your babel.config.js file, add the react-native-reanimated/plugin as follows:
module.exports = {
    presets: ['module:metro-react-native-babel-preset'],
    plugins: ['react-native-reanimated/plugin']
};
Edit the project.ext.react property in android/app/build.gradle to turn on Hermes as such:
project.ext.react = [
    enableHermes: true,  // <- edit
]
Under the android/app/src/main/java/com/woo_ecommerce_shop/MainApplication.java, add the following imports:
import com.facebook.react.bridge.JSIModulePackage; // <- add
import com.swmansion.reanimated.ReanimatedJSIModulePackage;// <- add
Now, under ReactNaitiveHost initialization in the MainApplication class, add the plugin Reanimated:
@Override
protected JSIModulePackage getJSIModulePackage() {
    return new ReanimatedJSIModulePackage(); // <- add
}
Create an src/screens directory inside the main React Native project folder. Inside the screens folder, create two files: Cart.js for showing the cart, and Home.js for showing the products.
Edit these files to display a simple text.
In the Home.js file:
// Home.js
import React from 'react';
import { View, Text, StyleSheet } from 'react-native';

function Home() {
    return (
        <View style={styles.container}>
            <Text>Home Screen</Text>
        </View>
    );
}

const styles = StyleSheet.create({
    container: {
        flex: 1,
        justifyContent: 'center',
        alignItems: 'center'
    }
});

export default Home;
In the Cart.js file:
// Cart.js
import React from 'react';
import { View, Text, StyleSheet } from 'react-native';

function Cart() {
    return (
        <View style={styles.container}>
            <Text>Cart Screen</Text>
        </View>
    );
}

const styles = StyleSheet.create({
    container: {
        flex: 1,
        justifyContent: 'center',
        alignItems: 'center'
    }
});

export default Cart;
Next, under App.js, add the following imports:
import {NavigationContainer} from '@react-navigation/native';
import {createDrawerNavigator} from '@react-navigation/drawer';
import HomeScreen from './src/screens/Home';
import CartScreen from './src/screens/Cart';
And now we can create a drawer navigator:
const Drawer = createDrawerNavigator();
Inside the App() function, return the NavigationContainer with the drawer navigator specifying the screens:
const App = () => {
    return (
        <NavigationContainer>
            <Drawer.Navigator initialRouteName='Home'>
                <Drawer.Screen name="Home" component={HomeScreen} />
                <Drawer.Screen name="Cart" component={CartScreen} />
            </Drawer.Navigator>
        </NavigationContainer>
    );
};
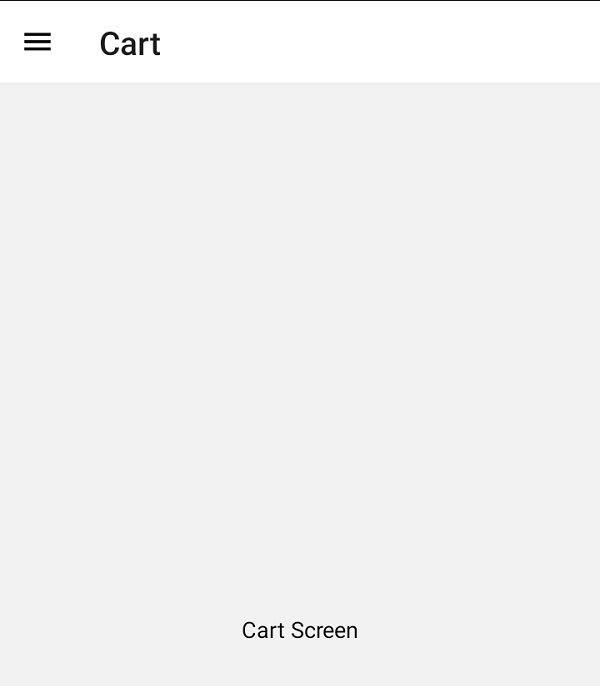
Start the development server to test if the drawer is working. Your application should look similar to the pictures below.
The home screen:

The cart screen:
Setting up application context
In the application's directory, navigate to the src folder created in the previous step. Create a store and a constants directories.
Inside the constants directory, create an index.js file and add the following lines of code:
let constants = {
    url : "http://ip_address:5000/products"
    // URL of the micro-service
}

export default constants;
Make sure you replace ip_address with the local IP address of your computer.
Inside the store directory, create a context.js file. In the file, add the following code blocks.
First, import the necessary dependencies:
import React from 'react';
import {createContext,useState,useEffect} from 'react';
import constants from '../constants';
import axios from 'axios';
Then, instantiate the application context:
const AppContext = createContext();
Next, define the application context provider function:
const AppContextProvider = ({ children }) => {

    // product's state
    const [products, setProducts] = useState([]);
    // cart's state
    const [cart, setCart] = useState([]);
    // loading's state
    const [loading, setLoading] = useState(false);

    useEffect(() => {
        // start loading.
        setLoading(true);
        axios.get(constants.url)
            .then(response => {
                // set the products from the response.
                setProducts(response.data);
            })
             // In case of an error, log it.
            .catch(err => console.log(err));
        // stop loading.
        return setLoading(false);
    }, [products, cart]);

    // remove item from cart
    const removeItem = (id) => {
        // Filter item from cart
        setCart(cart.filter(item => item.id !== id));
    }

    // return the provider with the defined properties.
    return (
        <AppContext.Provider value={{ products, setProducts, cart, setCart, removeItem, loading }}>
            {children}
        </AppContext.Provider>
    )
}
Finally, export the application context and the application context provider:
export {
    AppContext,
     AppContextProvider
}
Now, navigate to the App.js file and import the created AppContextProvider:
import {AppContextProvider} from './src/store/context';
Wrap all the elements rendered on the App() with AppContextProvider like so:
const App = () => {
    return (
        <AppContextProvider>
            <NavigationContainer>
                <Drawer.Navigator initialRouteName='Home'>
                    <Drawer.Screen name="Home" component={HomeScreen} />
                    <Drawer.Screen name="Cart" component={CartScreen} />
                </Drawer.Navigator>
            </NavigationContainer>
        </AppContextProvider>
    );
};
With that, the application is wrapped with one data source.
Because we have not yet installed Axios, stop the development server and run the following command to install it:
npm i axios
Displaying products
Let's display the products listed in the WordPress WooCommerce store. Navigate to the src directory and create a components directory. Inside, create a Products.js file and import these dependencies and modules:
import React, { useContext } from 'react';
import { View, Text, StyleSheet, Button, Image } from 'react-native';
import { AppContext } from '../store/context';
Then, create a Products function to render the products like so:
function Products({ }) {
    const { products, cart, setCart, loading } = useContext(AppContext); // from context
    return (
        <View style={styles.container}>
            {
                loading ? <Text>Loading...</Text> :
                    products.map(product => {
                        let already_in_cart = cart.find(item => item.id === product.id); // Check if item is already in cart
                        return ( // render the product card
                            <View key={product.id} style={styles.product}>
                                <Image source={{ uri: product.images[0].src.replace('https', 'http') }} style={styles.image} />
                                <Text>{product.name}</Text>
                                <Text>${product.price}</Text>
                                <Button
                                    title={
                                        already_in_cart ? "Added to cart" : "Add to cart"
                                    }
                                    onPress={
                                        already_in_cart ? () => null :
                                            () => { // add the item to cart
                                                setCart([...cart, {
                                                    id: product.id,
                                                    name: product.name,
                                                    price: product.price,
                                                    quantity: 1
                                                }]);
                                            }
                                    }
                                />
                            </View>
                        )
                    })}
        </View>
    );
}
Add these styles to format the products. Go ahead and add the following StyleSheet right below your Products function:
// styles for the product card
const styles = StyleSheet.create({
    image: {
        width: 100,
        height: 100,
        borderRadius: 10
    },
    container: {
        flex: 1,
        display: 'flex',
        flexDirection: 'row',
        flexWrap: 'wrap',
    },
    product: {
        width: 180,
        height: 220,
        backgroundColor: '#ccc',
        alignItems: 'center',
        justifyContent: 'center',
        margin: 10
    }
});
Finally, export the Products function so that other modules can access it:
export default Products;
While displaying these products, we need to add a ScrollView that lets the user scroll through the list of displayed product items. To do so, navigate to the Home.js file under the screens folder and import ScrollView from react-native:
import {ScrollView} from 'react-native';
Then, import the Products component we created earlier:
import Products from '../components/Products';
Finally, render the Products component inside ScrollView:
function HomeScreen() {
    return (
        <View style={styles.container} >
            <ScrollView>
                <Products />
            </ScrollView>
        </View>
    );
};
At this point, you should be able to see your products. Your home screen should now display the items like so:

Displaying and removing items in the cart
Let's learn how to display the items to the cart and remove them. On your src/components directory, create a Cart.js file and import the necessary dependencies like so:
import React, { useContext } from 'react';
import { View, Text, StyleSheet, Button } from 'react-native';
import { AppContext } from '../store/context';
Then, define a Cart function to render the cart:
function Cart() {
    // from the context
    const { cart, removeItem } = useContext(AppContext);
    return (
        <View style={styles.container}>
            {
                cart.length > 0 ?
                // render a cart card.
                    cart.map(item => {
                        return (
                            <View key={item.id} style={styles.cart}>
                                <Text style={styles.text}>{item.name}</Text>
                                <Text style={styles.text}>${item.price}</Text>
                                <Text style={styles.text}>{item.quantity}</Text>
                                <Button title="Remove" onPress={() => removeItem(item.id)} />
                            </View>
                        )
                    }) : (
                        <Text style={styles.text}>Cart is empty</Text>
                    )
            }
        </View>
    );
}
Add these styles to format the cart items. Go ahead and add the following StyleSheet right below your Cart function:
const styles = StyleSheet.create({
    container: {
        flex: 1,
        alignItems: 'center'
    },
    text: {
        fontSize: 15,
        color: "#000"
    },
    cart: {
        padding: 10,
        backgroundColor: "#fff",
        width: '90%',
        borderRadius: 20,
        margin: 10
    }
});
Finally, export the Cart function so that other modules can access it:
export default Cart;
To enable ScrollView to the cart items, navigate the Cart.js file under screens and import ScrollView:
import {ScrollView} from 'react_native';
Then import the Cart component:
import Cart from '../components/Cart';
Inside the render function, render the Cart component wrapped in the ScrollView component like so:
function CartScreen() {
    return (
        <View style={styles.container}>
            <ScrollView>
                <Cart />
            </ScrollView>
        </View>
    );
}
Also, update the cart's container and text styles as follows:
const styles = StyleSheet.create({
    container: {
        flex: 1,
        justifyContent: 'center',
    },
    text: {
        color: "#000"
    }
});
On the home screen, add various items to the cart by tapping on the ADD TO CART button, then proceed to the cart screen. Your items will be listed similarly to what is show in the photo.

You can also tap Remove to remove any item from the cart.
Showing a specific product
Because some of the descriptions of the products will have HTML tags, we will need to install the React Native HTMLView package. Make sure you have stopped the development server before you install:
npm i react-native-htmlview
When the installation is done, on the src/screens directory, create a Product.js file. In this file, import the necessary dependencies and modules:
import React, { useState, useContext } from 'react';
import { View, Text, StyleSheet, Image, TouchableOpacity, Button } from 'react-native';
import HTMLView from 'react-native-htmlview';
import { AppContext } from '../store/context';
Next, create the Product function for rendering the product:
function Product({ route, navigation }) {
    // Get the dynamic product from the params.
    const { product } = route.params;
    // get the cart and the setcart from the application context
    let { cart, setCart } = useContext(AppContext);
    // check if item already in cart
    let already_in_cart = cart.find(item => item.id === product.id);
    // set the quantity
    let [quantity, setQuantity] = useState(already_in_cart ? already_in_cart.quantity : 1);
    return (
        <View style={styles.container}>
            <View style={styles.imageContainer}>
                <Image source={{ uri: product.images[0].src.replace('https', 'http') }} style={styles.image} />
            </View>
            <Text style={styles.text}>
                {product.name}
            </Text>
            <Text style={styles.text}>
                ${product.price}
            </Text>
            <HTMLView value={product.short_description} stylesheet={{
                p: {
                    fontSize: 15,
                    color: '#000',
                    //textAlign:'center',
                    width: '100%',
                    padding: 10
                }
            }} />
            <View style={styles.quantityContainer}>
                <Text style={styles.text}>Quantity</Text>
                <View style={styles.quantity}>
                    <TouchableOpacity onPress={() => quantity > 1 ? setQuantity(quantity - 1) : null}>
                        <Text style={styles.text}>-</Text>
                    </TouchableOpacity>
                    <Text style={styles.text}>{quantity}</Text>
                    <TouchableOpacity onPress={() => setQuantity(quantity + 1)}>
                        <Text style={styles.text}>+</Text>
                    </TouchableOpacity>
                </View>
            </View>
            <View style={styles.buttonContainer}>
                <Button onPress={() => {
                    already_in_cart ? setCart(cart.map(item => item.id === product.id ? { ...item, quantity: quantity } : item)) :
                        setCart([...cart, {
                            id: product.id,
                            name: product.name,
                            price: product.price,
                            quantity: quantity
                        }]);
                    navigation.navigate('Cart')
                }} title={
                    already_in_cart ? "Update cart" : "Add to cart"
                } />
            </View>
        </View>
    );
}
Add some styling for the product:
const styles = StyleSheet.create({
    container: {
        flex: 1,
        //alignItems:'center',
        justifyContent: 'center',
    },
    imageContainer: {
        //textAlign:'center',
        width: '100%',
        display: 'flex',
        justifyContent: 'center',
        alignItems: 'center',
    },
    text: {
        fontSize: 18,
        color: '#000',
        padding: 10
    },
    image: {
        width: 200,
        height: 200,
        borderRadius: 10,
    },
    quantityContainer: {
        display: 'flex',
        flexDirection: 'row',
        justifyContent: 'space-between',
        alignItems: 'center',
        padding: 10
    },
    quantity: {
        display: 'flex',
        flexDirection: 'row',
        justifyContent: 'center',
        alignItems: 'center',
    },
    buttonContainer: {
        width: '100%',
        padding: 10,
    }
});
And export the product function:
export default Product;
Now, under the App.js file, import the module we have just created:
import ProductScreen from './src/screens/Product';
We will define the module inside the Drawer.Navigator component. Then, style it so as not to display it on the drawer because it is dynamic:
<Drawer.Screen name="Product" component={ProductScreen} options={{
    drawerItemStyle: {
        display: "none"
    }
}} />
Under src/components/Products.js, import TouchableOpacity from react-native:
import {TouchableOpacity} from 'react-native';
When rendering the product image and name, wrap each of them with the TouchableOpacity component passing the dynamic product data:
<TouchableOpacity onPress={() => navigation.navigate('Product',{product})}>
<Image source={{uri:product.images[0].src.replace('https','http')}} style={styles.image}/>
</TouchableOpacity>
<TouchableOpacity onPress={() => navigation.navigate('Product',{product})}>
<Text>{product.name}</Text>
</TouchableOpacity>
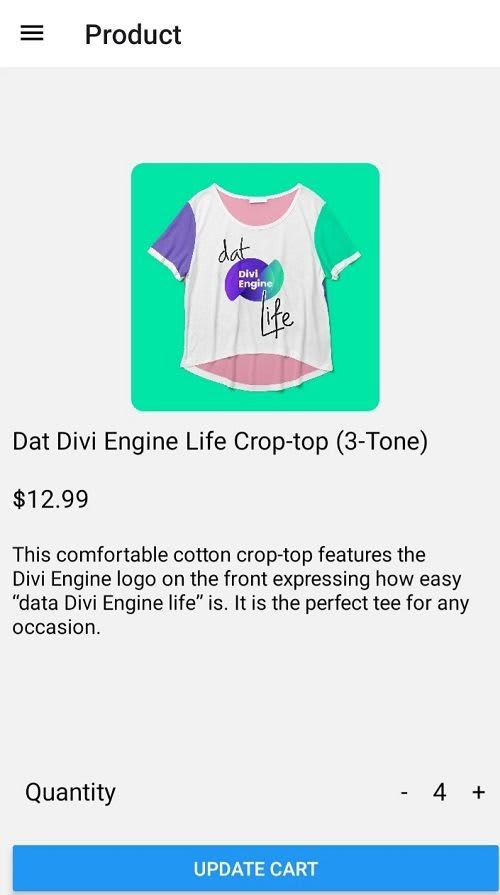
At this point, everything is set! On the home page, click on any product's image or title, and you should be redirected to a new single product screen, as shown in the image below.
Conclusion
WooCommerce is one of the popular open source ecommerce plugins available for WordPress. It gives you the flexibility to set up any store you can think of. WooCommerce's ability to generate APIs for your store gives you the power to select the ideal platforms to reach out to various users.
In this guide, we learned how to use WooCommerce in a React Native mobile app, but you can use the same API, develop any application, and run them on different platforms.
I would suggest going ahead and adding other modules such as a checkout and payment integration of your choice.
I hope you found this helpful!
If you get stuck, check the code used in this tutorial on GitHub.
LogRocket: See the technical and UX reasons for why users don’t complete a step in your ecommerce flow.

LogRocket is like a DVR for web and mobile apps and websites, recording literally everything that happens on your ecommerce app. Instead of guessing why users don’t convert, LogRocket proactively surfaces the root cause of issues that are preventing conversion in your funnel, such as JavaScript errors or dead clicks. LogRocket also monitors your app’s performance, reporting metrics like client CPU load, client memory usage, and more.
Start proactively monitoring your ecommerce apps — try for free.


Top comments (0)