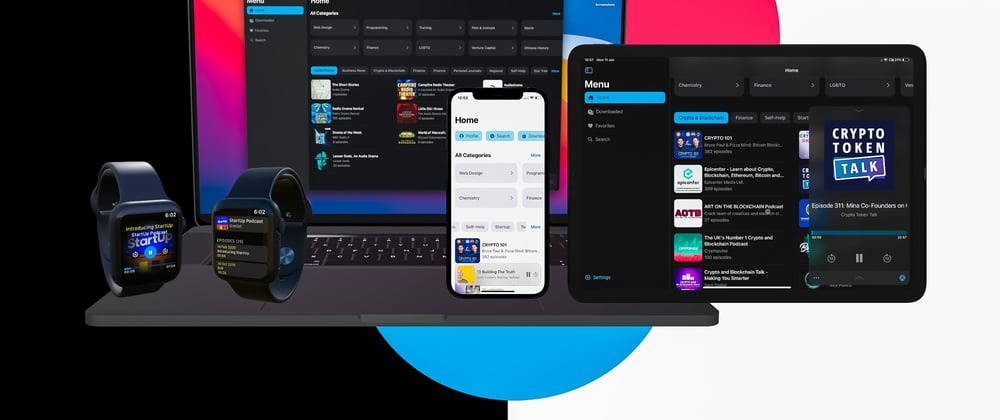
Hey reader, this is a lesson taken from my premium course in which we are building the app you see in the picture above or the video below, from scratch through videos and written lessons. We will. build the app for iOS, iPadOS, macOS and watchOS. If you are interested, come join us at https://liquidcoder.com.
Here is a glimpse of what we are building.
Requirements
To follow along, you need:
- Xcode 12 or greater
- MacOS Big Sur or greater
- Swift 5.0 or greater
- iOS 14 or greater
Get started
Open Xcode,
Create a new Xcode project,
Select App and click next
Name your app StreamCast and make sure the user interface is Swift UI
Make sure to select 'Use Coredata' and 'Host in CloudKit'

Then click Next.
You can choose to create git right now or you can create it later
And last click on the create button
Watch os target
The project we've just created only has iOS/iPadOs and macOS targets, but does not have a watchOS one, so before going any further, let's add the watchOS target as well.
Open the project if it is not already and click File → New → Target. Select the watchOS tab, then watch App for iOS App.

Then on the next screen, name the target watchOS and leave everything as is, but make sure Include Notification Scene is checked.

When prompted by Xcode to activate the complication scheme, click cancel.

Now that you have the watch os target created, let's take care of some minor details before we continue.
Select the project (.xcodeproj file), then watchOS Extension, make sure the support Running Without iOS App installation is checked.
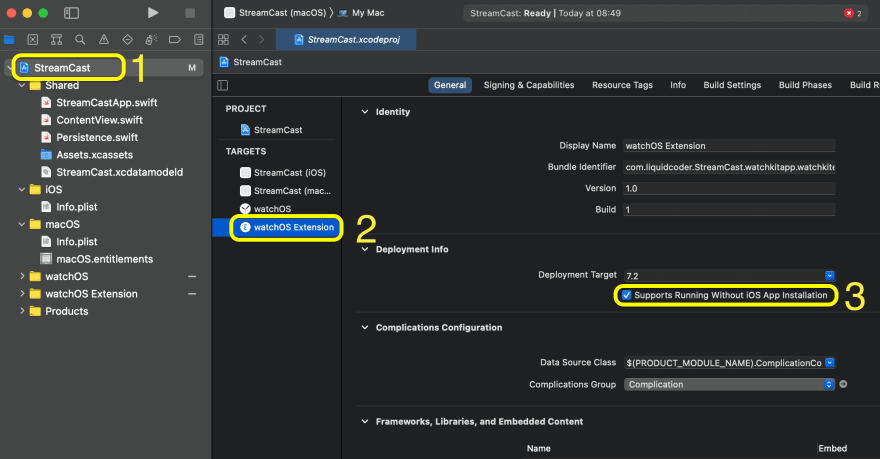
And with that done, let's now setup the environment configurations.
Project environment setup
It’s always a best practice to have separate environments for your iOS apps. let me explain.
The purpose of us creating multple enviroments is to prevent messing with the production one. maybe you have 2 different api keys or api urls for testing and production, it would tedius and error-prone to change them every time you want to test one or the other, so it is important to take some time when you start a new project to setup your enviroments correctely. This will also allow you to install multiple variants of the same app on a single device. When you are done, you will able to run any of the environments on demand.
We will have 3 environments, and each one of them will have a debug and a release configuration. So we will have:
- Development: this is what we will mostly work with throughout this course.
- Staging : This is the one that you would typical give to your investors as a preview.
- Production: This is the official one, the one to deploy to the app store
Setting up different environments in Xcode is not as straight forward as it should be, but it will make sense as we go along.
If you don't want to setup the project with multiple environments, you can download the starter project without multiple environment that I have included to the project content in the floating menu.
Configurations
Open the project settings by clicking on the project file, then select the project, and under the info tab, find the Configurations section. Right now, we only have 2 configurations. So Let's now add some more.
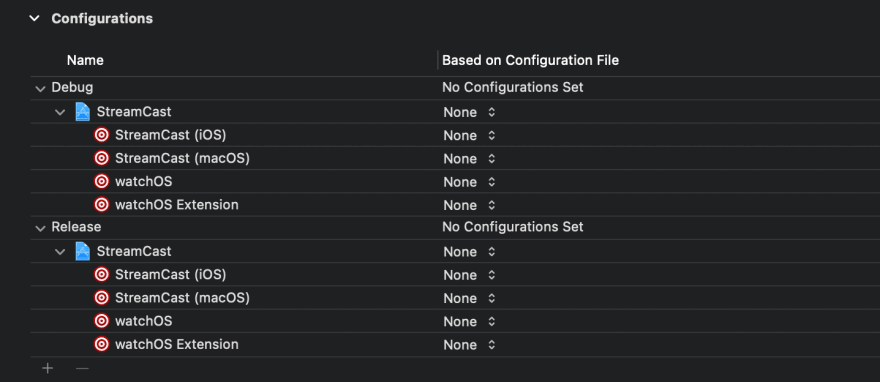
Now click the plus (+) button under configurations, and duplicate each configuration two times, and rename the duplicates [CONFIGURATION].[ENVIRONMENT] and [CONFIGURATION].[ENVIRONMENT] where [CONFIGURATION] will either be Debug or Release and [ENVIRONMENT] will either be staging or development. The original ones will stay that way because they will be used for production.

When you are done, you should have something like this.

Schemes
An Xcode scheme defines a collection of targets to build, a configuration to use when building, and a collection of tests to execute.
You can have as many schemes as you want, but only one can be active at a time. You can specify whether a scheme should be stored in a project—in which case it’s available in every workspace that includes that project, or in the workspace—in which case it’s available only in that workspace. When you select an active scheme, you also select a run destination (that is, the architecture of the hardware for which the products are built).
Every Xcode project comes with one scheme for both the debug and release configurations. Having added 2 more configurations (staging and development), we will also need to add 2 schemes for those as well.
To add a new scheme, you need to open the scheme manager located in the Xcode toolbar, select whichever target is currently displayed, and click manage schemes...

Or go to Product → Scheme → Manage Schemes...

Right now, here is what we have. We will need to duplicate each one of those twice, except the watchOS (Notification).

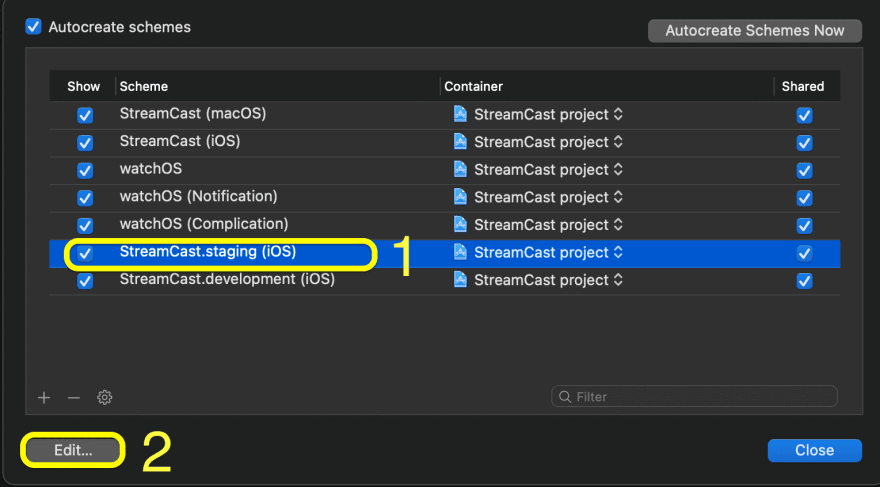
The process is almost the same like what we've done with the configuration, but you will need to verify that the configurations are correctly set for each action. So click the plus (+) button, and choose the target you want to duplicate and rename it to YouAppName.staging or YourAppName.development. Once that's done, select the scheme you've just added then click the Edit... button on the bottom-left corner
Take a look at this image as an example :
When you click on the Edit... button, another dialogue will be opened, and here we need to make some more changes. Depending on whether it's staging or development, we need to set the correct build configurations. We need to make sure the build configuration is set to the correct [CONFIGURATION].[ENVIRONMENT]. So if, for example , the scheme you are editing is staging , you need to replace the Debug or Release with Debug.staging or Release.staging. when you are done, click manage schemes again, and duplicate the next one and so on until you have 2 copies for each scheme.

When you are done, you should have something this:

Configuration settings
So, we have all configurations, environments and schemes stuff done, what's next? The purpose of us creating multiple environments for each configuration is to allow us not only to build and run the app with different behaviours, but also to be able to install the same app with 3 different bundle id on a single device.
So we need an easier way of setting and changing configurations values based on environment. We will use .xcconfig files for that job.
So, in the Shared folder, create a folder named Configs, and inside it *****create an *xcconfig** file. The process is the same as before, but this time you need to choose a Configuration Settings File.

Name the first file Development , and make sure all targets are checked.

Repeat the process for Staging and Production.
Now that we have those config files, the next step, before adding anything inside them, is to add them to their respective configurations in the project settings.
Open the project settings by clicking on the project file, then select the project, then under the info tab, find the Configurations section.
As you can see above, there's no configuration file set... So let's do that now. The Production.xcconfig file will be set to the Production environment (the ones without an environment suffix), and the remaining 2 will be set respectively to the staging and development environments
When you are done, you have should something like this:

As far as the hard stuff are concerned, we are done. Everything that remain are relatively easy.
Adding values in xcconfig files
The first values we will add are the names and bundle identifiers. As I said, different bundle identifiers will allow us to install 3 variants of the same app on the same device.
Add the following values in each of the files:
Development.xcconfig
APP_BUNDLE_IDENTIFIER = com.liquidcoder.StreamCast.development

APP_NAME = StreamCast Development

APP_ICON_NAME = AppIcon.development
Staging.xcconfig
APP_BUNDLE_IDENTIFIER = com.liquidcoder.StreamCast.staging

APP_NAME = StreamCast Staging

APP_ICON_NAME = AppIcon.staging
Production.xcconfig
APP_BUNDLE_IDENTIFIER = com.liquidcoder.StreamCast

APP_NAME = StreamCast

APP_ICON_NAME = AppIcon
App icons
Before we continue, you will need to download app icons. When you unzip the folder, you will find them like this.

Just like the names in the config files, the AppIcons in the asset catalogues will contain the same environment names after AppIcon, except the Production one.
If you open the Assets.xcassets folder, you will see something like this:
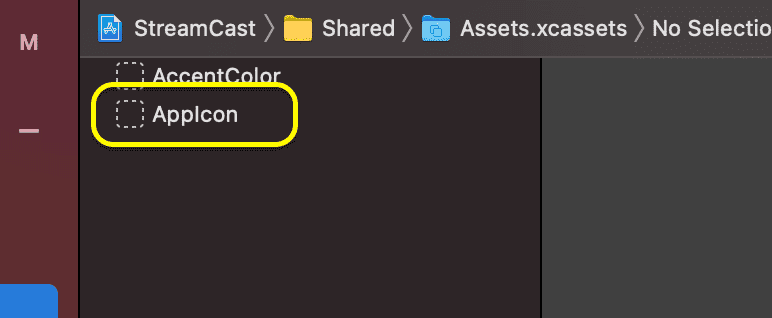
Leave that AppIcon as it is, it will be used for production... Let's now add staging and development ones. Inside the Asset folder, tap the "+" button located at the bottom of the page, and select iOS then iOS App Icon. Rename the AppIcon-1 to AppIcon.development.

Now while the new AppIcon.development is selected, open the project inspectors, and make sure Mac and Apple Watch are checked in the attributes inspector settings. When you are done, do the same thing for staging.

Now the next step is to copy the icons you've downloaded over to the project. However, before we do that, you will need to include the shared Assets.xcassets folder to WatchOS target and remove the Assets.xcassets in the WatchOS for its target. While the Assets.xcassets folder is selected, open the file inspector , located on the right of Xcode inside the project inspectors, and check the watchOS target for the shared one and uncheck the watchOS target in the watchOS folder, like this:
Shared

WatchOS

Having done that, you will now open the Assets.xcassets folder in finder and start copying the content of the Icons folders to your project . You will need to drag and drop the AppIcons in the actual project, and when prompted to replace the older ones, click replace.

Configs in info.plist and project settings
Info.plist
We need to update the existing configuration values in the info.plist. The entries to update will be bundle identifier and the bundle name.
iOS and macOS
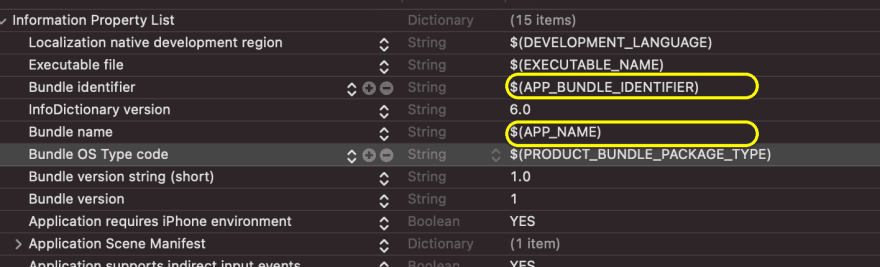
Let's start with info.plist files first. We will first modify the iOS and macOS info.plist files. So, open the info.plist in the iOS target, and replace the $(PRODUCT_BUNDLE_IDENTIFIER) with $(APP_BUNDLE_IDENTIFIER) and $(PRODUCT_NAME) with $(APP_NAME) .
The 2 info.plist files should look like this:
iOS
macOS

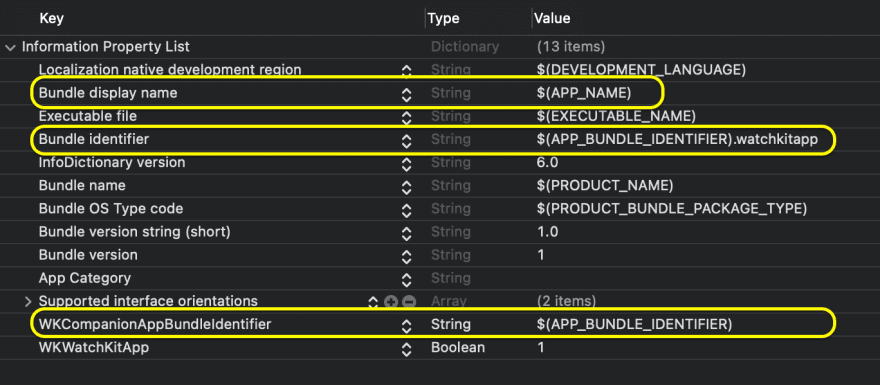
watchOS and watchOS Extension
In the watchOS info.plist, we will change 3 configurations. You will need to replace the Bundle *identifier* value with $(APP_BUNDLE_IDENTIFIER).watchkitapp and Bundle display name with $(APP_NAME) . Now find the WKCompanionAppBundleIdentifier , and change its value to $(APP_BUNDLE_IDENTIFIER) .
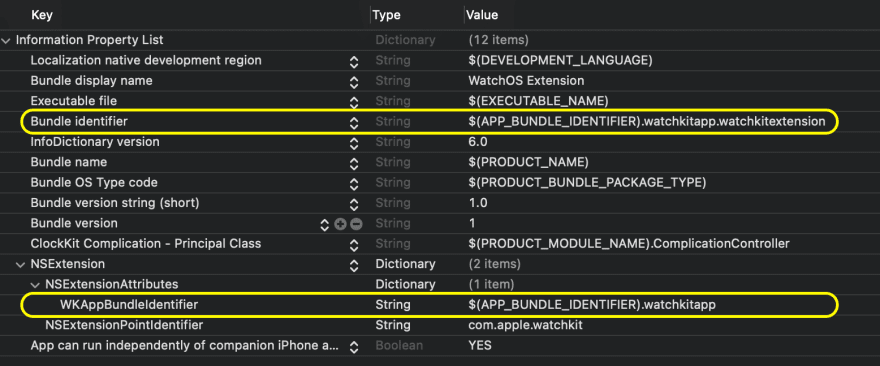
Next in the watchOS Extension, we will change 2 configurations. Replace the bundle identifier value with $(APP_BUNDLE_IDENTIFIER).watchkitapp.watchkitextension . Last, find the WKAppBundleIdentifier, located under NSExtension → NSExtensionAttributes, replace its value with $(APP_BUNDLE_IDENTIFIER).watchkitapp
Project settings
Open the project settings by clicking on the project file.
Let's change the iOS target first. While the target is selected, start typing in the search field this "bundle identifier". Now replace the value of Product Bundle Identifier with $(APP_BUNDLE_IDENTIFIER) , and when you tap return or enter, you will see every configuration has its corresponding bundle identifier.
Again, start typing "Product name" in the search, and replace the value of the product name with $(APP_NAME). This works the same as the bundle identifier.
And last for the iOS target, start typing "asset catalogue", and you should get something like few values, now under Asset Catalogue Compiler, change the Asset Catalogue App Icon Set Name $(APP_ICON_NAME)
Now you will do the exact same thing for the macOS target as well. However, for the watchOS and watchOS Extension targets, the bundle identifier will be different, make sure it correspond to the values that are in the info.plist files respectively. For the App icon, only change the watchOS target. Bundle display name
This is the end of lesson #1, if you want to test run each environment, just select a scheme in the XCode toolbar and choose a device to run on. Happy coding guys!


Top comments (0)