Cloudflare Pages was recently just released in public beta and I'm very happy to give it my first try. In this tutorial, we'll walk through a step-by-step process of deploying a Nuxt.js application using Cloudflare Pages.
What is Cloudflare Pages?
Pages is a platform for deploying your frontend application. It is super-fast, always up-to-date, and deployed directly from your GitHub account.

Getting Started
Let's start with creating a Nuxt.js website. I wanted the core of the tutorial to be Cloudflare Pages so I went with a minimal demo. To set up a new Nuxt.js app you need to use the command:
npx create-nuxt-app cloudflare-demo
or
yarn create nuxt-app cloudflare-demo
You'll get prompted to answer some questions like what UI framework, Linter, Testing Framework you want to use. we'll skip all that but pick Tailwind CSS as the UI library of choice instead of writing our CSS from scratch.
After following this, all the dependencies will be installed and our project is now ready to work with.
To start your local environment and get into coding, run the following:
cd cloudflare-demo
yarn dev
The application should now be available on localhost:3000!
Designing the Demo
With our application now running, you get a landing page template from Nuxt as a default but instead of just deploying this. Let's twerk it a bit before deploying.
If you want to learn more about Nuxt.js, I wrote a getting started guide on it.
For this demo, we'll make a few edits to the already existing pages/index.vue.
<template>
  <div>
    <div>
      <img src="https://giftegwuenu.com/deployment-with-cloudflare-pages/~assets/cloudflare.svg" alt="Cloudflare Pages" width="350">
      <h1>
        Deploy your Jamstack Website with <a href="https://pages.cloudflare.com/"> Cloudflare Pages.</a>
      </h1>
    </div>
    <div>
      <a href="https://pages.cloudflare.com/">
        Learn More
      </a>
    </div>
  </div>
</template>
And a few changes made to the styling:
<style>
.container {
  margin: 0 auto;
  min-height: 100vh;
  display: flex;
  flex-direction: column;
  justify-content: center;
  align-items: center;
  text-align: center;
}

.title {
  font-family:
   -apple-system, system-ui, "Segoe UI", Roboto, Oxygen, Ubuntu, Cantarell, "Fira Sans", "Droid Sans", "Helvetica Neue", sans-serif;
  font-weight: 400;
  color: hsl(0, 30%, 10%);
  letter-spacing: 1px;
}
</style>
All code snippets can be found on the GitHub Repo.
Deploy to Cloudflare Pages
Now, let's get to the fun part. To deploy the app we just created we need to follow a couple of steps which I'll outline: First, you need a Pages account if you don't have one yet, you can create yours now.
Next, we can create a new project.
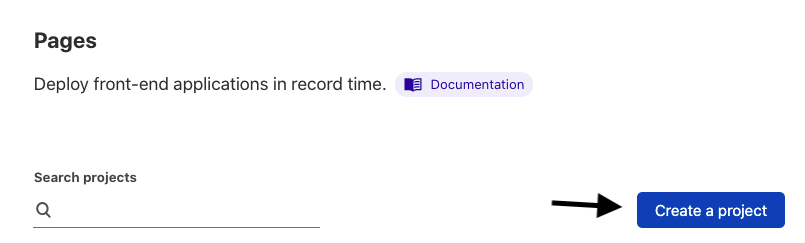
Click the create a project button, and that leads to a page where you can connect your GitHub account. After connecting to GitHub you can select the project you want to deploy from the list of repos displayed.

After you select a project from GitHub, we need to set up the build commands so that when a commit is triggered Cloudflare knows to use the command set to build your website.
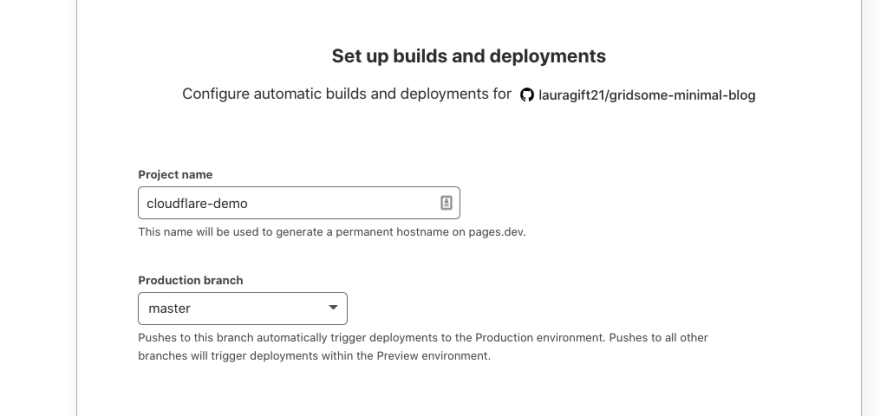
You can set a custom name you want to use as a hostname on pages.dev and also select the production branch in our case this is the master branch.

You also need to set up build settings, there are different framework presets to choose from which makes it easier for you if you don't find the framework you are using or feel you don't need to use any of this then you can directly input your commands in the fields provided. We'll use the Nuxt.js preset for this and if there's a need to set up a default root directory or add environment variables you can also do that here.

We don't need any of that, so let's click the save and deploy button to kick off the first build process. You'll be redirected to a page with a deploy log and details where you can see the current progress of the ongoing deployment.

After the build completes and is successful you get a deploy URL where you can see the version of the app that was deployed. This was fast and this screenshot isn't the first build I made but the first build took around 7 secs to deploy and I'm very impressed with that.
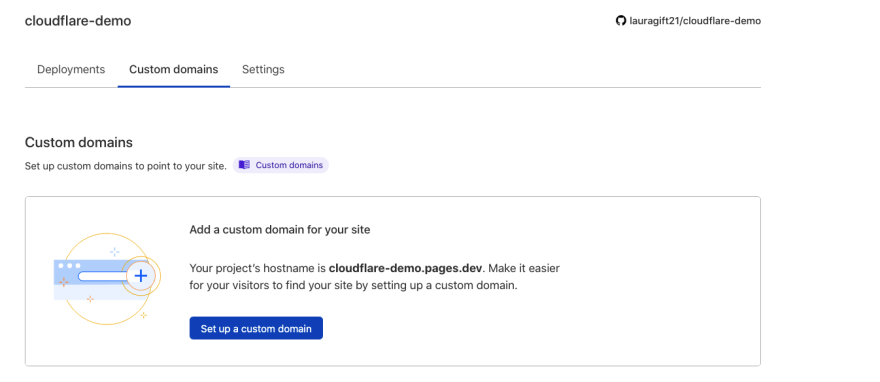
What else can you do?
You can set up a custom domain for your website and also access the deployment settings incase you need to change anything.
Resources
Cloudflare Pages Docs
A first look at Cloudflare Pages
If you prefer a video version of this tutorial. I made one on my channel check it out and please subscribe 😁


Latest comments (1)
very straightforward indeed. I might switch out of netlify now