Sometimes, in our test code, we need to handle actions that apparently could not be done automatically. For example, some mouse actions such as context click, double click, drag and drop, mouse movements, and some special key down and key up actions. These specific actions could be crucial depending on the project context.
Together Python & Selenium are the third most popular technology according to Stack Overflow Developer Survey 2021 and the most used frontend test automation framework. Test automation has become essential in all software development projects because agile business needs increasingly require faster development and delivery.
In this Selenium Python tutorial on how to automate mouse clicks with Selenium Python, we will learn how to automate essential mouse click actions with Python and Selenium using the ActionChains library. We will learn from the prerequisites needed to install and configure your environment to run the tests directly on cloud Selenium Grid like LambdaTest.
So, let’s get started!
Why Python & Selenium for Test Automation?
Python was created to be simple, open-source, with excellent readability, and a cross-platform language (it can run on any operating system and device).
When writing this blog on how to automate mouse clicks with Selenium Python, 3.11 is the latest version of Python. It is a programming language that is constantly being updated and has excellent community support.
According to Stack Overflow Trends, Python has gained prominence over the years and has become the most popular language, as seen in the chart below.

Python is one of the most used programming languages for test automation, and there are many reasons for it. If you want to learn more about it, you can check out this blog on Python automation testing.
Python automation testing with Selenium is a killer combination for web automation testing. Selenium is open-source and one of the most popular test automation frameworks that support six popular programming languages, including Python. When writing this blog on how to automate mouse clicks with Selenium Python, the latest version of Selenium is Selenium 4.

What is ActionChains?
ActionChains is a Python library that lets you automate low-level interactions such as context click, double click, drag and drop, mouse movements, and some special key down and key up actions. ActionChains is very useful for executing complex actions using the keyboard and mouse.
To use the ActionChains library, you need to create an ActionChains object that can call methods to perform some actions sequentially, one by one. The called actions are pushed into a queue, and when calling the “perform” method, they are fired and performed in the same order in which they were queued.
Syntax:
First, we would like to show you how to create an object using the ActionChains library.
# import Action chains
from selenium.webdriver.common.action_chains import ActionChains
# create action chain object
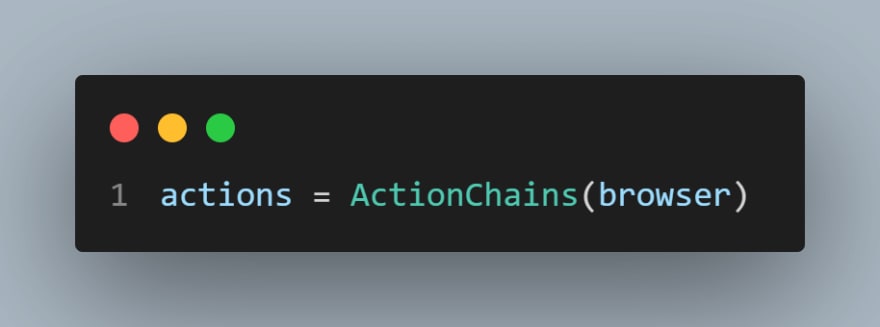
action = ActionChains(browser)
To use the ActionChains method, you just need to import the library and instantiate the object in a variable, calling the library constructor passing the browser element that is the instance of the browser that the actions will be executed.
ActionChains supports a lot of mouse actions. Below are all the methods (mouse and keyboard) supported by the ActionChains library:
click
Description: Performs a click operation on an element.
Syntax: click(element)
- element: WebElement to be clicked with the left mouse button.
click_and_hold
Description: Performs the action of holding the left mouse button to an element.
Syntax: click_and_hold(element)
- element: WebElement to be clicked and held with left mouse button
context_click
Description: Performs a right-click operation on an element.
Syntax: context_click(element)
- element: WebElement to be clicked with the right mouse button.
double_click
Description: Performs a double-click operation on an element.
Syntax: double_click(element)
- element: WebElement to be clicked twice with the left mouse button.
drag_and_drop
Description: Performs the action of holding the left mouse button on the source element. Then moves to the target element and finally releases the mouse button.
**Syntax: **drag_and_drop(element, target)
*element: *WebElement to mouse down.
target: WebElement to mouse up.
drag_and_drop_by_offset
Description: Performs the action of holding the left mouse button on the source element. Then moves to the target offset and finally releases the mouse button.
Syntax: drag_and_drop_by_offset (element, xoffset, yoffset)
element: WebElement to mouse down.
xoffset: X offset to move the element to.
yoffset: Y offset to move the element to.
key_down
Description: Performs a key press only action without releasing it. It should only be used by modifier keys like CTRL and ALT.
Syntax: key_down(key)
- key: Key to be pressed.
key_up
Description: Releases a key that was previously pressed.
Syntax: key_up(key)
- key: Key to be released.
move_by_offset
Description: Performs movement of the mouse to an offset from the present position of the mouse.
Syntax: move_by_offset(xoffset, yoffset)
xoffset: X offset to move to.
yoffset: Y offset to move to.
move_to_element
Description: Performs mouse movement to the middle of the element.
Syntax: move_to_element(element)
- element: WebElement where the mouse should be moved to.
move_to_element_with_offset
**Description: **Performs movement of the mouse by the offset of the element specified on the page. The offsets are for the top left corner of the element.
Syntax: move_to_element_with_offset(element, xoffset, yoffset)
element: WebElement to move to.
xoffset: X offset to move to.
yoffset: Y offset to move to.
perform
Description: Performs all the actions queued one after the other.
Syntax: perform()
pause
Description: Performs stopping all inputs for a particular duration of time.
Syntax: pause(seconds)
- seconds: Duration (in seconds) to pause a particular input action.
release
Description: Performs releasing a held mouse button on an element.
Syntax: release(element)
- element: WebElement to be released.
reset_actions
Description: Performs the action of resetting all the actions stored locally and on to the remote end.
Syntax: reset_actions()
send_keys
Description: Performs the action of sending keys to the present element, which is focused. It can also be used for modifier keys, like CTRL, ALT, and more. You can also use a combination of different keys by leveraging ActionChains in Selenium Python.
Syntax: send_keys(keys)
- keys: Keys to be sent.
We will see some of the frequently used actions in the further sections of this blog on how to automate mouse clicks with Selenium Python.
Run your Python automated scripts on 3000+ browser environments. Try LambdaTest Now!
Demonstration: How to automate mouse clicks with Selenium Python?
The primary purpose of this blog is to show you how to automate mouse clicks with Selenium Python in Chrome web pages on a Windows device.
We are going to do this by executing the following test scenarios, that will demonstrate the usage of the following ActionChains methods:
double_click
click
context_click
move_to_element
move_to_element_with_offset
move_by_offset
drag_and_drop
drag_and_drop_by_offset
The demonstration will be done on a cloud Selenium Grid like LambdaTest, a continuous quality testing cloud platform that helps developers and testers ship code faster. Cloud-based cross browser testing platforms like LambdaTest provides an online browser farm of 3000+ browsers and operating systems to perform Selenium Python testing at scale.
You can also Subscribe to the LambdaTest YouTube Channel and stay updated with the latest tutorials around automated browser testing, Selenium testing, Cypress E2E testing, CI/CD, and more.
To run the test on the LambdaTest cloud grid is to use the capabilities to configure the environment where the test will run.
In this blog on how to automate mouse clicks with Selenium Python, we are going to run the tests with the following characteristics:
Selenium 4
OS: Windows 11
Browser: Chrome
Browser Version: “latest”
Resolution: 1024 x 768
You can generate the capabilities code from the LambdaTest Capabilities Generator.

The generated code for our environment is presented below.
capabilities = {
    'LT:Options' : {
        "user" : "Your LambdaTest Username",
        "accessKey" : "Your LambdaTest Access Key",
        "build" : "your build name",
        "name" : "your test name",
        "platformName" : "Windows 11",
    },
    "browserName" : "Chrome",
    "browserVersion" : "103.0",
}
You have to put this code just after the imports and fill in the variables with the proper information.
Then you should configure these three variables.
username = "Your LambdaTest Username"
accessToken = "Your LambdaTest Access Token"
gridUrl = "hub.lambdatest.com/wd/hub"
You can get the “Username” and “Access Token” from your LambdaTest Profile Section.
Finally, you have to set the URL where the test will run, with a default format, and the code that will instantiate the driver in a variable called “browser”.
url = "https://" + username + ":" + accessToken + "@" + gridUrl
    browser = webdriver.Remote(
        command_executor=url,
        desired_capabilities=capabilities
    )
Prerequisites: Setup Process
To start our coding, we need to proceed with the following steps to set up Python, Selenium, and Visual Studio Code.
Step 1: Download and Install Python
First, you must download and install Python according to your operating system.
Step 2: Install Selenium WebDriver
Selenium WebDriver can be installed simply using the pip install manager. PIP is a package management system used to install/manage packages and libraries written in Python.
pip install selenium
**Quick Note: **ActionChains is installed within the Selenium WebDriver library, so you just need to use it.
Step 3: Download and Install Visual Studio Code
Visual Studio Code (VSC) is one of the most used coding IDEs. For our coding demonstration, we are going to use Visual Studio Code.
You are free to use your preferable IDE; everything that we will show in this blog on how to automate mouse clicks with Selenium Python will work in any IDE. Choose yours!
Opening a webpage on Chrome
According to our test scenarios, we first need to open a specific webpage. We will show how you can do this for the first scenario webpage, the Table Sort And Search LambdaTest Playground page, and you can use the same code for the other scenarios, just changing the URL.
First, you must import the Selenium WebDriver that is needed for Selenium WebDriver to interact with the browser.
from selenium import webdriver
from selenium.webdriver.chrome.service import Service
Then, you have to insert LambdaTest capabilities as shown in the previous session, inform the URL in the correct structure for running in the LambdaTest grid, and then instantiate the driver in a variable called “browser”.
url = "https://"+username+":"+accessToken+"@"+gridUrl
browser = webdriver.Remote(
    command_executor=url,
    desired_capabilities=capabilities
)
Finally, you need to use the browser instance to access the desired webpage, using the function “get” and informing the URL of the website that should be opened.
browser.get(“https://www.lambdatest.com/selenium-playground/table-sort-search-demo")
Extra Tip 1: If you want a better view, you can maximize your browser window using the below code right after the driver instantiation.
browser.maximize_window()
Extra Tip 2: You should use the below code to close the browser window when finishing your test. This code must be the last line of your script.
browser.quit()
For more tips, refer to our blog on 16 Selenium Best Practices for Efficient Test Automation to efficiently use Selenium WebDriver.
How to perform Double Click on an element in Selenium with Python?
We would use the double_click(element) method of ActionChains to double-click on a WebElement in the DOM. Shown below is the test scenario:
Test Scenario:
You can view the page where we will automate some actions in the picture below.

Implementation:
from selenium.webdriver.common.by import By

from selenium import webdriver
from selenium.webdriver.chrome.service import Service

from selenium.webdriver.common.action_chains import ActionChains

#lambdatest setup and opening the desired website
username = "Your LambdaTest Username"
accessToken = "Your LambdaTest Access Key"
gridUrl = "hub.lambdatest.com/wd/hub"

capabilities = {
    'LT:Options' : {
        "user" : "Your LambdaTest Username",
        "accessKey" : "Your LambdaTest Access Key",
        "build" : "your build name",
        "name" : "your test name",
        "platformName" : "Windows 11",
    },
    "browserName" : "Chrome",
    "browserVersion" : "103.0",
}

url = "https://"+username+":"+accessToken+"@"+gridUrl

browser = webdriver.Remote(
    command_executor=url,
    desired_capabilities=capabilities
)

browser.maximize_window()
browser.get("https://www.lambdatest.com/selenium-playground/table-sort-search-demo")

#locating the element
age_sorting = browser.find_element(By.XPATH, value="//th[@aria-label='Age: activate to sort column ascending']")

# create action chain object
actions = ActionChains(browser)
actions.double_click(age_sorting)
actions.perform()

#asserting that the first two values are 66
first_age = browser.find_element(By.XPATH, value="//tr[1]//td[@class='sorting_1']")
second_age = browser.find_element(By.XPATH, value="//tr[2]//td[@class='sorting_1']")

assert first_age.text == "66"
assert second_age.text == "66"

#closing the browser
browser.quit()
Code Walkthrough:
The first part of the script will be the necessary code to open the desired page, as shown in the previous section of this blog on how to automate mouse clicks with Selenium Python.

Then, we need to locate the element we will double-click. In this scenario, will be the Age column title.
First, you must import the By method from selenium.webdriver.common.by.

Then, you should locate the element using XPath. You can see the page elements information, and you will find the Age column title element.

As you can see, the element is shown in the details below. We can locate this element using the “th” element, which has the “aria-label” attribute with the “Age: activate to sort column ascending” value. We are going to store the element in a variable called age_sorting.
<th class=”sorting” tabindex=”0" aria-controls=”example” rowspan=”1" colspan=”1" aria-label=”Age: activate to sort column ascending” style=”width: 25.3906px;”>Age</th>
The code for locating the element is shown below.

For more information about how to automate mouse clicks using Selenium Python, you can look at this blog on how to automate web forms with Python. You can check our XPath Locators Cheat Sheet to learn more about using XPath.
After locating the element, we will create the most important part of the code, which is to use ActionChains to double-click the element.
First we need to instantiate an ActionChains element, which we will call “actions”, as was shown in the previous session.

Then, we should use the ActionChains method “double_click”, informing the element we want to double-click that it is stored in the age_sorting variable.

Finally, we need to execute the ActionChains method “perform.
To check if after the double click, the first two lines of the table have 66 as the age, we should locate the age in the first two lines using XPath again.

Then, we can finally assert that first_age and second_age have “66” in their values.

How to perform Click in Selenium with Python?
We would use the click(element) method of ActionChains to click on a WebElement in the DOM. Shown below is the test scenario:
Test Scenario:
- Open Simple Form Demo LambdaTest Playground page.
- Click in the message field.
- Write “Hello!” in the message field.
- Click on the button “Get Checked Value”.
- Check that the message is presented as “Hello!”.
You can view the page where we will automate some actions in the picture below.

Implementation:
from selenium.webdriver.common.by import By

from selenium import webdriver

from selenium.webdriver.common.action_chains import ActionChains

#lambdatest setup and opening the desired website
username = "Your LambdaTest Username"
accessToken = "Your LambdaTest Access Key"
gridUrl = "hub.lambdatest.com/wd/hub"

capabilities = {
    'LT:Options' : {
        "user" : "Your LambdaTest Username",
        "accessKey" : "Your LambdaTest Access Key",
        "build" : "your build name",
        "name" : "your test name",
        "platformName" : "Windows 11",
    },
    "browserName" : "Chrome",
    "browserVersion" : "103.0",
}

url = "https://"+username+":"+accessToken+"@"+gridUrl

browser = webdriver.Remote(
    command_executor=url,
    desired_capabilities=capabilities
)

browser.maximize_window()
browser.get("https://www.lambdatest.com/selenium-playground/simple-form-demo")

#locating the element
message_field = browser.find_element(By.ID, value="user-message")
button = browser.find_element(By.ID, value="showInput")
your_message = browser.find_element(By.ID, value="message")

# create action chain object
actions = ActionChains(browser)
actions.click(on_element=message_field)
actions.send_keys("Hello!")
actions.click(on_element=button)
actions.perform()

#asserting that the message presented is Hello!
assert your_message.text == "Hello!"

#closing the browser
browser.quit()
Code Walkthrough:
In this test scenario, we will need to locate the message field, the button, and the “your message” area of the first form. These fields can be located by id, making our code more simple.

Then, we should again instantiate an element called “actions”.

The first action will be to click on the message field. We have to use the method “click,” and in the method parameter “on_element” we should point to the “message_field” variable.

The second action will be to type “Hello!” In the field, we can do this using the “send_key” method.

The third step will be to click on the button.

Finally, we should call the “perform” method.

Just to finish, you can check if your presented message on the right side of the form is “Hello!”.

How to perform Context Click in Selenium with Python?
We would use the context_click(element) method of ActionChains to click on a WebElement in the DOM with the right mouse button. Shown below is the test scenario:
Test Scenario:
Click in the message field.
Perform a right mouse click (context click).
You can view the page where we will automate some actions in the picture below.

Implementation:
import time
from selenium.webdriver.common.by import By

from selenium import webdriver

from selenium.webdriver.common.keys import Keys

from selenium.webdriver.common.action_chains import ActionChains

#lambdatest setup and opening the desired website
username = "Your LambdaTest Username"
accessToken = "Your LambdaTest Access Key"
gridUrl = "hub.lambdatest.com/wd/hub"

capabilities = {
    'LT:Options' : {
        "user" : "Your LambdaTest Username",
        "accessKey" : "Your LambdaTest Access Key",
        "build" : "your build name",
        "name" : "your test name",
        "platformName" : "Windows 11",
    },
    "browserName" : "Chrome",
    "browserVersion" : "103.0",
}

url = "https://"+username+":"+accessToken+"@"+gridUrl

browser = webdriver.Remote(
    command_executor=url,
    desired_capabilities=capabilities
)

browser.maximize_window()
browser.get("https://www.lambdatest.com/selenium-playground/simple-form-demo")

time.sleep(5)

#locating the element
message_field = browser.find_element(By.ID, value="user-message")
button = browser.find_element(By.ID, value="showInput")
your_message = browser.find_element(By.ID, value="message")

# create action chain object
actions = ActionChains(browser)
actions.click(on_element=message_field)
actions.context_click()
actions.perform()

time.sleep(5)

#closing the browser
browser.quit()
Code Walkthrough:
In this test scenario, we will need to locate the message field, the button, and the “your message” area of the first form. These fields can be located by id, making our code more simple.

Then, we should again instantiate an element called “actions”.

The first action will be to click on the message field. We have to use the method “click,” and in the method parameter “on_element” we should point to the “message_field” variable.

The second action will be to click with the right mouse button and type “Hello!” In the field, we can do this using the “context_click” method.
Finally, we should call the “perform” method.

Check this out: Selenium Testing Automation Cloud- Test on Selenium Grid Cloud of 3000+ Desktop & Mobile Browsers.
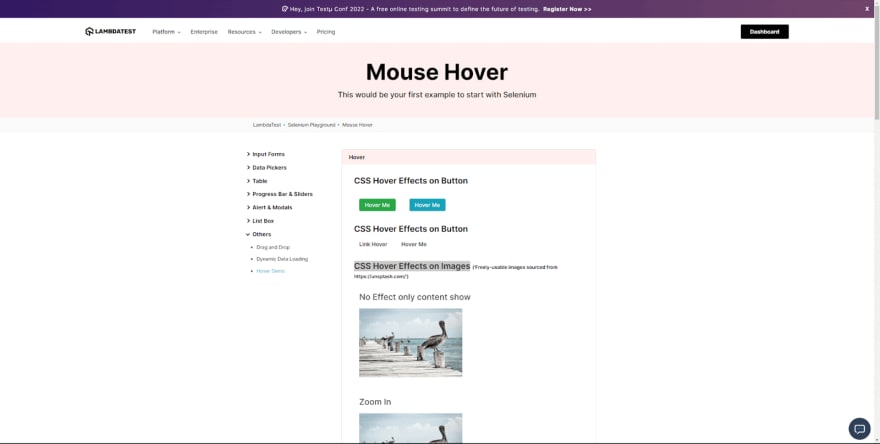
How to perform Move to Element in Selenium with Python?
We would use the move_to_element(element) method of ActionChains to move the mouse to a WebElement in the DOM. Shown below is the test scenario:
Test Scenario:
Move the mouse cursor to the first picture.
Check that the text “Hover” is shown below the image.
You can view the page where we will automate some actions in the picture below.

Implementation:
from selenium.webdriver.common.by import By

from selenium import webdriver

from selenium.webdriver.common.action_chains import ActionChains

#lambdatest setup and opening the desired website
username = "Your LambdaTest Username"
accessToken = "Your LambdaTest Access Key"
gridUrl = "hub.lambdatest.com/wd/hub"

capabilities = {
    'LT:Options' : {
        "user" : "Your LambdaTest Username",
        "accessKey" : "Your LambdaTest Access Key",
        "build" : "your build name",
        "name" : "your test name",
        "platformName" : "Windows 11",
    },
    "browserName" : "Chrome",
    "browserVersion" : "103.0",
}

url = "https://"+username+":"+accessToken+"@"+gridUrl

browser = webdriver.Remote(
    command_executor=url,
    desired_capabilities=capabilities
)
browser.maximize_window()
browser.get("https://www.lambdatest.com/selenium-playground/hover-demo")

#locating the element
first_image = browser.find_element(By.XPATH, value="//div[@class='s__column m-15']//img")

# create action chain object
actions = ActionChains(browser)
actions.move_to_element(first_image)
actions.perform()

#asserting that when hoving, "Hover" is shown below the image
message = browser.find_element(By.XPATH, value="//div[@class='s__column m-15']//p")

assert message.text == "Hover"

#closing the browser
browser.quit()
Code Walkthrough:
In this test scenario, we will need to locate the first image on the page. We can do this using XPath again and storing the element in the “first_image” variable.

Then, we should again instantiate an element called “actions”.

To move the mouse cursor to the first image, we should call the “move_to_element” method, passing the “first_image” variable as a parameter. Finally, we can call the “perform” method to execute it.

We will locate an element called “message”, that is shown below the image with “Hover” text, when the mouse is on the image. We can again use XPath to locate it and then assert that the presented message is correct.

Check this out: How To Test Internet Explorer For Mac
How to perform Move to Element by Offset in Selenium with Python?
We would use the move_to_elemenet_with_offset(element, xoffset, yoffset) method of ActionChains to perform mouse movement by offsetting the specified WebElement in the DOM. Shown below is the test scenario:
Test Scenario:
Move the mouse cursor to the first picture using offset values.
Check that the text “Hover” is shown below the image.
You can have a quick view of the page where we will automate some actions in the picture below.
Implementation:
from selenium.webdriver.common.by import By

from selenium import webdriver

from selenium.webdriver.common.action_chains import ActionChains

#lambdatest setup and opening the desired website
username = "Your LambdaTest Username"
accessToken = "Your LambdaTest Access Key"
gridUrl = "hub.lambdatest.com/wd/hub"

capabilities = {
    'LT:Options' : {
        "user" : "Your LambdaTest Username",
        "accessKey" : "Your LambdaTest Access Key",
        "build" : "your build name",
        "name" : "your test name",
        "platformName" : "Windows 11",
    },
    "browserName" : "Chrome",
    "browserVersion" : "103.0",
}

url = "https://"+username+":"+accessToken+"@"+gridUrl

browser = webdriver.Remote(
    command_executor=url,
    desired_capabilities=capabilities
)

browser.maximize_window()
browser.get("https://www.lambdatest.com/selenium-playground/hover-demo")

#locating the element
first_image = browser.find_element(By.XPATH, value="//div[@class='s__column m-15']//img")

# create action chain object
actions = ActionChains(browser)
actions.move_to_element_with_offset(first_image, 100, 200)
actions.perform()

#asserting that when hoving, "Hover" is shown below the image
message = browser.find_element(By.XPATH, value="//div[@class='s__column m-15']//p")

assert message.text == "Hover"

#closing the browser
browser.quit()
Code Walkthrough:
In this test scenario, we will need to locate the first image on the page. We can do this using XPath again and storing the element in the “first_image” variable.

Then, we should again instantiate an element called “actions”.

To move the mouse cursor to the first image, we should call the “move_to_element_with_offset” method, passing the “first_image” variable as a parameter and the two offset values. In our example, we use 100 to xoffset and 200 to yoffset.
Finally, we can call the “perform” method to execute it.

We will again locate an element “message”, that is shown below the image with “Hover” text, when the mouse is on the image. We can again use XPath to locate it and then assert that the presented message is correct.

Check this out: Online Automation Testing Platform- Accelerate your release velocity with blazing fast test automation on cloud lambdatest.com/automation-testing
How to perform Move by Offset in Selenium with Python?
We would use the move_by_offset(xoffset, yoffset) method of ActionChains to perform mouse movement by offsetting the current mouse position. Shown below is the test scenario:
Test Scenario:
Move the mouse cursor to a specific position using offset values.
Check that the text “Hover” is shown below the image.
You can view the page where we will automate some actions in the picture below.

Implementation:
from selenium.webdriver.common.by import By

from selenium import webdriver

from selenium.webdriver.common.action_chains import ActionChains

#lambdatest setup and opening the desired website
username = "Your LambdaTest Username"
accessToken = "Your LambdaTest Access Key"
gridUrl = "hub.lambdatest.com/wd/hub"

capabilities = {
    'LT:Options' : {
        "user" : "Your LambdaTest Username",
        "accessKey" : "Your LambdaTest Access Key",
        "build" : "your build name",
        "name" : "your test name",
        "platformName" : "Windows 11",
    },
    "browserName" : "Chrome",
    "browserVersion" : "103.0",
}

url = "https://"+username+":"+accessToken+"@"+gridUrl

browser = webdriver.Remote(
    command_executor=url,
    desired_capabilities=capabilities
)

browser.maximize_window()
browser.get("https://www.lambdatest.com/selenium-playground/hover-demo")

# create action chain object
actions = ActionChains(browser)
actions.move_by_offset(617, 593)
actions.perform()

#closing the browser
browser.quit()
Code Walkthrough:
In this test scenario, we will start instantiating an element called “actions”.
To move the mouse cursor to a specific offset position, we should call the “move_by_offset” method, passing the two offset values. In our example, we are using 617 to xoffset and 593 to yoffset.
Finally, we can call the “perform” method to execute it.

Check this out: 30 Top tools for Automation Testing In 2022
How to perform Drag and Drop in Selenium with Python?
We would use the drag_and_drop(element, target) method of ActionChains to drag a WebElement in the DOM to a specific target element. Shown below is the test scenario:
Test Scenario:
In the second drag-and-drop demo, drag and drop the draggable element to the “Drop Here” area.
Check that the “Drop Here” message changes to “Dropped!”.
You can view the page where we will automate some actions in the picture below.

Implementation:
from selenium.webdriver.common.by import By

from selenium import webdriver

from selenium.webdriver.common.action_chains import ActionChains

#lambdatest setup and opening the desired website
username = "Your LambdaTest Username"
accessToken = "Your LambdaTest Access Key"
gridUrl = "hub.lambdatest.com/wd/hub"

capabilities = {
    'LT:Options' : {
        "user" : "Your LambdaTest Username",
        "accessKey" : "Your LambdaTest Access Key",
        "build" : "your build name",
        "name" : "your test name",
        "platformName" : "Windows 11",
    },
    "browserName" : "Chrome",
    "browserVersion" : "103.0",
}

url = "https://"+username+":"+accessToken+"@"+gridUrl

browser = webdriver.Remote(
    command_executor=url,
    desired_capabilities=capabilities
)

browser.maximize_window()
browser.get("https://www.lambdatest.com/selenium-playground/drag-and-drop-demo")

#locating the element
draggable = browser.find_element(By.XPATH, value="//p[normalize-space()='Drag me to my target']")
droparea = browser.find_element(By.XPATH, value="//div[@id='droppable']")

# create action chain object
actions = ActionChains(browser)
actions.drag_and_drop(draggable, droparea)
actions.perform()

#asserting that when dropping, "Dropped!" is shown inside the droparea
message = browser.find_element(By.XPATH, value="//div[@id='droppable']/p")
assert message.text == "Dropped!"

#closing the browser
browser.quit()
Code Walkthrough:
In this test scenario, we will need to locate the draggable WebElement and the drop area, another WebElement. We can use XPath again and store the element in “draggable” and “droparea” variables.

Then, we should again instantiate an element called “actions”.

To drag and drop the element, we should call the “drag_and_drop” method, passing the “draggable” and “droparea” variables as parameters.
Finally, we can call the “perform” method to execute it.

We will again locate an element “message” shown inside the droparea with “Dropped!” text when the WebElement is dropped. We can again use XPath to locate it and then assert that the presented message is correct.

Check this out: Online test Automation cloud- Accelerate your release velocity with blazing fast test automation on cloud lambdatest.com/automation-testing
How to perform Drag and Drop by Offset in Selenium with Python?
We would use the drag_and_drop_by_offset(element, xoffset, yoffset) method of ActionChains to drag a WebElement in the DOM to a specific target offset. Shown below is the test scenario:
Test Scenario:
In the second drag-and-drop demo, drag and drop the draggable element to the “Drop Here” area using offset values.
Check that the “Drop Here” message changes to “Dropped!”
You can view the page where we will automate some actions in the picture below.

Implementation:
from selenium.webdriver.common.by import By

from selenium import webdriver

from selenium.webdriver.common.action_chains import ActionChains

#lambdatest setup and opening the desired website
username = "Your LambdaTest Username"
accessToken = "Your LambdaTest Access Key"
gridUrl = "hub.lambdatest.com/wd/hub"

capabilities = {
    'LT:Options' : {
        "user" : "Your LambdaTest Username",
        "accessKey" : "Your LambdaTest Access Key",
        "build" : "your build name",
        "name" : "your test name",
        "platformName" : "Windows 11",
    },
    "browserName" : "Chrome",
    "browserVersion" : "103.0",
}

url = "https://"+username+":"+accessToken+"@"+gridUrl

browser = webdriver.Remote(
    command_executor=url,
    desired_capabilities=capabilities
)

browser.maximize_window()
browser.get("https://www.lambdatest.com/selenium-playground/drag-and-drop-demo")

#locating the element
draggable = browser.find_element(By.XPATH, value="//p[normalize-space()='Drag me to my target']")

# create action chain object
actions = ActionChains(browser)
actions.drag_and_drop_by_offset(draggable, 80, 30)
actions.perform()

#asserting that when dropping, "Dropped!" is shown inside the droparea
message = browser.find_element(By.XPATH, value="//div[@id='droppable']/p")
assert message.text == "Dropped!"

#closing the browser
browser.quit()
Code Walkthrough:
In this test scenario, we will again need to locate the draggable WebElement. We can do this using XPath again and storing the element in the “draggable” variable.

Then, we should again instantiate an element called “actions”.

To drag and drop the element by offset, we should call the “drag_and_drop_by_offset” method, passing the “draggable” variables and the xoffset and yoffset as parameters. In this scenario, we are going to use 80 and 30.
Finally, we can call the “perform” method to execute it.

We will again locate an element “message”, that is shown inside the droparea with “Dropped!” text, when the WebElement is dropped. We can again use XPath to locate it and then assert that the presented message is correct.

You can run your test in LambdaTest by just typing the below command, for example, for 01_double_click.py:
python scenario1.py

Attention Point 1: 01_double_click.py is the name of our file. You can adjust the filename that you created.
If you’re a Python programmer looking to make a name for yourself in the automation testing domain, you can start by getting broad hands-on experience with Selenium Python 101 certification.

Check this out: 30 Top Automation Testing Tools In 2022
Conclusion
In this blog, we have learned about how to automate mouse clicks with Selenium Python.
It was presented why using Python and Selenium for test automation. We showed what the ActionChains library is and how it helps you to automate mouse actions, and we presented all the available library methods.
We also presented the setup process you should follow to configure all the required environments, including how to run automation tests on a cloud Selenium Grid using the LambdaTest platform.
You could learn the most basic thing in Python web automation: how to open a webpage in Chrome. Finally, it was shown how to automate mouse action with Selenium Python through demonstration test scenarios.


Top comments (0)