Sometimes referred to as automated UI testing or visual regression testing, VRT checks software from a purely visual standpoint (taking a screenshot and comparing it against another approved screenshot). Cypress is an emerging test automation framework that enables teams to ship high-quality products faster.
Cypress utilizes a modern architectural approach and is fully equipped with built-in screenshot functionality and also video recording capabilities, making it one of the best test automation frameworks for Cypress visual regression testing.
For those Automation Engineers validating a UI or performing an HTML canvas test, the UI look and feel of the application is vital for our end-users. Companies spend a lot on strategies to acquire more customers through advertisements, campaigns, and more. A missing visual error in production can jeopardize their reputation. My recommendation is to start learning some Visual Testing tools.
Visual Testing is about which parts of your UI are most important to test (Visual Coverage). Perhaps visual or HTML canvas test is similar to functional testing in that it’s designed to be an automated process that runs alongside code reviews. However, unlike functional testing, the HTML canvas test results cannot be considered as Passed or Failed.
Starting your journey with Cypress UI Automated Testing? Check out how you can test your Cypress automation test scripts on LambdaTest’s online cloud.
Now execute test scripts faster than any other automation testing grid on LambdaTest’s Automated UI testing cloud.
Let’s deep dive into performing visual regression testing with the Cypress test automation framework.
Which are the most wanted automation testing tools that have climbed the top of the ladder so far? Let’s take a look.
Understanding Visual Regression Testing
Before talking about visual regression testing, we need to understand the current state of visual testing. Functional test scripts can validate the size, position, and color scheme of visual elements.
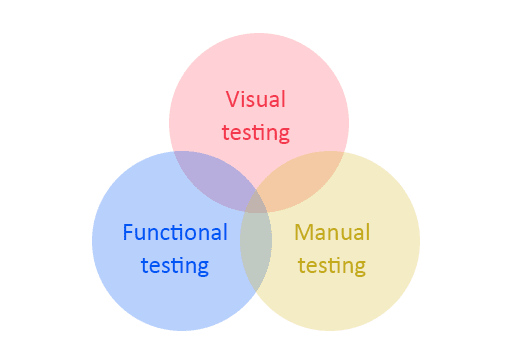
As Automation Engineers, we perform ad hoc and exploratory testing to catch edge cases and visual bugs regarding manual checkpoints. But, to be honest, it could be challenging from a manual standpoint to verify an entire screen or different screens and detect those visual diffs.

Some years ago, there was a good approach called pixel matching. It was related to a bitmap of a screen capturing various points, and its pixels were compared to a baseline bitmap. Pixel matching tools can spot pixel differences quickly and consistently and highlight the visual differences based on pixels.
If we had a great approach, what went wrong? Well, various things were wrong with snapshot or screenshot testing; we can enumerate some of the challenges using this approach:
Variation of screen resolutions
Image hardware rendering bitmaps differently
Variations in browser font size and other elements
Flakiness on dynamic content (Capturing screenshots by the element, we can skip flaky visual tests)
With this Screenshot Testing Tutorial, you will learn how to perform Automated Screenshot Testing on the LambdaTest platform.
Actual tools currently combine computer vision as the core of visual comparison and visual diffs when discussing visual regression testing. Unlike pixel matching (snapshot testing), VRT tools do not need unique environments that remain static to ensure accuracy. By blending test automation and image processing, visual regression testing checks that our application looks as it should. With functional checks alone, multiple of the challenges of frontend testing persists.

Cypress Visual Regression Testing
In this cypress tutorial for cross browser testing with Cypress, we discussed the difference between snapshot testing and visual regression testing; typically, we can find some plugins in Cypress to compare images and follow the same process of performing snapshot testing; for example, we can use the cypress-plugin-snapshots.
This open-source plugin compares the baseline and the side of the current image by the side within the Cypress Test Runner if the pixel difference is above the threshold.
Try this online Selenium Automation Grid to run your browser automation testing scripts. Our cloud infrastructure has 3000+ desktop & mobile environments. Try for free!
Cypress Version 9.0.0
Before talking about Cypress plugins, we should consider the new Cypress 9.0.0, as I updated to that version; if you want to update, please consider the following changes below; my recommendation is to check the Release notes before updating any project to the latest version.
The nodeVersion configuration option now defaults to the system. The behavior of the system option has always changed to use the Node.js binary/version that launched Cypress. If Cypress was not launched via the terminal, Cypress would use the bundled Node.js version. It could change the code behavior within your plugins file since it may be run in your system Node.js version #18684.
Windows 32-bit is not supported in Cypress #17962.
-
cy.contains() no longer yields the
element when it matches the content of or <style> tags <a href="https://github.com/cypress-io/cypress/issues/14861">#14861</a>.</p></li> <li><p>Attempting to add an existing built-in Cypress command using Cypress.Commands.add() will now throw an error, indicating that Cypress.Commands.overwrite() should be used instead to overwrite the behavior of existing commands <a href="https://github.com/cypress-io/cypress/issues/18572">#18572</a>.</p></li> <li><p>Custom command implementations are now typed based on the declared custom chainable <a href="https://github.com/cypress-io/cypress/issues/17496">#17496</a>.</p></li> <li><p>The bundled Node.js version was upgraded from 14.17.0 to 16.5.0. This could change the code behavior within the plugins file when using the bundled Node.js version of Cypress <a href="https://github.com/cypress-io/cypress/pull/18317">#18317</a>.</p></li> <li><p>When null is passed as the encoding to cy.readFile() or cy.fixture(), the file is treated as binary and read as a Buffer. Similarly, null passed as the encoding to cy.writeFile() allows direct writing of buffers. If the encoding is unspecified, the default remains utf8, matching the current behavior <a href="https://github.com/cypress-io/cypress/issues/18534">#18534</a>.</p></li> <li><p>Sticky elements within a fixed container will now be adequately scrolled to during action commands <a href="https://github.com/cypress-io/cypress/issues/4233">#4233</a>.</p></li> <li><p>document.referrer will now correctly reflect the correct value from the application under test after cy.visit() <a href="https://github.com/cypress-io/cypress/issues/4295">#4295</a>.</p></li> </ul> <p>If you are new to the world of Cypress or don’t know <a href="https://www.lambdatest.com/blog/cypress-test-automation-framework/?utm_source=devto&utm_medium=organic&utm_campaign=oct06_kj&utm_term=kj&utm_content=blog">what is Cypress</a> in detail, you can go through this complete <a href="https://www.youtube.com/playlist?list=PLZMWkkQEwOPnxrxi544nL1vdC1noooXPx?utm_source=devto&utm_medium=organic&utm_campaign=oct06_kj&utm_term=kj&utm_content=blog">Cypress Tutorial for Beginners</a>, which will walk you through the basics of what is Cypress, including the Cypress Installation & Project Setup, and help you create your first test script using Cypress.</p> <p> </p> <p>However, you can visit the <a href="https://www.youtube.com/c/LambdaTest?utm_source=devto&utm_medium=organic&utm_campaign=oct06_kj&utm_term=kj&utm_content=blog">LambdaTest YouTube channel</a> for more videos on <a href="https://www.lambdatest.com/blog/cypress-test-automation-framework/?utm_source=devto&utm_medium=organic&utm_campaign=oct06_kj&utm_term=kj&utm_content=blog">Cypress Testing</a>, <a href="https://www.lambdatest.com/selenium-automation?utm_source=devto&utm_medium=organic&utm_campaign=oct06_kj&utm_term=kj&utm_content=blog">Selenium testing</a>, etc., so there’s never a shortage of learning opportunities.</p> <h2> <a name="cypress-visual-regression-plugin" href="#cypress-visual-regression-plugin" class="anchor"> </a> Cypress Visual Regression Plugin </h2> <p>I recommend one plugin (<a href="https://github.com/mjhea0/cypress-visual-regression?utm_source=devto&utm_medium=organic&utm_campaign=oct06_kj&utm_term=kj&utm_content=blog">cypress-visual-regression</a>) for Cypress visual regression testing, which is really easy to install within Cypress.</p> <h3> <a name="setting-up-our-cypress-project" href="#setting-up-our-cypress-project" class="anchor"> </a> Setting up our Cypress Project </h3> <p><strong>Step 1</strong>: Installation</p> <div class="highlight"><pre class="highlight plaintext"><code>$ npm install cypress-visual-regression </code></pre></div> <p>We should add the following to your cypress.json file:</p> <div class="highlight"><pre class="highlight plaintext"><code>const getCompareSnapshotsPlugin = require('cypress-visual-regression/dist/plugin'); module.exports = (on, config) =&gt; { getCompareSnapshotsPlugin(on, config); }; </code></pre></div> <p>And add the command to cypress/support/commands.js:</p> <div class="highlight"><pre class="highlight plaintext"><code>const compareSnapshotCommand = require('cypress-visual-regression/dist/command'); compareSnapshotCommand(); </code></pre></div> <p><strong>Note</strong>: Please ensure import commands.js in cypress/support/index.js</p> <p>Once the configuration is ready, we can add our visual testing checkpoints into our existing cypress tests, let’s see an example:</p> <div class="highlight"><pre class="highlight plaintext"><code>describe('Visual Testing Regression', () =&gt; { it('verify UI across the pages', () =&gt;{ cy.visit(`${config.URL2}`) cy.compareSnapshot('Home Page', { capture: 'fullPage', errorThreshold: 0.0 }); }) }) </code></pre></div> <p>The code above will visit a web page, take a <a href="https://www.lambdatest.com/full-page-screen-capture?utm_source=devto&utm_medium=organic&utm_campaign=oct06_kj&utm_term=kj&utm_content=blog">full page screenshot</a>, and validate zero difference between the base and the actual image comparison. You will wonder about the image baseline, as we don’t have anything in our code. To run basic comparisons, we need to have a baseline image; let’s explore that.</p> <p>Let’s run the following command:</p> <div class="highlight"><pre class="highlight plaintext"><code>npx cypress run --env type=base </code></pre></div> <p>Once the command is completed, we should see a new couple of folders like the following:</p> <p><img src="https://cdn-images-1.medium.com/max/2000/0*Ug6ZgEOMtnHC4zNB.png" alt=""></p> <p>Once the baseline is created, we’re ready to compare and run a test; first, we need to run the following command:</p> <div class="highlight"><pre class="highlight plaintext"><code>npx cypress run --env type=actual </code></pre></div> <p>After the command runs successfully, we will see the folder structure like the following.</p> <p><img src="https://cdn-images-1.medium.com/max/2000/0*YJZ0DWrhaDw05FEW.png" alt=""></p> <p>As we can see from the image above, we have three folders created, one for the actual result, one for the base image, and another for spotting the difference between the images. So basically, we are done with our basic configuration; next time we run, we can spot any discrepancies in our command line.</p> <p><img src="https://cdn-images-1.medium.com/max/2912/0*-jOy4Ay7RrRCLG_b.png" alt=""></p> <h3> <a name="implementing-cypress-plugin-snapshots" href="#implementing-cypress-plugin-snapshots" class="anchor"> </a> Implementing Cypress Plugin Snapshots </h3> <p>There is another exciting plugin for snapshot tests in Cypress. Same API as Jest that we can use with the Cypress GUI. To install the plugin, we need to run:</p> <div class="highlight"><pre class="highlight plaintext"><code>npm i cypress cypress-plugin-snapshots </code></pre></div> <p>If you are using Cypress 9.0.0, which in my case, then you need to add an extra parameter like this:</p> <div class="highlight"><pre class="highlight plaintext"><code>npm i cypress --legacy-peer-deps cypress-plugin-snapshots </code></pre></div> <p>Just avoid version conflicts and, in many cases, break the installation process. The –legacy-peer-deps flag was introduced with v7 to bypass peerDependency auto-installation; it tells NPM to ignore peer deps and proceed with the installation anyway. It is how things used to be with NPM v4 thru v6.</p> <p>As we did for the previous plugin, we need to do the same for cypress-plugin-snapshot; add this to your cypress.json configuration file:</p> <div class="highlight"><pre class="highlight plaintext"><code>"ignoreTestFiles": [ "**/__snapshots__/*", "**/__image_snapshots__/*" ], "env": { "cypress-plugin-snapshots": { "imageConfig": { "threshold": 0.01 } } } </code></pre></div> <p>Then add to your cypress/plugins/index.js file and change it to look like this:</p> <div class="highlight"><pre class="highlight plaintext"><code>const { initPlugin } = require('cypress-plugin-snapshots/plugin'); module.exports = (on, config) =&gt; { initPlugin(on, config); return config; }; </code></pre></div> <p>Similar to your cypress/support/index.js file and add the following line:</p> <div class="highlight"><pre class="highlight plaintext"><code>import 'cypress-plugin-snapshots/commands'; </code></pre></div> <p>After installation is done, we are ready to create some tests; my suggestion is to create a new test spec under your integration folder ‘cypress/integration/.’</p> <div class="highlight"><pre class="highlight plaintext"><code>import config from './config.json' import MainPage from '../../page-objects/components/MainPage' describe('Visual Testing Cypress Snapshots', () =&gt; { before(function(){ cy.visit(`${config.URL1}`) }) it('verify full Page is displayed correctly', () =&gt;{ cy.document().toMatchImageSnapshot() }) it('verify Multiple elements across the pages', () =&gt;{ //First element Screenshot MainPage.elementOne() //Second Element Screenshot MainPage.elementTwo() }) it('Verify blogs related to Cypress', () =&gt; { MainPage.search('Cypress') //Full page plus renaming screenshot cy.document().toMatchImageSnapshot({ name: 'screenshot with Blogs related to Cypress' }) }) }) </code></pre></div> <p><strong>Code Walkthrough</strong></p> <p><strong>Step 1</strong>: We first import config.json since it contains the test links located in /cypress/integration/e2e_tests/config.json</p> <div class="highlight"><pre class="highlight plaintext"><code>import config from './config.json' </code></pre></div> <p><strong>Step 2</strong>: We need to import our MainPage component; we use another component to reuse our HTML elements.</p> <div class="highlight"><pre class="highlight plaintext"><code>import MainPage from '../../page-objects/components/MainPage' </code></pre></div> <p><strong>Step 3</strong>: We visit the URL. The base URL is stored in Cypress.json to ensure better portability and maintainability; also, we use the Before Fixture.</p> <div class="highlight"><pre class="highlight plaintext"><code>cy.visit(`${config.URL1}`) </code></pre></div> <p><strong>Step 4</strong>: In our first test, we take a full-page screenshot to validate that our web page is displayed correctly and there are no UI errors.</p> <div class="highlight"><pre class="highlight plaintext"><code>cy.document().toMatchImageSnapshot() </code></pre></div> <p><img src="https://cdn-images-1.medium.com/max/3200/1*K7Xz_iT3enrJDNOIihhCkA.png" alt=""></p> <p><strong>Step 5</strong>: In our second test, we want to validate multiple elements to make sure they are displayed correctly; this is useful in case of any specific element like a banner or footer on our webpage. For this case, we have our elements inside of our MainPage component located in cypress/page-objects/components/Mainpage.js</p> <div class="highlight"><pre class="highlight plaintext"><code>//First element Screenshot MainPage.elementOne() //Second Element Screenshot MainPage.elementTwo() </code></pre></div> <p><img src="https://cdn-images-1.medium.com/max/3032/1*VRTTUCD6C1w9gr9S1l68cQ.png" alt=""></p> <p><img src="https://cdn-images-1.medium.com/max/3200/1*zUfJyLVEwDIzjsGtNwMX6g.png" alt=""></p> <p>If we want to avoid flakiness related to dynamic content or other factors, it is better to capture elements to compare discrepancies; we want to ignore full-page screenshots and focus on our web pages’ specific UI instability areas.</p> <p><strong>Step 6</strong>: For the last test, we want to validate specific search results; in this case, we are searching in our blog for Cypress-related material and taking a full-page screenshot. Last but not least, we are renaming the screenshot to customize our image comparison.</p> <div class="highlight"><pre class="highlight plaintext"><code>MainPage.search('Cypress') //Full page plus renaming screenshot cy.document().toMatchImageSnapshot({ name: 'screenshot with Blogs related to Cypress' }) </code></pre></div> <p>A critical aspect of this plugin is the screenshot location, and the plugin saves the actual image in cypress/integration/<strong>image_snapshots</strong>. The snapshot compares against another picture of the current interface on subsequent runs, and if the tool finds any difference, the test fails. But what if we want to change our current image baseline? Well, in that case, as there is no way to run a baseline command, the easiest way to do that is to remove the previous images saved on cypress/integration/<strong>image_snapshots</strong> and rerun our tests to get a new baseline.</p> <p><img src="https://cdn-images-1.medium.com/max/2000/0*rMnscJF8oo-qfg5K.png" alt=""></p> <p>Open Cypress test runner and click on the corresponding test to execute the same.</p> <p><img src="https://cdn-images-1.medium.com/max/3200/0*6bGlenAGKy_mIP4W.png" alt=""></p> <p>And here is the test execution, which indicates that we have a new baseline:</p> <p><img src="https://cdn-images-1.medium.com/max/3200/0*65RRx-CSSE9-b7qM.png" alt=""></p> <p>One more time to see that the image is correct:</p> <p><img src="https://cdn-images-1.medium.com/max/3200/0*Z_PcrHj-Nay8pMTH.png" alt=""></p> <p>You can download the code from the GitHub repository.</p> <p>Take this certification to showcase your expertise with end-to-end Cypress testing and stay one step ahead.</p> <p>Here’s a short glimpse of the Cypress 101 certification from LambdaTest:</p> <p> </p> <p><strong><em>Check our <a href="https://www.lambdatest.com/selenium-automation?utm_source=devto&utm_medium=organic&utm_campaign=oct06_kj&utm_term=kj&utm_content=webpage">selenium automation testing</a> cloud infrastructure has 3000+ desktop & mobile environments. Try for free!</em></strong></p> <h2> <a name="how-to-use-visual-regression-plugin-on-cypress-cloud-grid" href="#how-to-use-visual-regression-plugin-on-cypress-cloud-grid" class="anchor"> </a> How to use Visual Regression Plugin on Cypress Cloud Grid </h2> <p>We can use a <a href="https://www.lambdatest.com/?utm_source=devto&utm_medium=organic&utm_campaign=oct06_kj&utm_term=kj&utm_content=blog">Cloud Cypress Grid</a> like LambdaTest, which provides automated <a href="https://www.lambdatest.com/?utm_source=devto&utm_medium=organic&utm_campaign=oct06_kj&utm_term=kj&utm_content=blog">cross browser testing</a> on 40+ browsers and operating systems, and <a href="https://www.lambdatest.com/blog/what-is-parallel-testing-and-why-to-adopt-it/?utm_source=devto&utm_medium=organic&utm_campaign=oct06_kj&utm_term=kj&utm_content=blog">Parallel testing</a> to expedite the test execution in a scalable way. In addition, it will help improve our overall visual test coverage by resulting in better visual standpoint product quality as we can cover different combinations using the same test scripts.</p> <p>Starting your journey with <a href="https://www.lambdatest.com/cypress-parallel-testing?utm_source=devto&utm_medium=organic&utm_campaign=oct06_kj&utm_term=kj&utm_content=blog">Cypress Parallel Testing?</a> Check out how you can test your Cypress test scripts on LambdaTest’s online cloud.</p> <p>Now execute test scripts faster than any other automation testing grid on <a href="https://www.lambdatest.com/automated-ui-testing?utm_source=devto&utm_medium=organic&utm_campaign=oct06_kj&utm_term=kj&utm_content=blog">LambdaTest’s Automated UI testing cloud</a>.</p> <p>To get started, you have to install <a href="https://accounts.lambdatest.com/detail/profile?utm_source=devto&utm_medium=organic&utm_campaign=oct06_kj&utm_term=kj&utm_content=blog">LambdaTest Cypress CLI</a> on your machine. Trigger the following command to install the same:</p> <div class="highlight"><pre class="highlight plaintext"><code>npm install -g lambdatest-cypress-cli </code></pre></div> <p>After installation is completed, set up the configuration using the below command:</p> <div class="highlight"><pre class="highlight plaintext"><code>lambdatest-cypress init </code></pre></div> <p>Once the command is completed, lambdatest-config.json is created in the project folder. Next, enter the LambdaTest credentials from the <a href="https://www.lambdatest.com/support/docs/testing-locally-hosted-pages/?utm_source=devto&utm_medium=organic&utm_campaign=oct06_kj&utm_term=kj&utm_content=blog">LambdaTest Profile Section</a>.</p> <div class="highlight"><pre class="highlight plaintext"><code>"lambdatest_auth": { "username": "", "access_key": "" </code></pre></div> <p>Here is how you can configure the required browser & OS combinations in lambdatest-config.json:</p> <div class="highlight"><pre class="highlight plaintext"><code>{ "lambdatest_auth": { "username": "", "access_key": "" }, "browsers": [ { "browser": "MicrosoftEdge", "platform": "Windows 10", "versions": [ "latest" ] }, { "browser": "Chrome", "platform": "Windows 10", "versions": [ "latest" ] }, { "browser": "Firefox", "platform": "macOS Big Sur", "versions": [ "latest" ] }, { "browser": "Firefox", "platform": "Windows 10", "versions": [ "latest" ] } ], </code></pre></div> <p>The run_settings section in the JSON file contains the desired Cypress test suite capabilities, including Cypress_version, build_name, visual feedback settings, number of parallel sessions, etc.</p> <div class="highlight"><pre class="highlight plaintext"><code>"run_settings": { "Cypress_config_file": "Cypress.json", "build_name": "build-visual-testing", "parallels": 5, "specs": "./Cypress/integration/e2e_tests/*.spec.js", "ignore_files": "", "feature_file_suppport": false }, </code></pre></div> <p>Tunnel_settings in the JSON file lets you connect your local system with LambdaTest servers via an SSH-based integration tunnel. Once this tunnel is established, you can <a href="https://www.lambdatest.com/support/docs/testing-locally-hosted-pages/?utm_source=devto&utm_medium=organic&utm_campaign=oct06_kj&utm_term=kj&utm_content=blog">test locally hosted pages</a> on all the browsers currently supported by Cypress on LambdaTest.</p> <div class="highlight"><pre class="highlight plaintext"><code>"tunnel_settings": { "tunnel": false, "tunnelName": null } </code></pre></div> <p>Now that the setup is ready, it’s time to run the tests; remember that our run_settings file displays the parallels field as five once we trigger our execution in parallel without any extra parameter.</p> <div class="highlight"><pre class="highlight plaintext"><code>lambdatest-cypress run </code></pre></div> <p>Shown below is the test execution status from the <a href="https://automation.lambdatest.com/?utm_source=devto&utm_medium=organic&utm_campaign=oct06_kj&utm_term=kj&utm_content=blog">LambdaTest Automation Dashboard</a>.</p> <p><img src="https://cdn-images-1.medium.com/max/3200/0*p7qxAVlwUAh02oE5.png" alt=""></p> <p>Here is the execution snapshot, which indicates the progress of test execution:</p> <p><img src="https://cdn-images-1.medium.com/max/3200/0*TGTSabTsn-hRkaLj.png" alt=""></p> <p>To summarize, the significant benefit of Cypress visual regression testing on the cloud is achieving optimal visual test coverage without modifying the core logic of the test code to incorporate multiple OS and Browsers.</p> <p><img src="https://cdn-images-1.medium.com/max/3200/0*Gcd6Rby2vyofT4mT.png" alt=""></p> <p>To view test performance metrics, navigate to the <a href="https://analytics.lambdatest.com/test-overview?utm_source=devto&utm_medium=organic&utm_campaign=oct06_kj&utm_term=kj&utm_content=blog">LambdaTest Analytics Dashboard</a>. The Test Overview will provide a snapshot of tests consistent with stable behavior. Meanwhile, the Test Summary will display the total number of tests passed or failed, as well as any completed tests and pending tests.</p> <p><img src="https://cdn-images-1.medium.com/max/3200/0*E7Wwm1ZFcKOlXWtj.png" alt=""></p> <p>With this Visual Testing Tutorial, you will learn how to perform Smart Visual UI Testing on the LambdaTest platform.</p> <p> </p> <h2> <a name="final-thoughts" href="#final-thoughts" class="anchor"> </a> Final Thoughts </h2> <p>Visual testing does the heavy lifting to contribute to our UI validation; no matter if you use open source tools or paid tools, visual inconsistencies deeply influence the user journey, which means they need to be eliminated. Performing Cypress visual regression testing can help us validate quickly, correctly, and comprehensively, making it indispensable for any enterprise looking to have an online presence.</p> <p><img src="https://cdn-images-1.medium.com/max/2000/0*cEkQvmcpDYfmkWML.png" alt=""></p> <p>“Just because your test automation is working doesn’t mean that it adds value.” — Enrique A Decoss</p> <p>Remember, we need to change our test automation landscape positively. If you are not including visual testing in your automation test scripts, this is an excellent opportunity to make your test scripts more robust; at the end of the day, automation testing must add value to our customers.</p> <p>Happy Visual Testing!</p>


Oldest comments (1)
Very good, Argos also has a very good Cypress integration!