In each and every app, you will see several kinds of authentication like login with Facebook, Google etc. But still, people prefer to entering email and password. In this tutorial, we are going to integrate Email authentication with React native and Firebase. Using firebase makes it easier to use. Let me tell you how?

Let’s get started. So we are going to start it from scratch. Begin with
Creating new react native project with expo:
We are not going to use react-native-cli instead of that we will use Expo. This will make our task a little bit easier. Because with react-native-cli, we need to install XCode or Android studio to at least run and test an application.
https://medium.com/media/18214d8333adbb5668f31791a3202b60/href
To make an app with Expo, you need to type in terminal or CMD:
expo init react-native-firebase

Once you hit enter, installation started. Once the installation is completed open project with VS Code.

To run the app you need go inside it using cd app-folder-name then run the command yarn start.

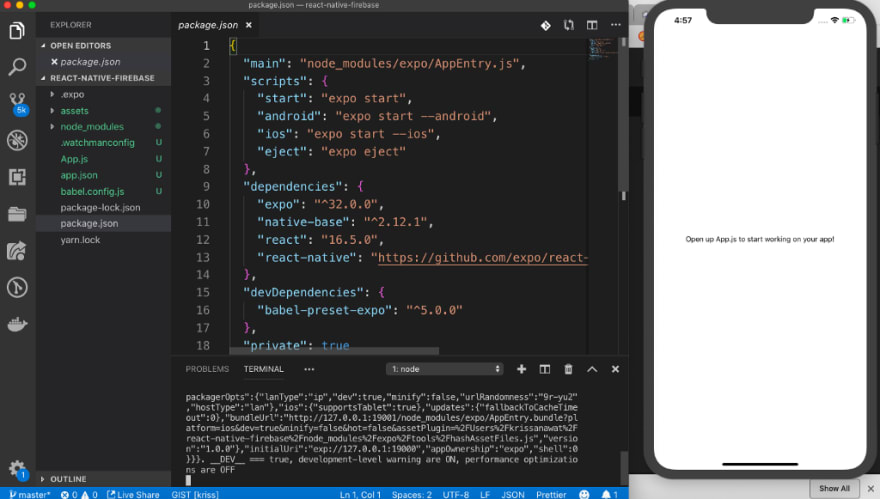
Once you run the app, the expo will open a new browser window.

You can see a lot of options available to run emulators for Android and iOS as well as QR Code. Here we are using the iOS simulator to run this app. Then after opening that simulator or use your device for open expo app.
There you will see the screen like as shown below:

If everything works properly then we are ready to go. So let’s start the real coding:
Bootstrap form quickly with a native base
To develop our interface quickly, we are using Nativebase for development.

To install native base , open a new terminal run the command given below:
npm i native-base -s

Don’t worry if you will some errors while native base installation takes place. Stop expo and run npm install again.
and we will back for normal mode
Setup form with Native base components
So now, we are ready to import necessary Nativebase component to to App.js
import { Container, Item, Form, Input, Button, Label } from "native-base";
and after importing we will construct a user interface for the frontend form.
render() {
**return** (
 \<Container\>
 \<Form\>
 \<Item floatingLabel\>
 \<Label\>Email\</Label\>
 \<Input autoCapitalize="none" autoCorrect={false} /\>
 \</Item\>
 \<Item floatingLabel\>
 \<Label\>Password\</Label\>
 \<Input
 secureTextEntry={true}
 autoCapitalize="none"
 autoCorrect={false}
 /\>
 \</Item\>
 \<Button full rounded\>
 \<Text\>SignIn\</Text\>
 \</Button\>
 \</Form\>
 \</Container\>
 );
 }
Once you save the code shown above and then you will be able to see the instant result on the screen. This concept is also known as Hot Reloading.

So let’s make the form align center. To do this, we are going to play stylesheet properties. Just look at the code below, you can easily understand that we are playing with attributes in the stylesheet with containers.
\<Container style={styles.container}\>
By just adding a comment to styling we able to make it center.
**const** styles = StyleSheet.create({
 container: {
 flex: 1,
 backgroundColor: "#fff",
 // alignItems: "center",
 justifyContent: "center"
 }
});
Now save the code and see the results. All components aligned center. Awesome let’s move on to next step:

Add firebase to React native project
To add firebase, we need to run the command npm i firebase --save and the after import firebase on App.js as shown below:
import \* as firebase from "firebase";
Next step is to create firebase project. Go to firebase console, create a project find apikey and configuration as shown in the image below:

Grab config and paste to App.js as shown in the below:
import \* as firebase from "firebase";
import { Container, Item, Form, Input, Button, Label } from "native-base";

var config = {
 apiKey: "AIzaSyDFdsjQWG8IFLXmviNqSiVZMw\_ADFl5tpo",
 authDomain: "react-native-firebase-3bde9.firebaseapp.com",
 databaseURL: "https://react-native-firebase-3bde9.firebaseio.com",
 projectId: "react-native-firebase-3bde9",
 storageBucket: "react-native-firebase-3bde9.appspot.com",
 messagingSenderId: "269398778466"
};

firebase.initializeApp(config);
Finally, we have successfully added firebase tp our project.
Sign Up
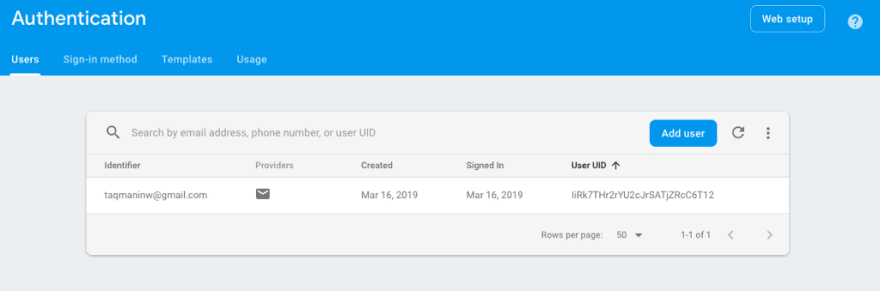
For email authentication, we need to activate Email authentication on Firebase console. Go to firebase console and enable it.

Again get back to VS Code and add a signup button. So that user can fill up the information.
\<Button full rounded success style={{ marginTop: 20 }}\> \<Text\>Signup\</Text\>
\</Button\>
After adding the button you will be able to see this result with a Signin and signup button.

Let’s code a little for signup button. You can follow along with me with all the steps. If you do that, there are rare chances to do mistakes and see any kind of error.
export default class App extends React.Component {
 constructor(props) {
 super(props);
 this.state = {
 email: "",
 password: ""
 };
 }
 SignUp = (email, password) =\> {
 try {
 firebase.auth().createUserWithEmailAndPassword(email, password);
 } catch (error) {
 console.log(error.toString(error));
 }
 };
Now, We create a state which handles email and password from the form and creates SignUp function for handling firebase code.
The next step is to add form value to state with onChangeText.
\<Item floatingLabel\>
 \<Label\>Email\</Label\>
 \<Input
 autoCapitalize="none"
 autoCorrect={false}
 onChangeText={email =\> this.setState({ email })}
 /\>
 \</Item\>
 \<Item floatingLabel\>
 \<Label\>Password\</Label\>
 \<Input
 secureTextEntry={true}
 autoCapitalize="none"
 autoCorrect={false}
 onChangeText={password =\> this.setState({ password })}
 /\>
We will trigger SignUp function with the onPress event for Signup button.
onPress={() =\> this.SignUp(this.state.email, this.state.password)}
Let’s try to save and submit form to test that we going in the right direction.

After entering and hitting the signup, goto firebase console. Hola, we have done it. See the firebase database, there you can see the value we have entered.
Now we have added successfully a new user to Firebase.
Sign In
Let’s code for sign in button. We use code from sign up method and change a little bit in firebase function. So that we can achieve what we want.
SignIn = (email, password) =\> {
**try** {
 firebase.auth().signInWithEmailAndPassword(email, password);
 firebase.auth().onAuthStateChanged(user =\> {
 alert(user.email);
 })

} **catch** (error) {
 console.log(error.toString(error));
 }
 };
Next, use onAuthStateChanged to getting user’s data from firebase. So, if we press the button then an onPress even call through to SignIn Buton which checks for right email and password.
onPress={() =\> this.SignIn(this.state.email, this.state.password)}
So let’s try to sign in.

It works. Finally, we did it. You can see everything works absolutely fine.
Conclusion
We have used Expo, Nativebase, Firebase. I hope you have learned. If you got stuck somewhere the following GitHub repo. There you will get the whole code. If you fee its worth, keep sharing.
Learn More
- Master React Native Animations | Udemy
- React Native: Advanced Concepts | Udemy
- The Practical Guide to React Native: Build iOS/Android Apps
- Multiplatform Mobile App Development with React Native | Coursera
Disclaimer
This post contains affiliate links to products. We may receive a commission for purchases made through these links.


Top comments (0)