
Make a fully functional real estate app in minutes
Become the next Trulia, Zillow or Airbnb by releasing a real estate app for both iOS and Android in minutes. Download our functional React Native Real Estate app template, integrated with Firebase Backend, to literally launch your own app today. Crafted with extreme attention to details, this beautiful app template written in React Native represents the best way to jumpstart the development of your new mobile app.
In this article, we’re going to learn how to build a Medium-style clap animation with React Native, including everything from initializing a React Native project to making the animation work properly.
This tutorial will cover every step in detail and include code snippets for each step. We’ll work through this tutorial by creating a new react-native project, downloading a clap image from Medium, and ending with the final animation that will include clapping, counting claps, hiding claps, etc.
Let’s get started.
Bootstrap our app
First, we need to create a new React Native project. For that we’ll use the following command:
react-native init
Then, we need to grab the Medium clap image. You can download the image from the link provided in the image below:

Next, we need to create a folder structure as shown in the screenshot below:

As we see in the above image, the clap.png image file is in “img” directory, with the components directory containing the JS files.
We need to clear up the App.js file as shown below:
Now we have a container for implementing a clap button and animation, as shown in the emulator screenshot below:

Prepare Clap Button
In this step, we need to open the clapbutton.js file in our IDE and then import the clap.png image file from the img directory of our project repository. Then we pull to the bottom of the view container. The components necessary for this are imported from the react-native package as shown in the snippet below:
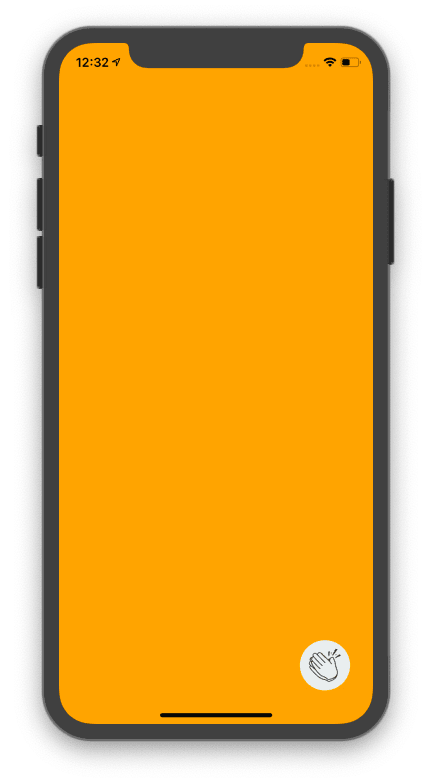
Here, we need to use a View component for the wrapper and TouchableOpacity to make an image that we imported seem like a button. Then, we need to add style to the image to it make look like the clap button from Medium. After this, we’ll get a clap button at the bottom-right corner of our emulator screen:
The next revolution in mobile development? Machine learning. Don’t miss out on the latest from this emerging intersection. Sign up for weekly updates from our crew of mobile devs and machine learners.
Clap Bubble effect
Next, we need to add a bubble animation to the clap button with the Animated component. We import the Animated component from the react-native package and use it in the view:
As a result, we’ll get the following animated object over the image in your emulator:

We can fix it by adjusting the CSS style and moving the Animated view component on top of the TouchableOpacity component:
We can now see that the clap button overlaps the clap bubble:

Adding Animation
This step is probably a bit complex compared to the others. In this step, we’re going to add an animation to our clap button. First, we add an animation for clapbubble_._ By adding translateY, we move clapbubble over the clap button, and then we configure its opacity.
Here, we start by adding a bootstrap animation state value as shown in the code snippet below:
And then, we add it to the clapbubble Animated component:
Now, we need to add the time value for our animation. We can do this by adding an animation value with timing function :
Here, we’re using a parallel method to ensure the two animations work concurrently.
The result of the above code can be seen in the simulation of the emulator below:

Adding Clap Count
In this step, we’re going to add clap count text to clapbubble that we implemented in the above steps. To do this, we’ll use the Text component from the react-native package. We’re binding the Text component with CSS style as well:
Here, we hard code the count value before making a dynamic change to it. Again, we can check out the result in our emulator:
Now, to make the count dynamic, we need to make our count value increase by a clap. To do this we need to create a new function to handle clap count.
First, add two new states to contain the count value, as shown in the code snippet below:
Then, we need to create a clap() function to handle the clap increment:
Now, we need to inject the clap() function into the clap button. We can do so by using the following code snippet:
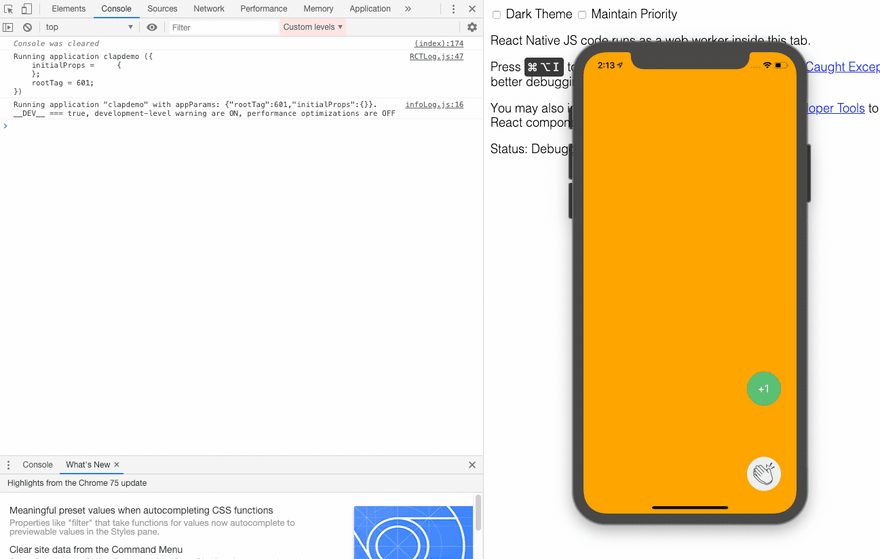
Now, test if it works as shown in the web console and emulator simulation below:

We use claps to contain the count to avoid multiple renders in the view by using the code snippet below:
Now, we can see the result of the code in the emulator simulation below:
Rendering Claps
In this step, we’ll make the clap re-render for animation purposes. The proper way to re-render a claps bubble is to make a new component for the clap bubble and then re-load the component multiple times when the clap is clicked. To do this, we need to create a component named ClapBubble and move all our clapbubble code to this component, as shown in the code snippet below:
And then, we need to import everything to the ClapButton component:
In order to re-render claps, first, when we hit the clap button, the clap value updates in the clap() function. Then, the updated state chains to the renderClaps() method, making the ClapBubble component reload with maps. Lastly, we call the renderClaps() function in the wrapper to make them re-render every time when we hit clap.
The result can be seen in the emulator simulation below:

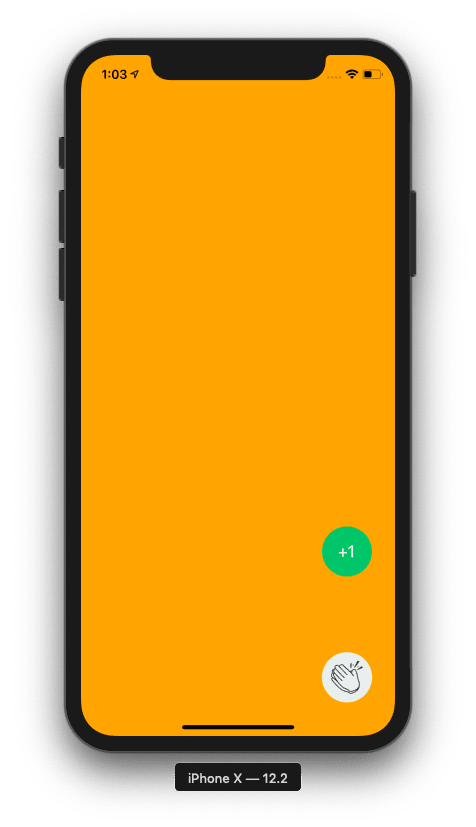
Next, we update the clap value by passing count value to the ClapBubble component. We can do this by using the code snippet below:
And then we need to update the ClapBubble component as shown in the snippet below:
We can see below that the count value increases every time we click the clap button with an animation:

Hiding the ClapBubble after clapped
After we click on the clap button, we can see that the clapbubble with the animation doesn’t hide and instead keeps showing itself in the view. In this step, we write some code to hide this clapbubble with a clap operation that’s completed by the user.
First, we need to open the ClapButton.js file and then add the function given in code snippet below:
Here, we remove the count clapbubble when the animation has successfully rendered. Next, we pass it to the ClapBubble component:
Now we need to open the ClapBubble component and paste the code below:
Next, we delay the removal of the clapped bubble by 500 ms, which will make the animation look nice and smooth. We can see the result in the emulator simulation below:

Keep Clapping
Here, we add our last feature to allow users to keep clapping when they hold the clap button. The clap bubble should render multiple times until we release the mouse.
Initiate keep clapping
First, to keep clapping, we need to repeatedly call the clap() function with setInterval as shown in the code snippet below:
Then we add the keepClapping() function to ClapButton with and OnPressIn event as shown in the code snippet below:
Let’s keep clapping to see the result:

But as we can see, now we can’t stop the clapping! So we need to add a stopClapping() function.
Stop keep clapping
We need to add one more function named stopClapping(), which will have a clearInterval() function to remove the interval object:
Finally, we activate with an onPressOut event to trigger the stopClapping() function:
And there it is! We have our final result, which you can observe in the simulation below:

Recap
In this post, we learned how to use many React Native Animated components and functions like timing, start, translate, opacity, etc. By using these components and functions, we learned how to implement a real-world example of the clap button that’s similar to Medium’s “Clap” feature. You can find all the code on GitHub:
krissnawat/react-native-medium-clap-clone
Resources
- React Native Animations Tutorial — Learn by building Medium’s claps animation
- React-Native-Medium-Clap-Animation
Looking for new ways to elevate your mobile app’s user experience? With Fritz, you can teach your apps to see, hear, sense, and think. Learn how and start building with a free account.
Editor’s Note:Join Heartbeat on Slack and follow us onTwitter andLinkedIn for the all the latest content, news, and more in machine learning, mobile development, and where the two intersect.


Top comments (0)