What's a Golden Image?
A golden image is a template for a virtual machine (VM), virtual desktop, server or hard disk drive. It's also often referred to as a clone image, master image or base image.
To create a golden image, an administrator first sets up the computing environment exactly the way it is needed and then saves the disk image as a pattern for making more copies. The use of golden images can save time and ensure consistency by eliminating the need for repetitive configuration changes and performance tweaks.
In this example, we are going to create a golden image for a SharePoint 2019 installation using Packer and we will save this template as an Amazon Machine Image (AMI). We can then use this AMI to automate the build out of our SharePoint farm.
What should be included in our Golden Image?
For our SharePoint image, we want to include everything that is needed to install the application. We will be using SharePointDSC, a PowerShell module that allows us to deploy and manage our SharePoint farm using PowerShell Desired Configuration (DSC). We won't go in to detail on what DSC is in this post, but at a high level it's a configuration management platform that's built into Windows that was designed with DevOps in mind.
In addition to the SharePointDSC module, we will also need the SharePoint binaries, any prerequisite files required for installing SharePoint, and the latest SharePoint Cumulative Update (CU).
So to recap, this is what we will include in our golden image:
- SharePointDSC PowerShell module
- SharePoint 2019 binaries
- Prerequisite files for SharePoint 2019
- Latest SharePoint 2019 CU
What tools will we be using?
We will primarily be using the following tools to create our golden image:
Packer - a free and open source tool provided by Hashicorp
for creating golden images for multiple platforms from a
single source configuration.AWS CLI - the AWS Command Line Interface (CLI) is a unified
tool to manage your AWS services; the AWS CLI is used by
Packer to create and manage our resources in AWS including
the resulting AMIVisual Studio Code (optional) - My person IDE of choice.
Since we are primarily working with YAML and HCL which are
both human-readable languages, we can use any IDE or text
editor to make changesWindows Subsystem for Linux (optional) - Since I'm a Windows
user and Ansible doesn't run natively on Windows, I use
Windows Subsystem for Linux (WSL) in order to build my
images. VS Code provides the ability to run a WSL terminal
inside of the IDE, which makes it easy to make changes and
test.
Getting started with Packer
Packer's behavior is determined by the Packer template, which consists of a series of declarations and commands for Packer to follow. This template tells Packer what plugins (builders, provisioners, post-processors) to use, how to configure each of those plugins, and what order to run them in.
The template contains flexible variable injection tools, as well as built-in functions to help you customize your builds.
Historically, Packer has used a JSON template for its configuration, but Packer is transitioning to a new template configuration format that uses HCL2 -- the same configuration language used by Terraform and HashiCorp's other products. This format is more flexible, more modular, and more concise than the original JSON template format. We will be using HCL2 in this example.
Builds
The main purpose of the HCL language is defining builds and sources. All other language features exist only to make the definition of builds more flexible and convenient. The syntax of the HCL language consists of only a few basic elements.
Blocks
Blocks are containers for other content and usually represent the configuration of some kind of object, like a source. Blocks have a block type, can have zero or more labels, and have a body that contains any number of arguments and nested blocks. Most of Packer's features are controlled by top-level blocks in a configuration file. The Packer - HCL2 language includes a number of built-in blocks that you can use to configure builds. A block is a container for configuration. The most important blocks can be broken into a couple of major types:
-
Build Blocks
Build blocks are used to build your templates. They contain configuration for a specific combination of builders, provisioners, and post-processors used to create a specific image artifact.Source Blocks
Source blocks contain configuration for builder plugins. Once defined, sources can be used and further configured by the "build" block.Data Blocks
Data blocks define data sources within your Packer configuration.Provisioner Blocks
Provisioner blocks are how we interface with our template once the operating system is installed. These blocks are nested inside of a build block. They will use either SSH or WinRM to communicate with the operating system. We will be focusing on two provisioners for our golden image: PowerShell for Windows and the File Provisioner.Variable Blocks
Variable blocks contain configuration for variables that can either be defaulted in configuration or set by the user at runtime.
Packer Template
Now, we'll break down the Packer template that we will be using to create our SharePoint Golden AMI.
Variable blocks
The first section of our Packer template is the variable blocks that define the variables that will be used throughout the rest of the template.
variable "vpc_region" {
  type    = string
  default = "$${vpc_region}"
}

variable "instance_type" {
  type    = string
  default = "$${instance_type}"
}

variable "username" {
  type    = string
  default = "$${username}"
}

variable "password" {
  type    = string
  default = "$${password}"
}
We have four variables defined: the AWS region that will host the VPC and all of the AWS resources that are used to create the AMI, the AWS instance type, and the Windows username and password for the administrator account. These variables are defined in a variable definitions file.
Data block
The next section of the Packer template is the data block. This block tells Packer to read from the given data source (amazon-ami in this case) and store the result to be used elsewhere in the template.
data "amazon-ami" "windows_server_2019_ami" {
  filters = {
    name                = "Windows_Server-2019-English-Full-Base-*"
    root-device-type    = "ebs"
    virtualization-type = "hvm"
  }
  most_recent = true
  owners      = ["801119661308"]
  region      = "${var.vpc_region}"
}
This section tells Packer to find the most recent Windows Server 2019 AMI that is owned by Amazon in the AWS region that we defined in our variable, and to save that result in "windows_server_2019_ami". We will use this AMI as a base to build out our golden image.
Source block
The next section of the Packer template is the source block. This block is used by the build block to build out our template.
source "amazon-ebs" "gold_sharepoint_2019" {
  region                      = "${var.vpc_region}"
  source_ami                  = "${data.amazon-ami.windows_server_2019_ami.id}"
  instance_type               = "${var.instance_type}"
  ami_name                    = "gold-ami-sharepoint-2019-{{ `${replace(timestamp(), ":", "_")}` }}"
  associate_public_ip_address = true
  communicator                = "winrm"
  winrm_username              = "${var.username}"
  winrm_password              = "${var.password}"
  user_data_file              = "./bootstrap_win.txt"
}
This section uses the Windows Server 2019 AMI that we retrieved in the data block, and uses that to build out a new AMI in the AWS region that we defined in our variable. The EC2 instance that is provisioned as part of the build process is given a public IP address so that we can communicate with it via WinRM to configure the rest of the golden image. We tell Packer that we will be communicating with the EC2 instance via WinRM and give it the administrator username and password that we defined in our variable definitions file. The last thing that we configure in the section is a user data file that is used when the EC2 instance is provisioned to configure the Windows 2019 instance to allow communication via WinRM. This user data file comes from HashiCorp's documentation on building a Windows image using Packer.
Build block
The next section is the build block, which builds on the source block that we defined earlier to configure the rest of our golden image. File Provisioner blocks are used to copy the PowerShell DSC scripts that we use to copy the SharePoint 2019 prerequisite files, binaries, and latest cumulative updates from the local file system to the template image.
 build {

  # Source blocks
  sources = ["source.amazon-ebs.gold_sharepoint_2019"]

  # Provisioner blocks

  provisioner "file" {
    destination = "C:\\Temp\\sharepoint_prereqs_dsc.ps1"
    source      = "files/sharepoint_prereqs_dsc.ps1"
  }

  provisioner "file" {
    destination = "C:\\Temp\\sharepoint_binaries_dsc.ps1"
    source      = "files/sharepoint_binaries_dsc.ps1"
  }

  provisioner "file" {
    destination = "C:\\Temp\\sharepoint_updates_dsc.ps1"
    source      = "files/sharepoint_updates_dsc.ps1"
  }
We then use a PowerShell Provisioner to install NuGet and load the modules required for our PowerShell DSC scripts
     provisioner "powershell" {
    elevated_user     = "Administrator"
    elevated_password = "${build.Password}"
    inline            = ["Install-PackageProvider -Name NuGet -MinimumVersion 2.8.5.201 -Force",
                         "Set-PSRepository -Name PSGallery -InstallationPolicy Trusted",
                         "Install-Module SharePointDSC",
                         "Install-Module xDownloadFile"]
  }
Finally, we use PowerShell Provisioner blocks to compile and apply the PowerShell Desired State Configurations to download the SharePoint 2019 prerequisite files, binaries, and latest update. We also mount the SharePoint 2019 image file and copy the files to C:\binaries. Lastly, we call a PowerShell script provided by Amazon that resets the EC2 configuration for the image before we create the AMI from it.
     provisioner "powershell" {
    elevated_user     = "Administrator"
    elevated_password = "${build.Password}"
    inline            = ["Set-Location C:\\Temp;./sharepoint_prereqs_dsc.ps1",
                         "Start-DSCConfiguration -Path C:\\Temp\\SharePoint2019Prereqs -Wait"]
  }

  provisioner "powershell" {
    elevated_user     = "Administrator"
    elevated_password = "${build.Password}"
    inline            = ["Set-Location C:\\Temp;./sharepoint_binaries_dsc.ps1",
                         "Start-DSCConfiguration -Path C:\\Temp\\SharePointBinaries -Wait"]
  }

  provisioner "powershell" {
    elevated_user     = "Administrator"
    elevated_password = "${build.Password}"
    inline            = ["$volume = Mount-DiskImage C:\\binaries\\officeserver.img -PassThru | Get-Volume",
                         "$drive = $volume.DriveLetter + \":\\*\"",
                         "Copy-Item $drive C:\\binaries -recurse"]
  }

  provisioner "powershell" {
    elevated_user     = "Administrator"
    elevated_password = "${build.Password}"
    inline            = ["Set-Location C:\\Temp;./sharepoint_updates_dsc.ps1",
                         "Start-DSCConfiguration -Path C:\\Temp\\SharePointUpdates -Wait"]
  }

  provisioner "powershell" {
    elevated_user     = "Administrator"
    elevated_password = "${build.Password}"
    inline            = ["C:\\ProgramData\\Amazon\\EC2-Windows\\Launch\\Scripts\\InitializeInstance.ps1 -Schedule"]
  }
}
Putting it all together
Now that we have our Packer template created, the last step is to actually run Packer to build our template. To do that, we navigate to our packer directory and run the following command:
packer build .
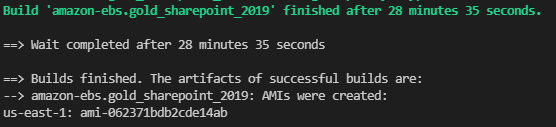
As Packer is running, we will see the current step in the process output to the screen:

When the build is complete, the resulting AMI will be output to the screen along with the time it took to build the image.
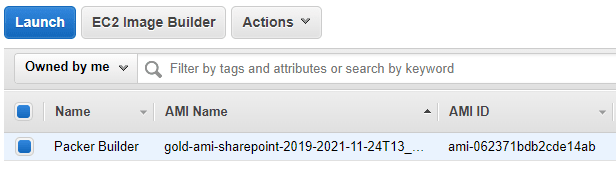
And if we check our AMIs in the AWS console, we should see our golden image that we can now use to build our SharePoint servers. We will cover how to actually build out our SharePoint farm with our golden AMI using Terraform and Ansible in future posts.
All source code used in this example can be found at https://github.com/kogermd/spgoldimage


Oldest comments (0)