NeoVim is a fork of vim that evolved into its own thing, but maybe you already knew that.
In this very short post, I'm going to help you configure your NeoVim installation on Windows to use NERDTree and vim-airline.
Starting from ready-made init.vim file
Download Lefticus's vim-config files (including the autoload directory) to your nvim configuration directory.
On Windows 10 it will be located at C:\Users\<USER>\AppData\Local\nvim, where <USER> is your user handle. Maybe you'll need to create the nvim folder.
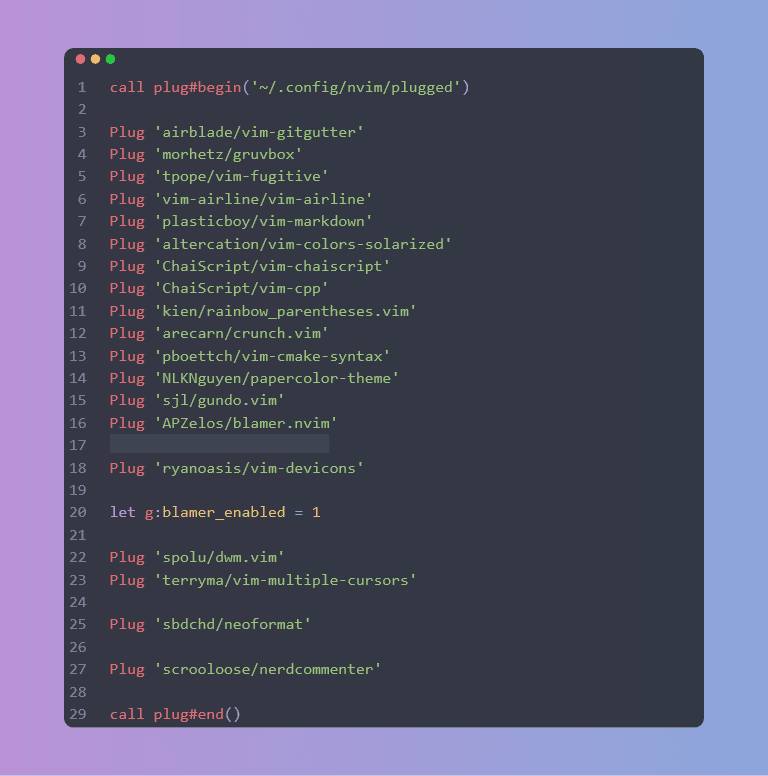
Lefticus's config files already include vim-airline. Let's add NERDTree. Locate in the init.vim file the section where plugins are added. Add the line Plug 'preservim/nerdtree' to this section. You may end with something like this.
Installing the plugins
Launching neovim after adding the files may show some errors. These errors will be corrected after downloading the plugins.
Enter command mode (press :) and run the command PlugInstall. Ex: :PlugInstall. Another tab will open with the downloading and installation progress.
If at any moment you need to update the plugins, run :PlugUpdate. And if any plugin is broken (for example, when I changed the path to NERDTree), you may be prompted to run :PlugClean.
Configuring Airline to use a Nerd Font with Powerlines
Firstly, if you don't have a Nerd Font, you can install Cascadia Code.
Better yet, if you're using the vim-devicons plugin, use the patched version at Nerd Fonts that include the icons. The rest of the post follows as equal.
The next step is to add a line to your init.vim file configuring GUI Font to a font with powerlines. See the example below, where I configure neovim to use Cascadia Mono PL with size 12:
set guifont=Cascadia\ Mono\ PL:h12
Mapping an shortcut for toggling NERDTree
Add the following line to your init.vim file.
map <C-o> :NERDTreeToggle<CR>
This will set Ctrl+o to run the command :NERDTreeToggle.
Adjusting tabs to spaces
These lines will adjust tabs to 4 charactes wide. (Extracted from StackOverflow).
set tabstop=4
set softtabstop=0 noexpandtab
set shiftwidth=4
Being a heretic and using the mouse
If you really want to use the mouse with neovim, add set mouse=a to your init.vim. a stands for "all modes".
Beware! You will attract strange looks from fellow workers using a mouse with neovim.
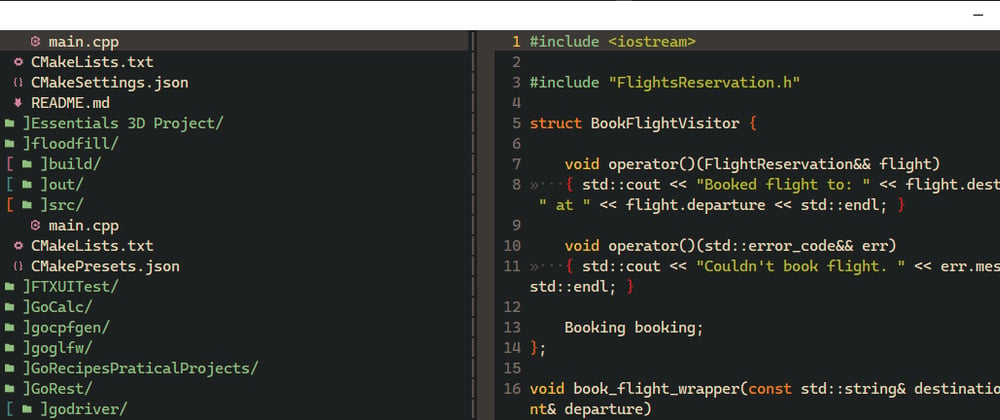
The final look

References
- C++ Weekly with Jason Turner - From where I took the initial vim files. Jason is a well known figure in the C++ community, and his channel is a great place to learn.
- How to make a pretty prompt in Windows Terminal with Powerline, Nerd Fonts, Cascadia Code, WSL, and oh-my-posh - Scott guides you through configuring Windows Terminal to show git status on your prompt. Still useful, and where I first heard about Nerd Fonts.


Latest comments (0)