This article will provide an initial setup to better understand and configure a continuous integration and delivery architecture (CI/CD). In a world where each tool overlaps the next, we want something simple, reliable, and easy to maintain. That’s why GitLab was chosen, as it provides a set of tools that would have to be externally added otherwise.
This guide assumes none of the tools mentioned in the title were either installed or configured.
Angular 6
Let’s start by installing the Angular CLI globally. Check https://nodejs.org/en/download/ if NodeJS and npm are not installed.
$ npm install -g @angular/cli
Create a new Angular application
$ ng new demo-app
$ cd demo-app/
Angular will set up everything you need for your application, including initial test setup.
Run the following, to run the unit tests.
$ ng test
And the following, for the end to end tests.
$ ng e2e
To run a server.
$ ng serve --open
When an application is created with the Angular CLI, a git repository is also created.
Let’s move to GitLab configuration.
GitLab
Create an account at https://about.gitlab.com/ and then a New Project.
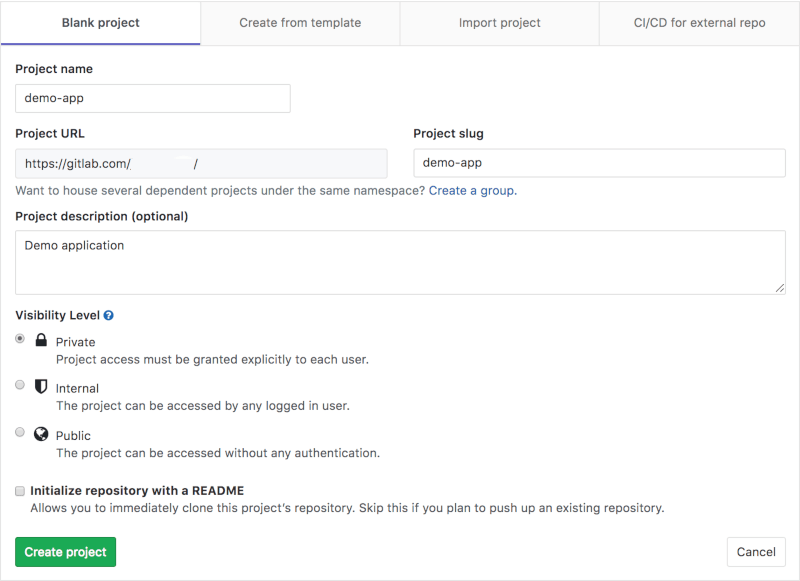
Once you’ve set up your empty repository, a list with several options regarding your local git configuration will show up.
Do not forget to set your ssh keys, check the following links for more information https://docs.gitlab.com/ee/ssh/README.html and https://docs.gitlab.com/ee/gitlab-basics/create-your-ssh-keys.html.
Let’s configure the previously created GitLab repository to be our Angular application origin.
$ git remote add origin git@gitlab.com:<your_account>/demo-app.git
Push it.
$ git push --set-upstream origin master
Google App Engine
This is a serverless platform that allows you to build highly scalable applications. Create an account at https://cloud.google.com/appengine/.
Similarly to other services, Google Cloud asks for a credit card upon the creation of an account, and also, as other services do, they provide an amount of credit ($300) for you to explore the platform. The trial period lasts for one year, or until the provided credit is used up.
Create a new project. Below is our project’s definition.
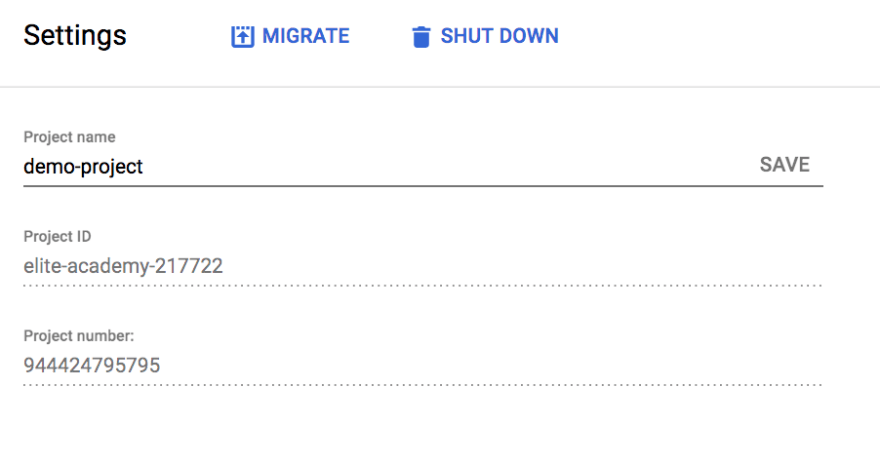
Once the project is ready, a set of options similar to the ones below will be available.

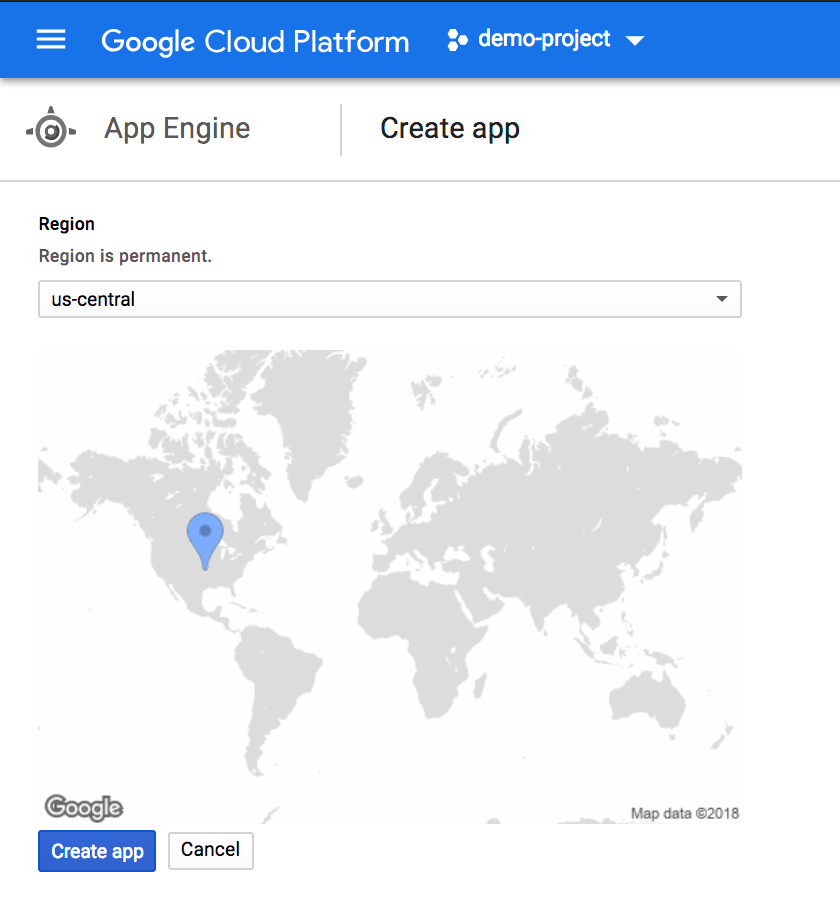
Now we’re going to create an application. Click **Create Application and **choose a region for your app.
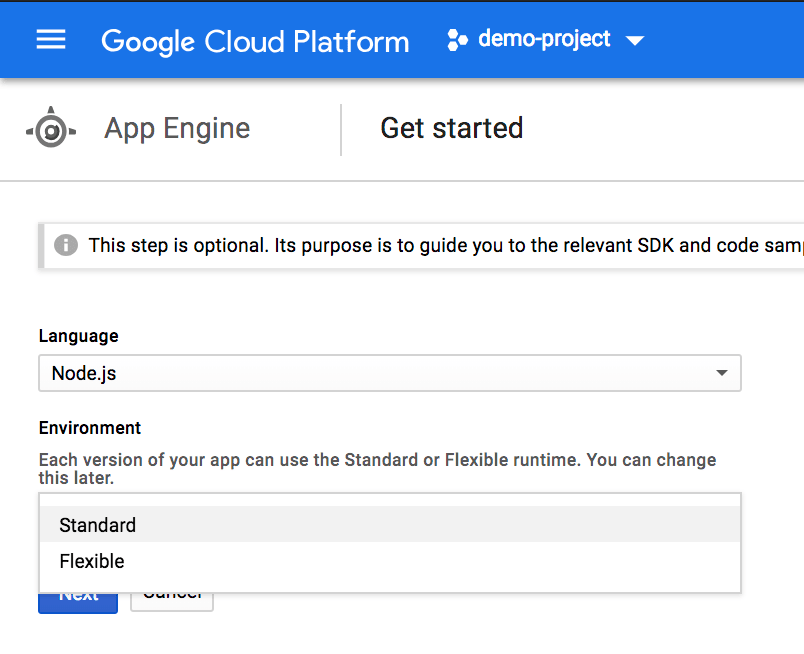
Define the language and the environment. The language will be Node.js and the environment will be Standard. To learn more about this topic check https://cloud.google.com/appengine/docs/the-appengine-environments .
Et voilà! We have created our application!
Before continuing, we want to make sure the deploys are working properly, so we’re going to deploy our Angular Application, using two different configurations, via command line.
First, we need to build our application.
$ ng build --prod --aot
We also need to create an app.yaml. This is the deployment configuration for Google App Engine.
To learn a bit more about the available configuration options take a look at https://cloud.google.com/appengine/docs/standard/python/config/appref
Second step, is to install the Google Cloud SDK. Follow the steps at https://cloud.google.com/sdk/ so that we can deploy our application via command line.
gcloud deploy with user credentials
Run the following command to initialise and set a new configuration. Choose one that’s associated with your user.
$ gcloud init
Once that’s set, run the command below to deploy and follow the instructions.
$ gcloud app deploy
gcloud deploy with service account
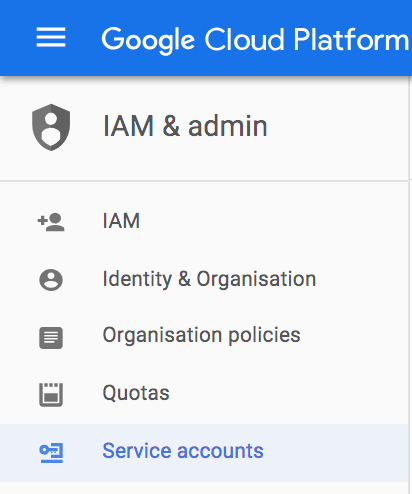
Navigate to Google App Engine console, go to IAM & admin. **There we’ll find a list of users/members and their respective roles. Since we want to deploy our Angular application via GitLab’s CD, we need to add a **service account.
- Go to Service Accounts menu.
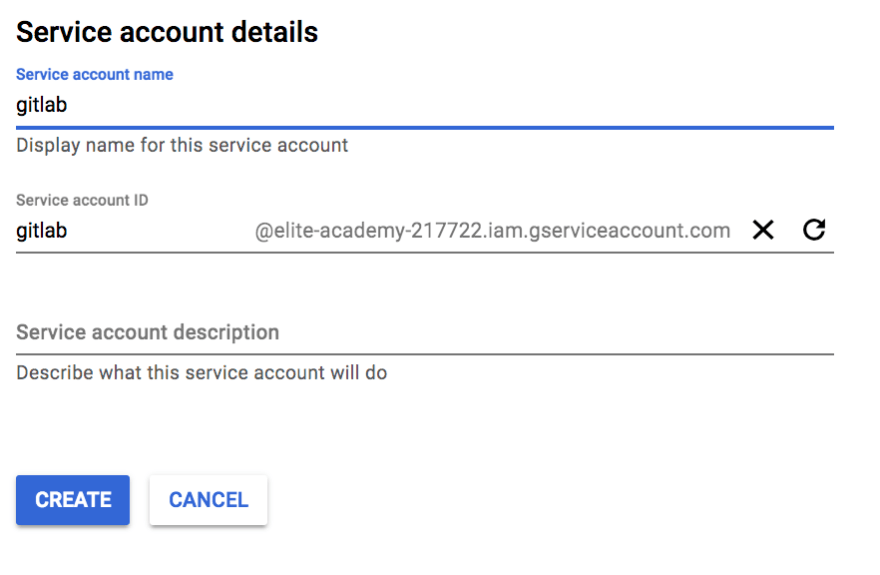
- Add a service account for GitLab.
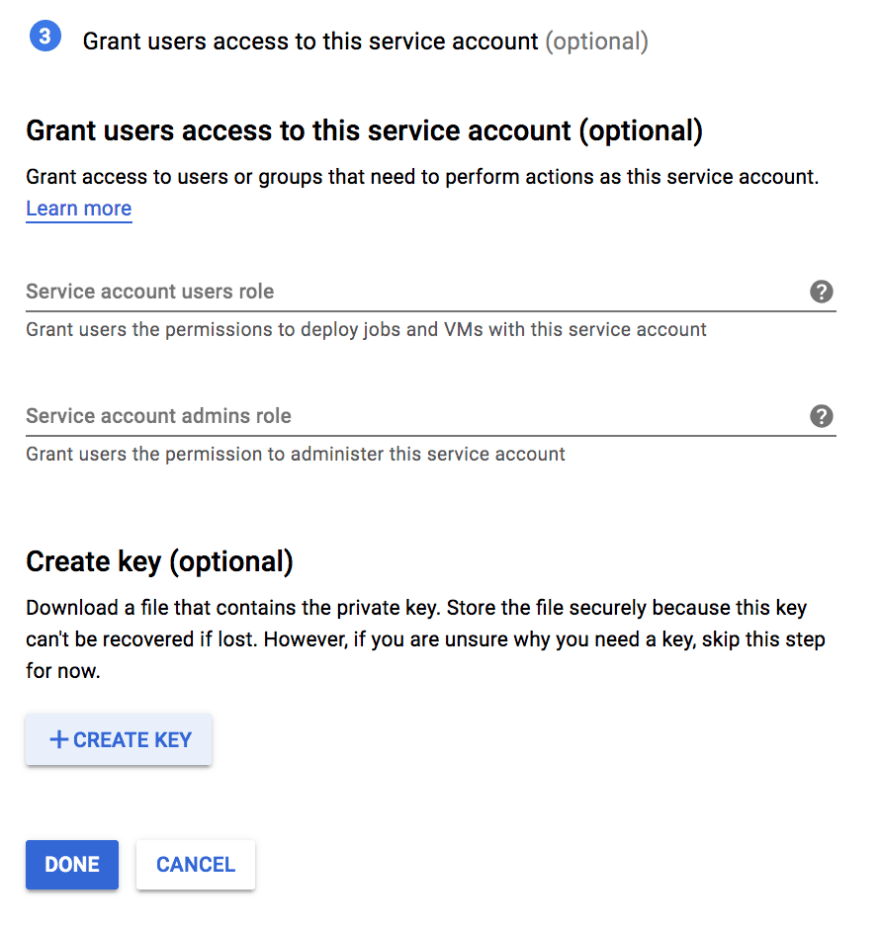
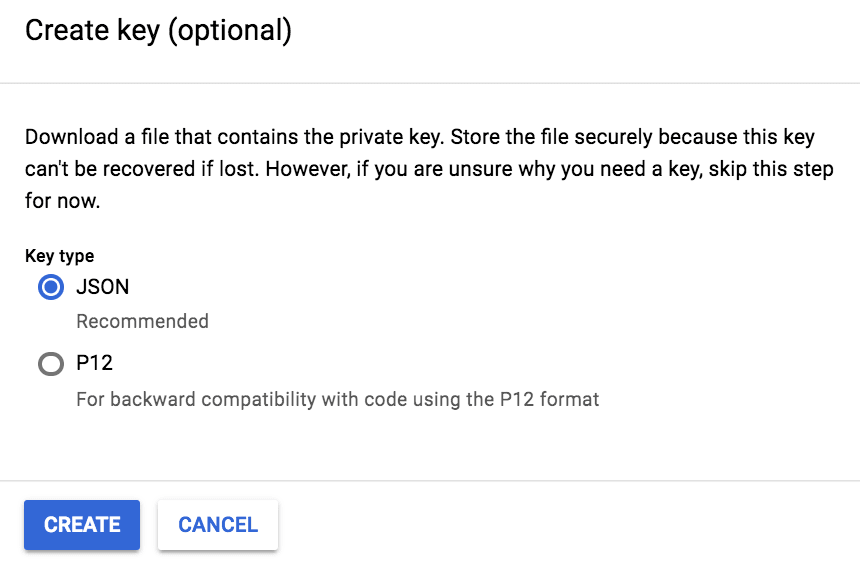
- Create a key for that account and save the json.
- Navigate to IAM where the members and their roles are listed, and add the following roles to the service account we’ve just created: App Engine Admin, Cloud Build Editor and Storage Admin. To better understand roles check https://cloud.google.com/iam/docs/understanding-roles .

Now that we’ve set up our Google App Engine side of things, we can deploy our Angular application using the Service Account. Run the following commands, the first is to authenticate using the service account, and the second is to deploy the Angular application. The option “— project” is the Project ID.
$ gcloud auth activate-service-account --key-file <service-acc-key.json>
$ gcloud app deploy --project=elite-academy-217722
Angular 6 + GitLab CI
Before activating the GitLab’s CI let’s change the way tests are run. If you recall, when you ran
$ ng test
or
$ ng e2e
A browser is opened and the test is performed. However, this is not supported by the GitLab’s CI. To overcome this we’re going to use a headless browser.
Test with Headless browser via Puppeteer
Install puppeteer and it will also install headless Chromium.
$ npm install puppeteer --save
Now we need to update karma.conf.js that is responsible for ng test.
And also protractor.conf.js responsible for ng e2e.
To automatically activate GitLab’s CI we need to add a file with the jobs to run. In this particular case we’re going to run two jobs, one for each test command.
CI jobs
Create a file with the name **.gitlab-ci.yml **at the root of demo-app, with the following content.
Let’s go through the above configuration:
image : this defines the docker image that’s going to be run by GitLab’s runners. Our base is NodeJS, so this defines that we’re going to use the latest NodeJS image.
**cache: **whenever a release is built, a cache is created. In this case, we’re caching node_modules.
**before_script: **this option defines the operations that we must run before executing a job. The first line defines all the additional packages that are required by Chromium, and the second line installs all the saved NodeJS packages.
stages: **here we define job groups. All jobs within a group are run in parallel. **Stage test runs first and, if it succeeds, stage build runs afterwords.
job 1: is the job responsible for running the unit tests. The stage where it runs is defined and also the script that’s going to perform the test. The relative path towards the project must be set, otherwise the executable won’t be found.
job 2: is the job responsible for the end-to-end tests. The configuration is very similar to the previous job.
release_job: **besides the already mentioned options, the release includes an artifact and a requirement tag. **Artifact is the result of the angular build, in this case it is set for production and compiled with the ahead of time option for better performance. The requirement tag is only, and is set to tags. This configuration means that release_job is only available whenever a release is created.
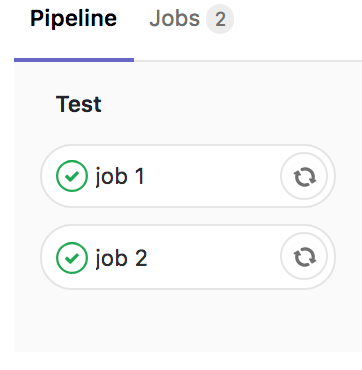
Push all the previous updates to the repository and check GitLab’s Pipeline under CI/CD.

Click the icon on the left that says passed, to access the jobs.
Release
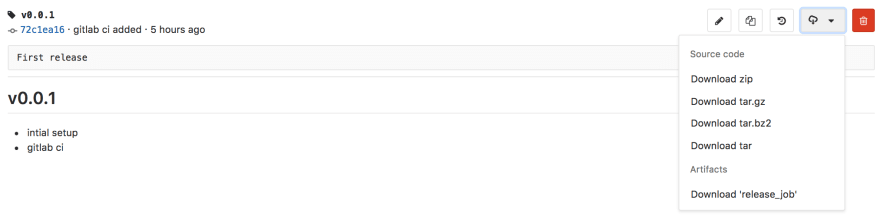
Let’s create a release to check our release job. In GitLab, on the side menu under Repository you’ll find Tags.
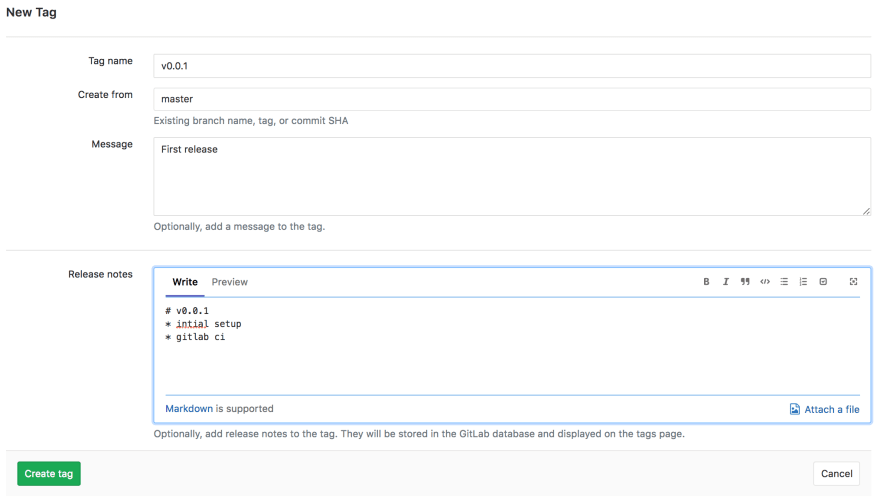
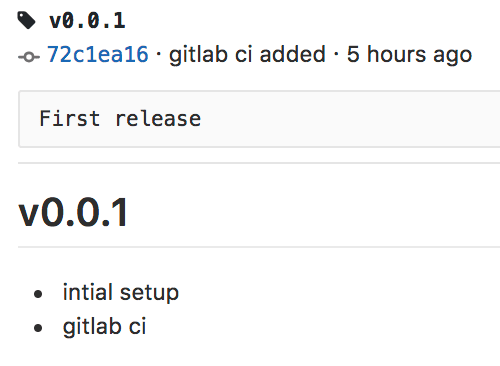
Our first release is created
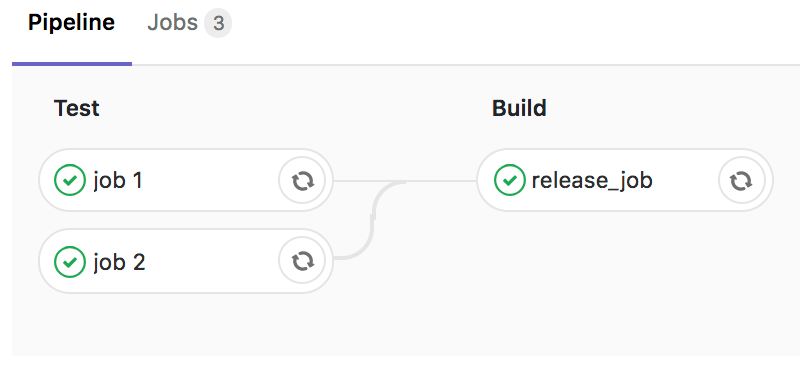
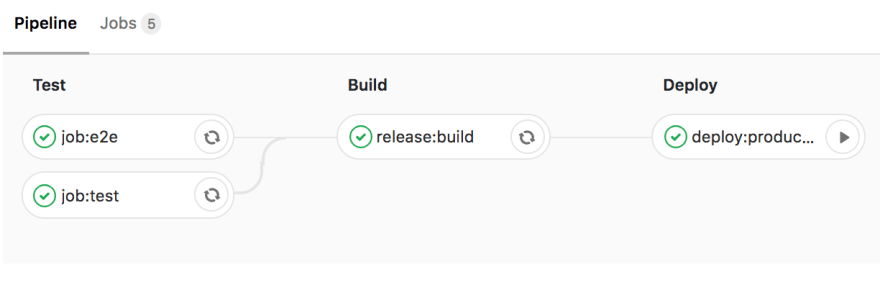
Let’s click the link within the git reference associated with the release, and then click the pipeline option. Our pipeline now has an additional step, build.
Under tags you have the option to download your newly built release. You can do so by choosing Download ‘release_job’.
Angular 6 + GitLab + Google App Engine
Now that everything is set, we are going to configure Manual deploys from GitLab **to Google App Engine**. It could be automatic whenever a release is built, but people make mistakes, so we’re going to set it to manual mode.
To do that, there are two things we need to do: configure environment variables and update .gitlab-ci.yml to run our deploy commands.
Set environment variables in GitLab
Under the settings menu in our GitLab project we’ll find the Variables menu, click expand.

Create two variables:
GAE_KEY_FILE: copy the content of the json file associated with the Google App Engine service account and paste it in the value field.
GAE_PROJECT_ID: the project id, in this case it’s value is elite-academy-217722
Save variables.
.gitlab-ci.yml update
The main addition was the deploy stage, however some other changes were introduced regarding the job names and script execution.
The before_script was moved inside each job, this means it will run for job:test and job:e2e but not for deploy:production.
Let’s go through the job deploy:production:
stage: stage that’s associated with it, in this case deploy
environment: this allows us to rollback if necessary. When a deploy is successful it will appear under GitLab’s Operations > Environments.

before_script: only has the necessary scripts for deployment.
dependencies: it will depend on the job release:build, meaning that the artifact that was created under the dependency will be available in this job. Also means that the build only runs once.
scripts: scripts used for deployment. As you can see, they are the same as the ones we tested earlier with service account. Both service account key file and project ID are set in GitLab’s environment variables.
when: set to manual, so that the deploy does not occur automatically.
only: similarly to the build, this job is only available when a release/tag is created.
The next time we create a release/tag, we’ll have something new in our pipeline.
Press play and the Angular application will be deployed to Google App Engine via GitLab’s CD.
That’s it! Hope you’ve found this guide helpful. Fell free to share your thoughts, problems or suggestions and don’t forget there’s always room for improvement!
Take it away!
At Runtime Revolution we take our craft seriously and always go the extra mile to deliver a reliable, maintainable, and testable product. Do you have a project to move forward or a product you’d like to launch? We would love to help you!


Top comments (0)