If you’re frequently moving data between SQL and MongoDB, chances are you’ve needed to do one or both of the following:
- Imported a single SQL table to a single MongoDB collection, and repeated the process 10, 20, 100 times to transfer the rest of your database
- Converted .sql files to JSON or CSV files to use for import
But these methods simply flatten a SQL table to a MongoDB document, with default mappings that usually lead to cleanup horror.
What if you want to reflect one-to-one and one-to-many table relationships in a JSON document?
Or let’s take it a step further: What if you want to create a new MongoDB collection – with data from multiple SQL tables and databases – and add, order, and remove fields as needed?
Here’s how.
A tale of two (or many) SQL databases
Let’s say you have a simple MySQL database called customers, which is how you keep track of people who have downloaded your app, ordered your product, signed up for your class, etc.
At some point, maybe you’d want to know which countries they come from. Or maybe in which continents they’re located, in case you’re trying to figure out the ideal location for your second office.
But turns out, you never collected this information.
Enter the world database, another MySQL database that’s publicly available, which contains three tables that will rescue us from this situation:
- country
- city
- countrylanguage
We can then extend our customers’ location information by adding the fields country and continent to their profiles.
How to merge multiple SQL tables
Using the MongoDB GUI Studio 3T and its SQL Migration feature, we can create a new MongoDB collection from multiple SQL datasets.
We want a MongoDB collection that contains seven fields (I’ve also indicated their source SQL tables in parentheses):
- id (customers)
- first name (customers)
- last name (customers)
- email address (customers)
- city (customers, world)
- country (world)
- continent (world)
With this new collection, we can answer two questions:
- Which countries do our customers mostly come from?
- On which continent should we open our second office?
1 - Connect to the SQL database
We connect to our MySQL customers database directly through Studio 3T.
This will be our source SQL connection.
2 - Define the target MongoDB connection
Then, we choose the target MongoDB database where we want to create our new collection, which is customer-support in our example.
3 - Add SQL tables
Studio 3T calls them “import units”, but an import unit is simply where we state the root SQL table for our import task.
The root table can, of course, have relationships with other SQL tables (we’ll define these in a bit).
Here we’ve added the import unit or root table customers.customers.
Next we’ll define its relationships to the other tables world.city, and world.country.
4 - Map SQL to MongoDB
The Mappings tab is where all the magic happens.
Here, we can define one-to-one and one-to-many relationships and add, edit, remove fields as we want – all before the migration job even takes place.
The tab displays three views at once: Datasets View, Schema View and JSON Preview.
Let’s break it down.
On the top-left is the Datasets View which shows the datasets that are part of any given import.
Here, we can see that the root table is customers.customers, which has a one-to-one relationship with the world.city and world.country datasets. (We’ll discuss how to create one-to-one relationships shortly.)
On the bottom-left is the Schema View, where we can view all the fields involved in our import. Here, we can clean up the MongoDB collection before it’s even created.
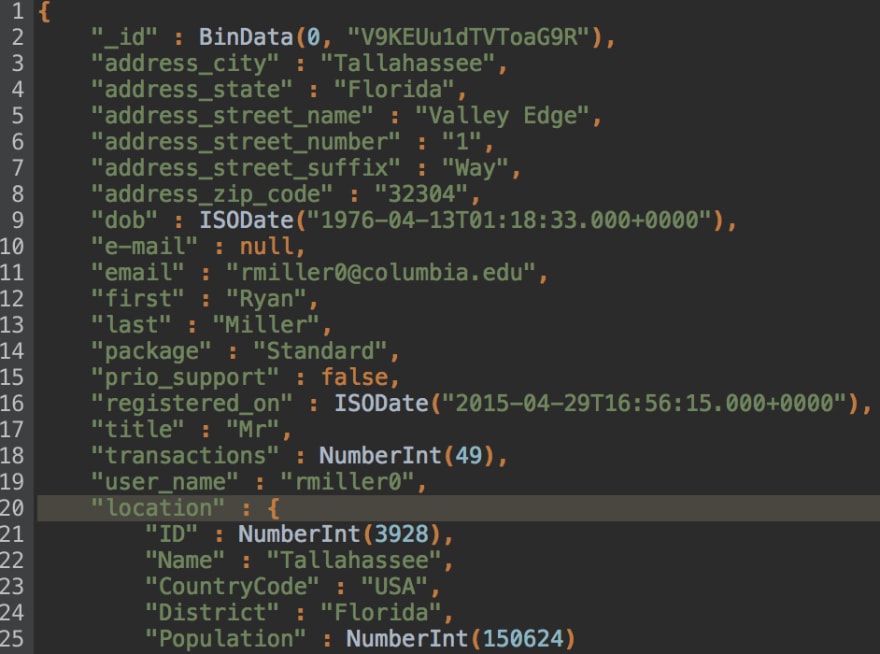
The JSON Preview, on the right-hand side, is a handy way of confirming we’re on the right track.
It shows us a preview of the final JSON document, so that we know we’re making the correct changes in the Datasets and Schema Views.
5 - Define one-to-one relationships
Let’s quickly revisit our goal, which is to create a MongoDB collection with seven fields:
- id (customers)
- first name (customers)
- last name (customers)
- email address (customers)
- city (customers, world)
- country (world)
- continent (world)
As you can see, bolded above is city, the common field between the customers and world databases which we can match on.
In the customers database, this field is called address.city; in the world database, it is called Name.
Note that using city as the unique ID doesn’t work in all cases (e.g. there is a Paris in Texas, a Berlin in Maryland, and so on), but still illustrates the functionality effectively.
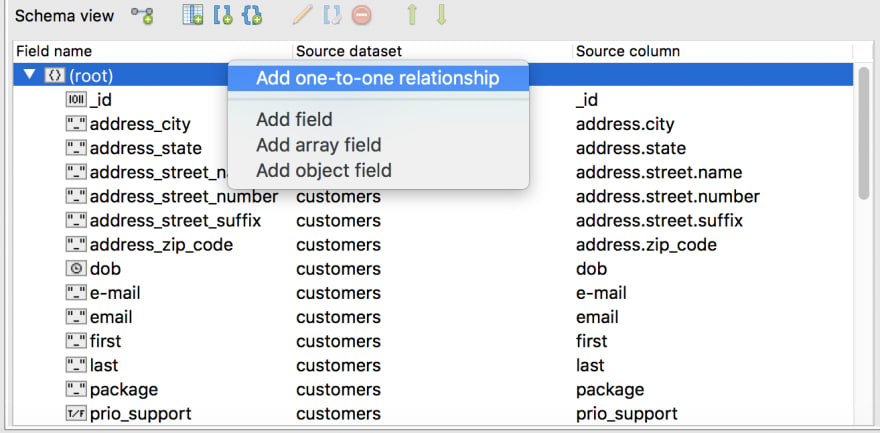
To create the one-to-one relationship, let’s go to Schema view, right-click on the root database, and choose Add one-to-one relationship.
First, we choose whether to specify the relationship manually or to get relationship from foreign keys. Here, we’ve chosen the manual approach.
We define customers as the parent dataset and world.city as the child table, whose fields address.city and Name have a one-to-one relationship.
Then, we want to create a new nested object called location. Click OK.
Hooray! We can immediately see in our JSON preview that a new nested field – location – was added to our document.
So far we have added country information to our customers’ profiles.
Next, let’s add their continent information by adding another one-to-one relationship, this time between world.country and world.city (which already has a relationship with our root table, customers.customers).
Let’s go back to Schema view, right-click on root, and choose Add one-to-one relationship.
This time, Studio 3T automatically detects the shared foreign key (CountryCode = Code) between the world.city and world.country datasets, because they come from the same database (world).
Note that you can always specify the relationship manually in case the automatically-detected mappings are incorrect.
Let’s once again add the fields in another nested object, name it country, and click OK.
And there it is in our JSON preview.
Two one-to-one relationships later, we now have successfully added the country and continent data points to our customers’ profiles.
All we need is a little bit of cleanup.
6 - Clean up the MongoDB collection
Remember how we only want seven fields in our new MongoDB collection?
The good news is, Studio 3T lets us conveniently remove, rename, reorder fields, even change field types before our import from SQL to MongoDB even begins.
Remove fields
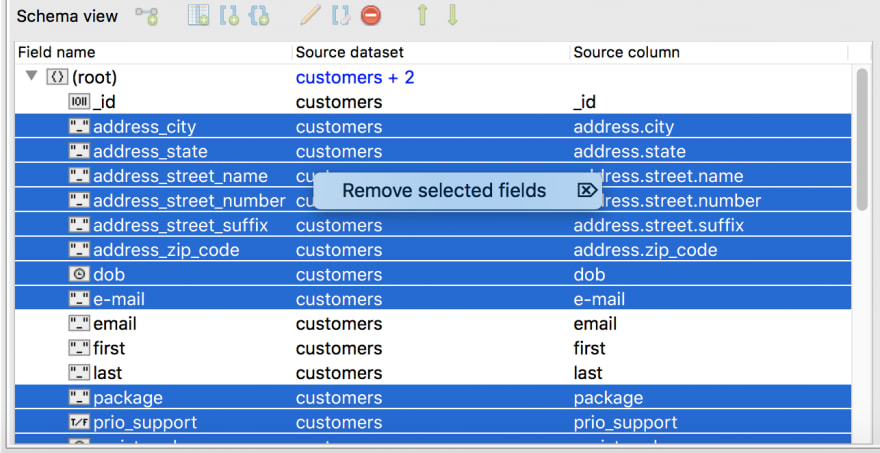
Simply select the unnecessary fields, right-click, and choose Remove selected fields.
The JSON preview handily reflects these changes immediately.
Now that we’ve whittled it down to the seven fields we want, let’s give them their correct names.
Rename fields
To rename fields, simply double-click on a cell and type the new name.
Reorder fields
Now, let’s move the fields city, country, and continent out of their nested objects to the parent level.
We do this simply by dragging the field – one at a time – to its desired location.
You can also move fields in non-nested objects by clicking on the up and down arrows in the toolbar.
Treating duplicate fields
Studio 3T flags instances of duplicate fields, which is actually the case for the field country:
Good thing renaming fields is easy. All we need to do is rename the nested object (in this case, to country-info) and drag country to the parent level.
Finally, we’re left with the seven fields we want and two nested object fields we can easily delete.
JSON preview looks good – except that _id field looks a bit funny.
Looks like Studio 3T autodetected it as field type Binary instead of String.
Change field types
Studio 3T lets us change field types directly in Schema view as well.
Right-click on the field, choose Edit/Rename, then choose the right field type from the list.
The JSON preview looks perfect – now it’s time to run the SQL to MongoDB migration.
7 - Run the SQL to MongoDB migration
SQL Migration gives us two migration options: Run migration or Run selected units.
Run migration does exactly as it states – it runs the migration and outputs one MongoDB collection per import unit. Choose Run selected units if you’re handpicking multiple import units from the list.
Click Run migration in the toolbar:
Confirm that you want the data to be imported to one collection, and click OK.
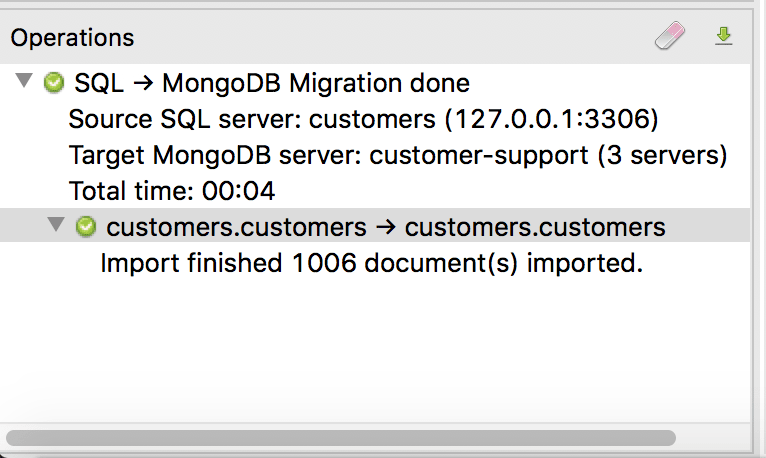
You can always track the progress of the migration task in the Operations window on the lower-left corner.
8 - Double-check the MongoDB collection
We’ve done it!
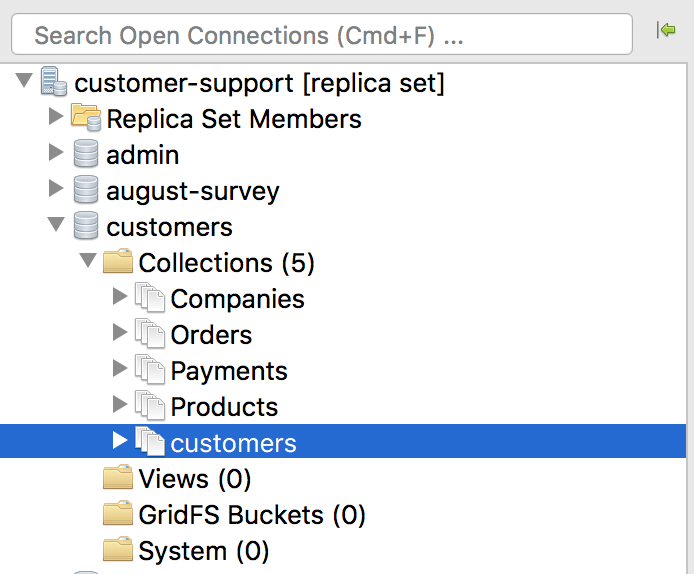
For good measure, let’s double-check that our new MongoDB collection is in indeed the customer-support database.
Go to the Connection Tree in Studio 3T and locate our target MongoDB connection.
Using Table View, Tree View, or JSON View, double-check that everything looks correct (and it does!)
Results
So, where do our customers mostly come from?
Using Schema Explorer – a separate but equally handy feature – we can see at a glance that our customers mostly come from the US.
Looks like it’s going to be a North American office after all.
And definitely East Coast.









Top comments (0)