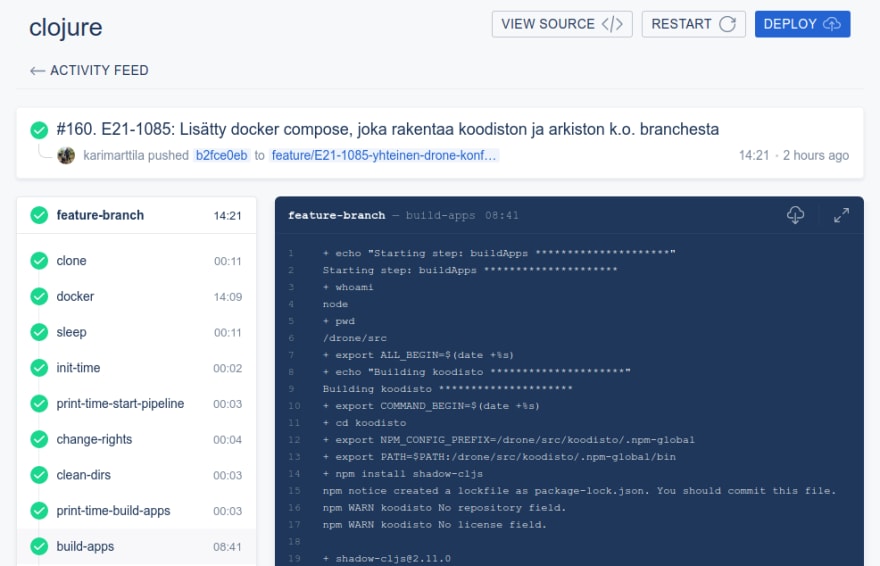
The pretty archaic Drone UI - but that’s all you need with Drone.
Introduction
We have been using Drone CI in our project for some months now. Recently I had to do a major refactoring regarding my team’s Drone pipelines so I thought that now that the Drone configurations are rather fresh in my memory I could write a blog post regarding my experiences with the Drone CI. So, here are my experiences using Drone CI as a developer - if you are looking for sysops stuff like how to install Drone CI, how to do authentication, etc. I’m not writing about that stuff and you need to read e.g. the official Drone documentation.
Drone CI Basics
I’m not going to give a lecture about Drone, you can read more about Drone in Drone CI home page but instead, I write about some important aspects about Drone CI regarding my experiences as a developer who maintains Drone pipelines and uses Drone to build and deploy applications as a daily basis.
Drone uses container architecture. This means that the Drone orchestrator is running in a Docker container and all steps in the Drone pipeline will trigger a new container that provides a nice isolated environment for that particular pipeline step. An example pipeline is depicted below:
local featureBranchPattern = "feature/*";
...
local buildApps() = {
    name: 'build-apps',
    user: user,
...
# Drone pipelines
[
{
    kind: 'pipeline',
    type:'kubernetes',
    name: 'feature-branch',
    trigger: {
        branch: [featureBranchPattern],
        event: ['push'],
    },
    steps: [
        changeRights(),
        cleanDirs(),
        buildApps(),
        startPostgresMinio(),
        runTests(),
...
It’s jsonnet and quite readable as is. You can read that it’s a pipeline meant to be run inside Kubernetes. The pipeline is triggered when a feature branch is pushed into the Git repository. I strongly recommend using jsonnet instead of yaml since you can use e.g. kind of “variables” (as the featureBranchPattern in the example above), “functions” (as the buildApps in the example above) and “branching constructs”(e.g. if). Jsonnet provides a lot better configuration language to template common parts of the pipeline, provide constants, etc.
You can basically use any Docker image in your Drone steps, i.e. basic Docker images from Docker Hub (e.g. we are using Docker Compose image to setup database, S3 simulator, various dependencies etc in tests), customized Docker images, i.e. Drone Plugins, meant to be used with Drone to do some specialized task (e.g. we are using AWS ECR Plugin to build images and push them to AWS ECR registry) or you can use your own custom built Docker images.
You can use Linux shell (e.g. bash) when writing Pipeline steps. The example below shows some simple bashing in a Drone pipeline step.
local user = 1000;
local buildBoxImage = 'circleci/clojure:openjdk-11-tools-deps-1.10.0.414-node';
local m2Repo = ' -Sdeps \'{:mvn/local-repo "/drone/src/.m2/repository"}\' ';
...
local buildApps() = {
    name: 'build-apps',
    user: user,
    image: buildBoxImage,
    commands: [
    'echo "Starting step: buildApps *********************"',
    'whoami',
    'pwd',
    'export ALL_BEGIN=$$(date +%s)',
    # Start actual jar building
    'echo "Building koodisto *********************"',
    'export COMMAND_BEGIN=$$(date +%s)',
    'cd koodisto',
    'export NPM_CONFIG_PREFIX=/drone/src/koodisto/.npm-global',
    'export PATH=$PATH:/drone/src/koodisto/.npm-global/bin',
    'npm install shadow-cljs',
    'npm install',
    'echo "css phase..."',
    'clj ' + m2Repo + ' -A:css -t target/shadow/prod/resources/public/css',
    'echo "frontend phase..."',
    'clj ' + m2Repo + ' -A:common:frontend -m shadow.cljs.devtools.cli release app',
    'echo "uberjar phase..."',
    'clj ' + m2Repo + ' -A:common:backend:uberjar',
    'cd ..',
    'export END=$$(date +%s)',
    'export KOODISTO_DURATION=$$(($${END}-$${COMMAND_BEGIN}))',
    'echo Koodisto build duration $$(($$KOODISTO_DURATION / 60)) minutes and $$(($$KOODISTO_DURATION % 60)) seconds',
...
As you can see writing steps is pretty familiar using your favorite Linux shell. You can use any Docker image for the pipeline step, and inside the step do basically anything you can do in any Docker container. You could do the building also in a docker container, using some dind (Docker in Docker) image, and build Docker images and start containers there.
Developing Drone pipelines and steps is rather easy since you can use local drone exec to simulate your pipelines in your own workstation, e.g.
# Convert .drone.jsonnet to .drone.yml...
drone jsonnet --source .drone.jsonnet --stream --target .drone.yml
# ... and run it.
DRONE_REPO_NAME="testing2" DRONE_BRANCH="testing2" DRONE_COMMIT_SHA="testing2aa2" drone exec --trusted --pipeline feature-branch --env-file=tmp/.env .drone.yml
… and you can see drone exec starting the build process in your workstation:
[build-apps:0] + echo "Starting step: buildApps *********************"
[build-apps:1] Starting step: buildApps *********************
[build-apps:2] + whoami
[build-apps:3] node
[build-apps:4] + pwd
[build-apps:5] /drone/src
[build-apps:6] + export ALL_BEGIN=$(date +%s)
[build-apps:7] + echo "Building koodisto *********************"
[build-apps:8] Building koodisto *********************
[build-apps:9] + export COMMAND_BEGIN=$(date +%s)
[build-apps:10] + cd koodisto
[build-apps:11] + export NPM_CONFIG_PREFIX=/drone/src/koodisto/.npm-global
[build-apps:12] + export PATH=$PATH:/drone/src/koodisto/.npm-global/bin
[build-apps:13] + npm install shadow-cljs
[build-apps:14]
[build-apps:15] > puppeteer@1.20.0 install /drone/src/koodisto/node_modules/puppeteer
[build-apps:16] > node install.js
...
Once you are confident your pipeline works in your own workstation you can push your branch to Git and let Drone server in your CI environment run the exactly same pipeline exactly the same way.
During the Drone pipeline Drone keeps a kind of environment which is shared between the steps. E.g. the git repo is checked into a certain directory which is automatically mounted to every step (docker container). This way you can refer to the same code directory structure in every container and also store more permanent artifacts (e.g. built jar files) into that directory structure (e.g. later on some other step builds a Docker image and bakes the jar (you built in some previous step) into the docker image.). You can also create e.g. Docker networks (e.g. using Docker Compose) in some previous step and spin some testing in another step using some other docker container running in the same network.
Running tests is pretty nice with Drone. Example:
...
local dockerComposePluginImage = 'docker/compose:1.25.4';
...
local startPostgresMinio() = {
    name: 'start-postgres-minio',
    image: dockerComposePluginImage,
...
    commands: [
        'echo "Starting docker-compose: postgres and minio..."',
        'docker-compose -p clojure-dc -f infra/docker-compose.yml up -d',
    ],
};
...

local koodistoTests() = {
    name: 'koodisto-tests',
    image: dockerComposePluginImage,
...
    commands: [
...
        'echo "Building koodisto unit test image..."',
        'docker build -f koodisto/infra/unit-test/Dockerfile -t ' + koodistoUtImage + ' koodisto',
        'echo "Starting testing koodisto..."',
        'docker run -u 1000 --name koodisto-unit-test --network clojure-network --env-file infra/.env -v /drone/src:/drone/src ' + koodistoUtImage,
    ],
};
...
# Drone pipelines
...
    steps: [
...
        buildApps(),
        startPostgresMinio(),
        koodistoTests(),
...
So, first we start two containers in a docker-compose setup: Postgres (DB) and Minio (simulating S3 bucket). Then we run our tests in another container - the image that was built specifically to run tests of that application (but requires Postgres and Minio to be up and running during tests).
Some Observations
In this chapter I list some special observations I noted when using Drone.
Caching. Caching might be a bit challenging since your Drone executor spins up ephemeral Docker containers for steps and those containers die when their job is done. You can however cache e.g. node modules, maven depencies etc but you have to plan it a bit in the steps. The easiest way might be to download those dependencies in the working directory and at the end of the pipeline store the dependencies e.g. to AWS S3 where those dependencies can be stored using a specialized Drone Plugin (AWS S3 Cache).
Users and rights. Images from Docker hub use various built-in users which might not be the ones you’d like to have. Your actual CI environment might also cause some other aspects that need to be taken into consideration. Personally I found the easiest solution to be just use some specific user and make all steps to use that user, e.g. user in the example below:
local user = 1000; # => Use this user.
...
local buildBoxImage = 'circleci/clojure:openjdk-11-tools-deps-1.10.0.414-node';
...
local buildApps() = {
    name: 'build-apps',
    user: user, # => This image provides that user
    image: buildBoxImage,
...
local changeRights() = {
    name: 'change-rights',
    image: 'alpine:3.11',
    commands:
    [
    'adduser -D -H -u 1000 node node', # => This image doesn't provide that user... so, just create it.
    'getent passwd | grep node',
    'chown -R node /drone/src',
    ],
...
Debugging tricks. A simple debugging trick is to put a temporary “stop the world” command inside the step:
local changeRights() = {
    name: 'change-rights',
    image: 'alpine:3.11',
    commands:
    [
    'sleep 100000', # => Stop the world!
    'adduser -D -H -u 1000 node node',
… and watch it stop:
[print-time-start-pipeline:3] + echo $MYBUF >> drone-build.log
[change-rights:0] + sleep 100000 # => It stopped here!
… then get a shell session inside the container and do debugging there…
λ> whoami
kari
λ> docker ps
CONTAINER ID IMAGE COMMAND CREATED STATUS PORTS NAMES
71ca3dd39a37 alpine:3.11 "/bin/sh /usr/drone/…" 16 minutes ago Up 16 minutes sun7x2doztrvwt72j058x9lcn9go3h81
c67686bcdcfb docker:dind "dockerd-entrypoint.…" 16 minutes ago Up 16 minutes 2375-2376/tcp 5hi9nwckg6dtufpg06znzf7l6qyqu1ir
λ> docker exec -it 71 /bin/sh
/drone/src # whoami # => We are in!
root
/drone/src # ls -lah
total 84K
drwxrwxr-x 10 1000 1000 4.0K Aug 26 13:33 .
drwxr-xr-x 3 root root 4.0K Aug 26 13:33 ..
-rw-rw-r-- 1 1000 1000 11.2K Aug 26 13:32 .drone.jsonnet
-rw-rw-r-- 1 1000 1000 10.0K Aug 26 13:32 .drone.yml
drwxrwxr-x 8 1000 1000 4.0K Aug 26 11:11 .git
Comparing Jenkins and Drone
I have mostly used Jenkins the previous years as my CI server. When comparing my Jenkins and Drone experiences I kind of like Drone more for the following reasons:
- Shell scripting. As you could see in the examples above you can write your pipeline steps using simple shell commands inside container, and do basically anything you like in those steps. You don’t have to use some “language that is a bit like Groovy but not quite”, I guess you know what I mean.
-
Containers. Containers provide a nice isolated place for your builds and they are also rather nice to debug once you understand the basic Drone container based architecture. Debugging Jenkins builds are of course rather easy, since you can always just get a
sshsession to the Jenkins server and go to the Jenkins workplace directory and experiment there. -
Local development.
drone execis a real nice tool to develop your CI pipelines. And if you follow some practices (e.g. the same user in all steps…) you can run the pipelines exactly the same way both in locally in your workstation and in your team’s Drone server. - No UI hassle. If you want to use some specific plugins in Jenkins you can of course install them when you install Jenkins, but there are quite a lot of configurations in those plugins that you usually need to do using Jenkins UI. With Drone everything are just Docker containers, no special configurations.
Conclusions
Drone is a refreshing new CI tool which provides a pretty different architecture and model to create your build pipelines. Give it a try - I think you just might like it!
The writer is working at Metosin using Clojure in cloud projects. If you are interested to start a Clojure project in Finland or you are interested to get Clojure training in Finland you can contact me by sending email to my Metosin email address or contact me via LinkedIn.
Kari Marttila
- Kari Marttila’s Home Page in LinkedIn: https://www.linkedin.com/in/karimarttila/


Top comments (0)