Well, this wasn't born as a blog post at first, but, I wanted to let the world now that I was able to build a Chrome extension! (I didn't publish it, tho)
TL;DR: Here's the GitHub repo: https://github.com/KevLehman/visible-ads
Requirements!
- VSCode (or similar editor)
- Git (to upload your project, or to clone the finished one!)
- An icon for your app (you can use this site to convert your image file to an icon)
- Patience ;)
Let's start!
We will create an extension to highlight (with a border) Google ads on the search results page (so they are identifiable by anyone!). We can do that by hand, but, we are developers, so, let's make an extension for it!
Let's start by creating a folder that will hold our extension's brain. I'll name it visible-ads (you can name it whatever you want it).
Now that you have the folder, cd into it and create a manifest.json file (every chrome extension should have this file since this is the presentation card for them). Let's create them and open it into your editor of choice.
On that file, we will add the following information (for now):

With that, we're telling Chrome our extension's information. We'll add more information here as we write our extension.
Now, let's create our first JS file. We'll name it background.js. This file will contain some logic that will run in the background when our extension starts. As before, here's the content and we'll talk about it after:

Let's see some details of it:
- First of all, we are using a global variable provided to all extensions:
chrome. This global contains an API that allows us to interact with the browser. Elements such asstorageorruntimeare only available through this variable. - We are using
chrome.runtime.onInstalledAPI to add an event listener. This event will be fired when our extension is installed on a browser. - On the callback for that function, we'll use another browser API which allows us to interact with the browser storage. We'll add there a variable called
hidethat we'll use to modify our script's behavior. - The other API we're using is the
declarativeContentAPI. This API allows our extension to decide on which domains our extension will work. For now, we'll limit it to run only ongoogle.com. To read more about this API, you can see this link
How does the browser know this file should be run in the background? manifest.json to the rescue! Add the following lines to your manifest.json file:

Per Google's Developer Docs, to use the declarativeContent or storage APIs, we should request them. Let's do this by setting up which permissions our extension needs. Where can we do this? In the manifest.json file!. Go ahead to it again, and add the following lines:

(Note: for simplicity, we're adding the activeTab permission here, but we'll use it later)
Now, let's start building our application logic!
Extension's Landing page (well, not really)
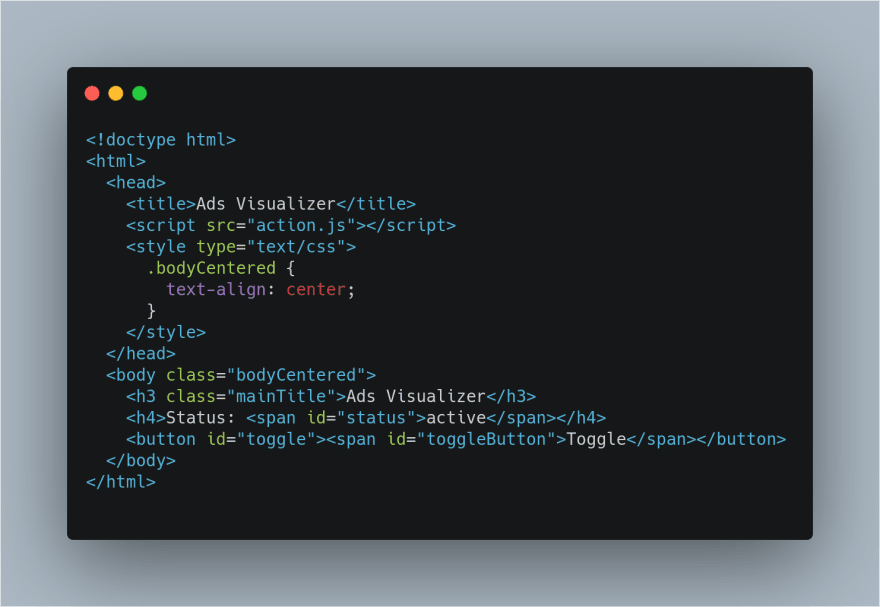
Our extension needs something a user can see and interact with! So, let's create a new file called action.html (no CSS, I promise) and let's add some code to it:
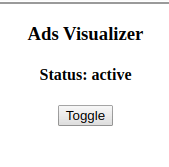
This file will produce something like this (so you know how ugly it is):
Let's add some lines to manifest.json file so the browser knows this is our "landing page" (well, a popup is what it'll be):

- We are using the same config to set the default title & icon for the page, as well as the popup that will show every time a user clicks on the icon (on chrome's extensions zone)
As you may notice, we are including a script called action.js, but we haven't done it yet! So let's create it! Create a file called action.js. This part will be the main point of interaction between our extension and the Tab's DOM.
At the first line, we'll call document.addEventListener('DOMContentLoaded... to make sure our script only runs when everything's ready (to avoid some undefineds there, ugh). Let's see the first half of the file's content:

- We are getting the button that we created on our HTML file and the status
spanitem we created. - Using the
storageAPI, we retrieve the value for thehidevariable we defined there. We don't care for this to be synchronous, so let it be. - After getting the value from
hide, we're using it to dynamically set the value of thestatuslabel toactiveorinactive. This won't be called every time we click, but every time we click on our extension's icon.
The second part of the file is this:

- We added an
onclicklistener to our button, which will perform the real work! - Inside this, the handler is updating the value saved on
storageto be the inverse of the one there's now (effectively, toggling it). - On the callback for this
storagecall, let's update thestatuslabel again. - After that, we'll use a new Chrome API to interact with the browser. This is the
tabsAPI, which allows us to query the browser to get the tabs we want to use. For example, we could query only foractivetabs by runningchrome.tabs.query({ active: true }, ...). For now, instead of querying it, we are using its handy function to get the tab we're on. As every other API used, this is asynchronous, so the work should be done on the callback - There, let's use another function that will allow us to communicate with something called
contentscripts. A content script is a file running on the context of web pages, allowing it to interact with the DOM of the tab we want. From the files we have, we are only allowed to interact with our extension's generated DOM (the HTML file we created above). - We're passing the command our content script will run as a message, and the value for
shouldToggle. - On the callback (after the message has been received & processed), let's log the result value. In the real world, you will perform other things here, but, since this is a blog post, a
console.logwill suffice.
WAIT A MINUTE! We don't have any content script!!!
Keep calm. Let's create one! Create the content.js file and add the following code:

- Our function
addStyleswill create a new CSS class within the tab's DOM with the border we want to add. - Our function
showAdBorderwill map over every ad (by the time of this blog post being written, ads contained theads-adclass) and add the style we've created - The
removeAdBorderwill do the same, but removing the class instead - Another chrome API used:
runtime.onMessageallows the tab to listen to whatever message we're passing to it. We pass messages as seen before by callingchrome.tabs.sendMessage. - Here, if the command received is
init(better naming the next time...) we'll callshowAdBorderandremoveAdBorderotherwise. - After finished, the function sends the response back to the emitter by calling
sendResponsefunction. In case of failures, you can use this to emit errors too!
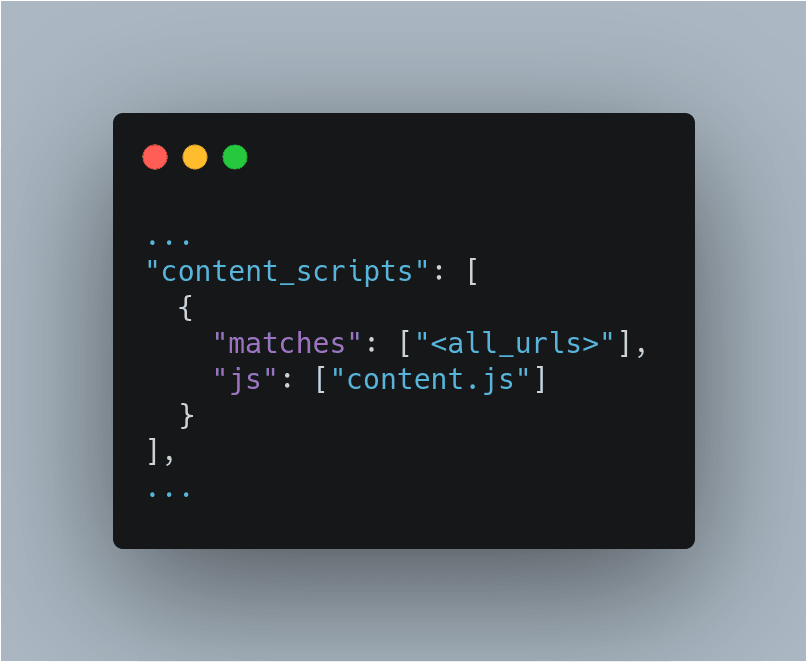
Now we have our content script! Wooo! Yay! But, wait, again, how does the browser know that this is a content script? Let's go again to manifest.json file and add the following lines:
Now we have a working extension! Woo!
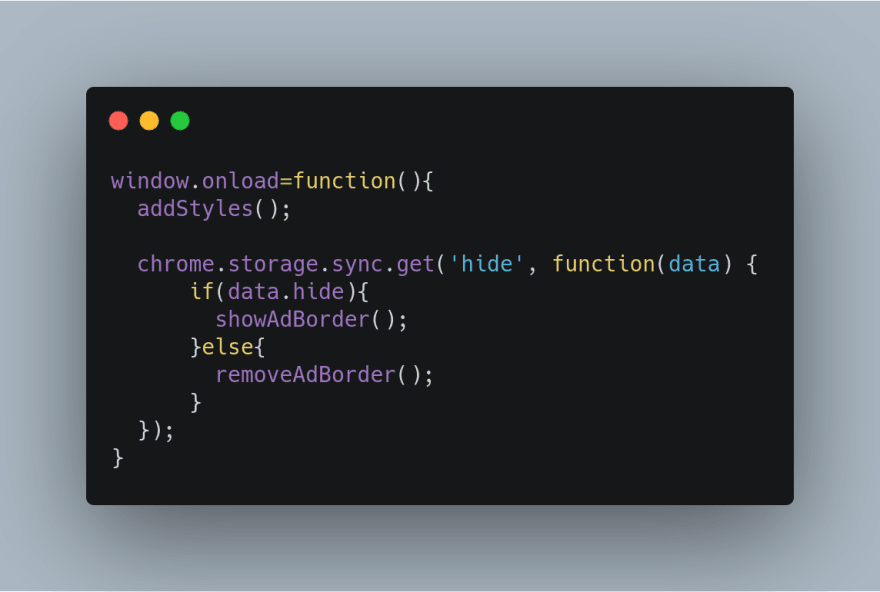
Now, let's add one last thing. We really want this behavior to be enabled by default, isn't it? So, let's do that by setting up an onload event listener on our content.js file! Add the following lines:
Save all the files (in case you haven't done it yet), because we're going to upload our extension!
- Find your way to
chrome://extensionson your browser. Make sure you have developer mode enabled on your extensions page! - Click on
Load Unpackedbutton, and locate the folder you were working on (in my case, it was on~/Documents/visible-ads - Wait for a second until it loads. If everything is OK, you should see something like this on your dashboard:
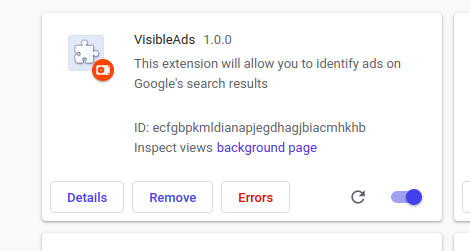
- If you are able to see it, it means it's running!
Let's try it. Go to www.google.com, and look for something that will contain ads, like, basecamp or amazon

As you can see, there's an ad. How do we know it is an ad? By the blue border around it. Now, you can share this extension with others so they don't confuse ads with organic results anymore!
Let's finish our extension with something we should've done at the very first. From a terminal, run git init git add . and git commit -m "your message goes here" so your project is safe & you can modify it freely. For example, you can change the styles variable to add a background color like the ones ads had on the past.
Thanks for reading! Happy coding!


Latest comments (3)
Hey I tried uploading the unpacked version but it doesn't appear to be working anymore? The ads aren't getting highlighted.
Also, how do you write the code so that the extension will run automatically, and doesn't require a toggle. (i.e. if the extension is on, it will run when you get to a new webpage). Thanks!
Thanks man for sharing this! Got the exact thing I was looking for to start!❤
Thanks for sharing your knowledge. This is a good starting point for the development of my first chrome extension. :-)