
Aws simple storage service (S3) is a cloud object storage service that is provided by AWS. It is similar to most cloud storage services offered by major cloud service providers. S3 allows you to upload and store files in your storage bucket on the cloud, we are going to create a storage bucket and interact with it using NodeJS.
I'll assume that you already have an AWS account set up so we are not going to dive into that, we'll just go ahead and create a bucket.
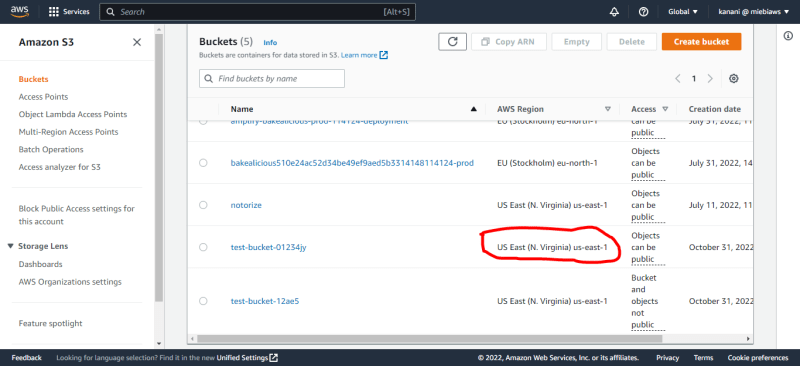
Create A Bucket

Go ahead and click the create bucket button you see on your dashboard. This will take us to a page where we will fill out some basic information about the bucket.
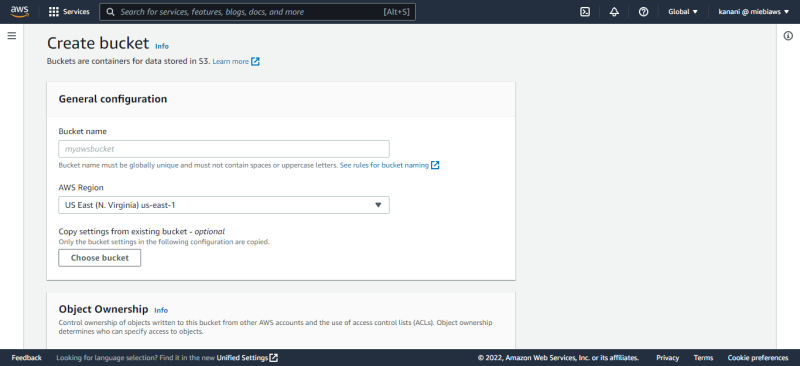
Give your bucket a name and scroll down all the way to the bottom where you'd see the create bucket button

After we are creating a bucket, we will allow cors for that bucket. This allows us to view the files stored in our bucket from a domain like a website.

When we are done configuring cors we want to create an access key for our user, this allows us to interact with AWS from our code. Our cors config for the bucket will follow the structure below;

[
    {
        "AllowedHeaders": [
            "*"
        ],
        "AllowedMethods": [
            "PUT",
            "POST",
            "DELETE"
        ],
        "AllowedOrigins": [
            "http://www.example1.com"
        ],
        "ExposeHeaders": []
    },
    {
        "AllowedHeaders": [
            "*"
        ],
        "AllowedMethods": [
            "PUT",
            "POST",
            "DELETE"
        ],
        "AllowedOrigins": [
            "http://www.example2.com"
        ],
        "ExposeHeaders": []
    },
    {
        "AllowedHeaders": [],
        "AllowedMethods": [
            "GET"
        ],
        "AllowedOrigins": [
            "*"
        ],
        "ExposeHeaders": []
    }
]
Copy and paste the snippet above in your cors file on your aws s3 dashboard, on the bucket you just created. Please replace each variable with the one that relates to your domain, headers, and methods.
Create and obtain an access key
Go to your IAM page and create an access key for the user account you want to use to interact with AWS.
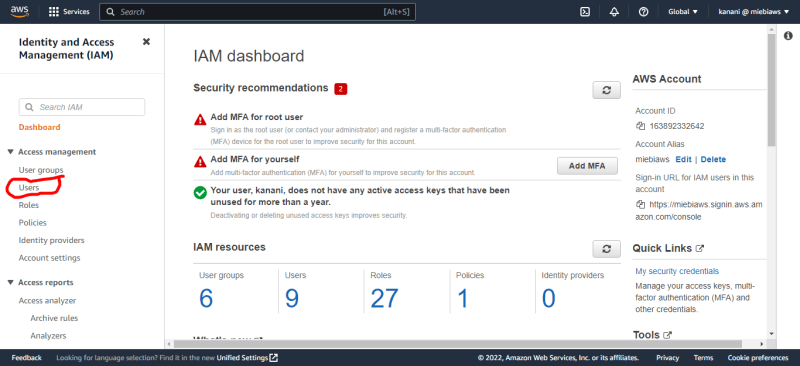
After selecting the user, click on security credentials

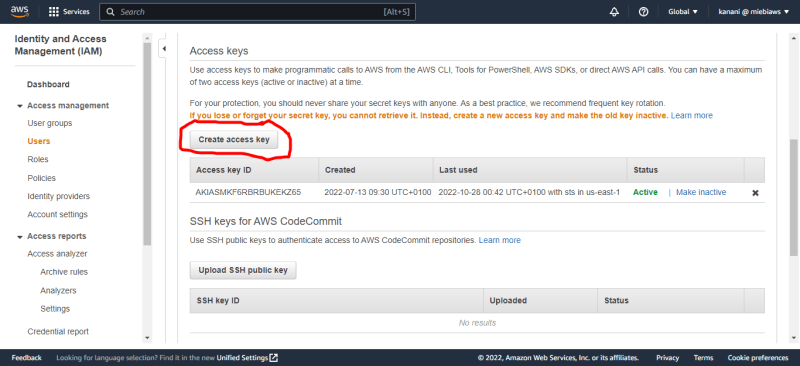
Click on create access key on the account, this access key will allow us to interact with S3 from NodeJS.
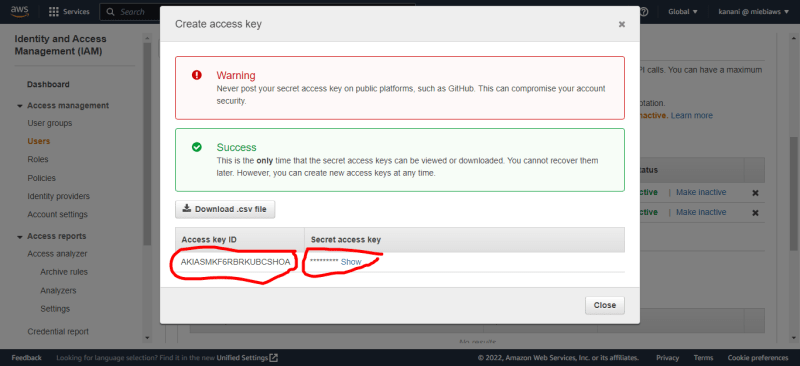
Copy your secret access key and your access key id.
Lastly, we need to copy the bucket's location
To read more articles like this visit Netcreed
Now we have all we need to get going so let's create a new folder and navigate inside it, set up a basic Node.JS project by generating a package.json file.
npm init --y
Next, we are going to install some dependencies, run the following command
npm i express cors aws-sdk multer
When it is done installing, we can proceed to write our code, first, let's set up the server.
To read more articles like this visit Netcreed.
const express = require('express');
require('dotenv').config();

const cors = require('cors');
const aws = require('aws-sdk');
const multer = require('multer');

const bootstrap = require('./helper');

const app = express();

const upload = multer({ storage: multer.memoryStorage() })

aws.config.loadFromPath('config.json');

app.use(cors());
app.use(express.json())


app.listen(4200, () => console.log(`app running on PORT 4200`));
Observe that we have loaded our aws config, this file contains our accessId and secreteKey that will allow aws identify us and our account, the content of the JSON file should look like this
{
  "accessKeyId": "accesskeyId",
  "secretAccessKey": "secreteaccesskey",
  "region": "region"
}
We need will handle uploads with the following snippet.
app.post('/upload', upload.single('document'), async (req, res) => {

  const s3 = new aws.S3()

  if (req.file && req.file.mimetype !== 'application/pdf') {
    res.writeHead(400, { 'Content-Type': 'text/plain'})
    res.end('Only pdf\'s allowed!')
  }

  const { s3UploadParams, key, fileSize, fileSizeInMB, extension } = bootsrap(req.file, 'notorize')

  s3.upload(s3UploadParams, (err, data) => {
    if (err) {
      res.error(500).json({ error: err.message})
    }
    const url = s3.getSignedUrl('getObject', {
      Bucket: 'notorize',
      Key: req.file.originalname,
      Expires: 60 * 60
    })
    res.json({
      key: `${key}.${extension}`,
      fileSize,
      fileSizeInMB,
      url,
    })
  })
});
We initialize a new s3 instance, then we check the file type to ensure that only PDFs can be uploaded to the bucket, then we use a custom function to obtain some useful parameters like the uploaded payload, the file key, and others. We then proceed to upload the object to aws s3, we use the s3.upload(payload, cb) where cb is a typical NodeJS call back function that accepts an error and a data object. If there are no errors we proceed to generate a signed URL that will allow us to view/download the object in the bucket. Notice the Expires property that determines how long this link will remain valid, it is usually in a number of seconds.
The bootstrap function helps get some basic stuff done and we'll look at the code sample below.
const crypto = require('crypto');

const bootstrap = (file, Bucket) => {

  const fileSize = file.size / 1000

  const fileSizeInMB = fileSize /1000

  const key = crypto.randomBytes(32).toString('hex');

  const [, extension] = file.originalname.split('.')

  const s3UploadParams = {
    Bucket,
    Key: `${key}.${extension}`,
    Body: file.buffer,
  }

  return { s3UploadParams, key, fileSizeInMB, fileSize, extension };
}

module.exports = bootstrap
We import the built-in crypto module from Node, and our function accepts two arguments. The first is the file we want to upload while the other is the name of the bucket. We get the file size, then we generate some random characters that will serve as the name of the file object, we create an s3 upload payload then we return the payload, along with the name of the file, the calculated file size, and the file extension
Let's add another route, this allows us to generate a signed URL to download the object in case the one we generated earlier expires.
app.get('/signedUrl/:key', (req, res) => {
  const s3 = new aws.S3();
  const { key } = req.params;
  const url = s3.getSignedUrl('getObject', {
    Bucket: 'notorize',
    Key: key,
    Expires: 60 * 30
  })
  res.json({ url })
})
To read more articles like this visit Netcreed


Top comments (0)