Let's learn how to create customizable components using props in React! We will be using Semantic UI, a CSS library for styling. For this example, we will be creating a group of horizontal cards.
First, let's put this CDN link for the Semantic UI library inside the index.html.
 <link
      rel="stylesheet"
      href="https://cdnjs.cloudflare.com/ajax/libs/semantic-ui/2.4.1/semantic.min.css"
    />
Then, we will be creating a Card.js that includes the following below. Remember to insert import React from 'react at the top. The important parts are passing props into the parentheses so that you can pass in a prop in the curly brackets in between the elements.
const Card = (props) => {
  return (
    <div class="container">
      <div class="ui link cards">
        <div class="card">
          <div class="image">
            <img src={props.img} />
          </div>
          <div class="content">
            <a class="header">{props.author}</a>
            <div class="meta">
              <span class="date">{props.joinYear}</span>
            </div>
            <div class="description">{props.bio}</div>
          </div>
        </div>
      </div>
    </div>
  );
};

export default Card;
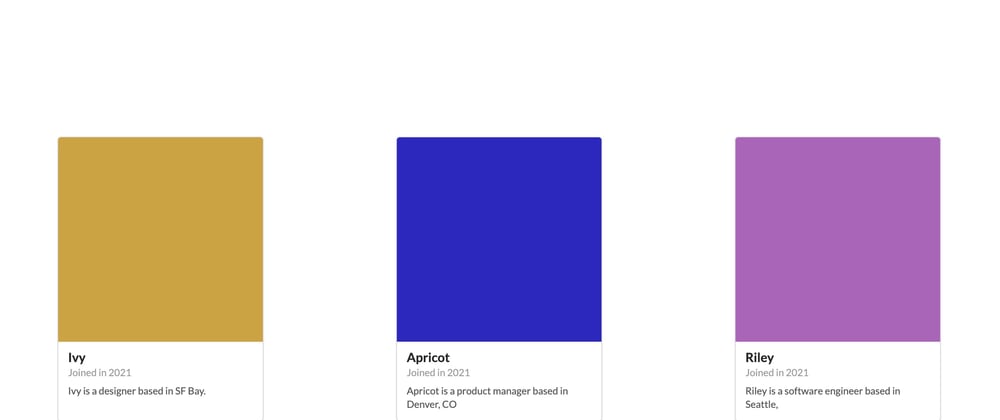
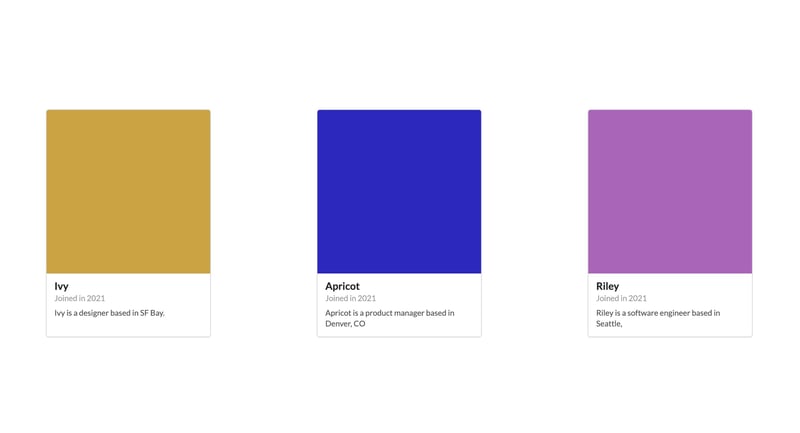
In your App.js, include the following. You can name the prop names whatever you want, but just make sure to refer to the same ones in Card.js. Then you can set the prop names equal to various contents. Also, make you can upload your own images in an assets folder under the public folder to see the cards take up the full space.
import "./styles.css";
import React from "react";
import Card from "./Card";

export default function App() {
  return (
    <div className="container">
      <Card
        img="./assets/image1.jpg"
        author="Ivy"
        joinYear="Joined in 2021"
        bio="Ivy is a designer based in SF Bay."
      />
      <Card
        img="./assets/image2.jpg"
        author="Apricot"
        joinYear="Joined in 2021"
        bio="Apricot is a product manager based in Denver, CO"
      />
      <Card
        img="./assets/image3.jpg"
        author="Riley"
        joinYear="Joined in 2021"
        bio="Riley is a software engineer based in Seattle,"
      />
    </div>
  );
}
In the styles.css, we're gonna add the following styling for the container div so that there's space around the cards and some padding on the top and bottom to make the cards line up horizontally in the middle
.container {
  display: flex;
  justify-content: space-around;
  padding: 100px 0px 50px 0px
}
Now, your cards should look like this!
If you want to see the full code for this example, see this codesandbox!


Top comments (0)