Hello Guys, You must have heard of Auth0 a quite number of times but you are not sure what it is. Or probably you might have known what it is but you have no idea how to use it. In this tutorial, I will show you what Auth0 is, what it is used for, and how you can also use it to speed up your development process. Without wasting much of your time, let's get to it.
What is Auth0?
Auth0 is easy to implement, adaptable authentication and authorization platform that creates login boxes to authenticate web application users.
Authentication is a system that is used to identify a particular application user through signing in with either an email, a username, or anything that can be used to identify the user.
So, imagine you wanted to create an application, as a developer, a lot of things are required of you to build for this application to be secured.
Users need to prove their identities through email and passwords to be able to access the resource from the application. Without these authentications passed the user won't be allowed to log on to the site.
As a developer, this requires you to create an interface on the frontend to collect data and send it to the server to save it on a database.
Creating these functionalities and integrating this into your application can be very tasking and time-consuming.
From logging in and logging out, to social medial signing in and signing out to even sign-ups. It takes a lot of time to build these functionalities.
This is the reason why auth0 was built.
To allow developers to authenticate their users with a ready-made authentication system, with beautiful Sign in, Sign out, and Signup functionality all embedded in one single piece.
Auth0 provides all these functions to make your application secure in one piece.
How does Auth0 work?
Auth0 allows developers to authenticate and authorize services to their web application through its API.
Auth0 works in a simple way.
When Auth0 is integrated into an application, the application then redirects the user to auth0 customizable login page, where it required that the user logins in before further usage.
Auth0 then takes them back to the app after successful login.
Auth0 sends user data to the application server which the developer can then use to know more about its user and perform some computations with this data.
How to integrate Auth0 into your web app
These simple steps will guide you on how to integrate Auth0 into your Node application to authentication your user and use the data that is being sent to the server by Auth0:
Step 1: Create an account on Auth0 by clicking here
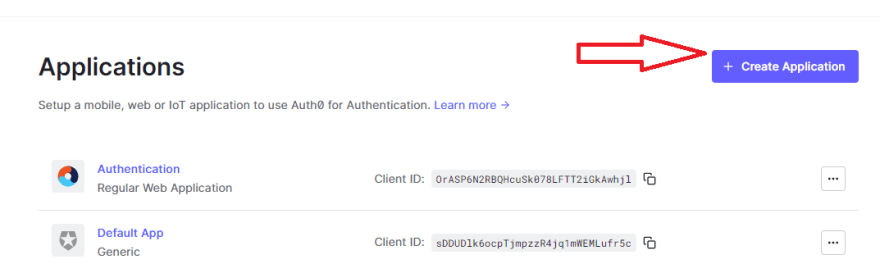
Step 2: After successful registration, you will be redirected to your Auth0 account dashboard. Click on "Application" as shown below.

Step 3: To create a new application click on the "Create Application" Button.
Step 4: Name your application, Select the "Single page web application" and click on create.

Step 5: Go to your settings tab and Copy all necessary information we will be using for our application out i.e Domain and the ClientID.
Now that we have set up our Auth0 application, we build our Node application.
Step 1: Create your application folder and let's run npm init to start a Node app.
Step 2: Run the following commands to install the dependencies that we need to build the Auth0 authentication system.
npm install express express-openid-connect dotenv
express-openid-connect allows us to be able to use Auth0 services on our application
Step 3: Create and app.js file and put in the following code:
const express = require('express');
const { auth } = require('express-openid-connect');
require('dotenv').config();

const config = {
  authRequired: false,
  auth0Logout: true,
  secret: process.env.SECRET,
  baseURL: process.env.BASEURL,
  clientID: process.env.CLIENTID,
  issuerBaseURL: process.env.ISSUER
};

const app = express();

app.set('view engine', 'ejs');

app.use(express.urlencoded({ extended: true }));

// auth router attaches /login, /logout, and /callback routes to the baseURL
app.use(auth(config));

// req.isAuthenticated is provided from the auth router
app.get('/', (req, res) => {
  console.log(req.oidc.isAuthenticated());
  res.render("index", {isAuthenticated: req.oidc.isAuthenticated()});
});

app.listen(3000)
We first made some imports in this file so that we will be able to use Auth0.
Then we configure Auth0 with the const config. This is all that is needed to configure your Node application to work with Auth0.
Secret: Just a randomly generated string
baseURL: This is the URL that we will use to test out our application
clientID: This is the ID that Auth0 gave to us on the application dashboard
issuerBaseURL: This is the URL that was given to us by Auth0 earlier.
Step 4: For how Front end, Create a folder called view and open and new file in this folder called index.js with the following code:
<!doctype html>
<html lang="en">
  <head>
    <!-- Required meta tags -->
    <meta charset="utf-8">
    <meta name="viewport" content="width=device-width, initial-scale=1, shrink-to-fit=no">

    <!-- Bootstrap CSS -->
    <link rel="stylesheet" href="https://maxcdn.bootstrapcdn.com/bootstrap/4.0.0/css/bootstrap.min.css" integrity="sha384-Gn5384xqQ1aoWXA+058RXPxPg6fy4IWvTNh0E263XmFcJlSAwiGgFAW/dAiS6JXm" crossorigin="anonymous">

    <title>Authentication with Auth0</title>
  </head>
  <body>

  <nav class="navbar navbar-light bg-light justify-content-between">
      <a class="navbar-brand">Auth0</a>
      <form class="form-inline">
      <% if(!isAuthenticated) { %>
        <a href="/login" class="btn btn-outline-success my-2 my-sm-0">Login</a>
        <% } else { %>
        <a href="/logout" class="btn btn-outline-danger my-2 my-sm-0">Logout</a>
        <% } %>
      </form>
  </nav>


    <% if(!isAuthenticated) { %>
        <div class="row d-flex justify-content-center align-items-center flex-nowrap" style="min-height: 100vh;">
            <h2>You are not Logged In</h2>
        </div>
        <% } else { %>
        <div class="row d-flex justify-content-center align-items-center flex-nowrap" style="min-height: 100vh;">
            <h2>You are Logged In</h2>
        </div>
    <% } %>


    <!-- Optional JavaScript -->
    <!-- jQuery first, then Popper.js, then Bootstrap JS -->
    <script src="https://code.jquery.com/jquery-3.2.1.slim.min.js" integrity="sha384-KJ3o2DKtIkvYIK3UENzmM7KCkRr/rE9/Qpg6aAZGJwFDMVNA/GpGFF93hXpG5KkN" crossorigin="anonymous"></script>
    <script src="https://cdnjs.cloudflare.com/ajax/libs/popper.js/1.12.9/umd/popper.min.js" integrity="sha384-ApNbgh9B+Y1QKtv3Rn7W3mgPxhU9K/ScQsAP7hUibX39j7fakFPskvXusvfa0b4Q" crossorigin="anonymous"></script>
    <script src="https://maxcdn.bootstrapcdn.com/bootstrap/4.0.0/js/bootstrap.min.js" integrity="sha384-JZR6Spejh4U02d8jOt6vLEHfe/JQGiRRSQQxSfFWpi1MquVdAyjUar5+76PVCmYl" crossorigin="anonymous"></script>

  </body>
</html>
Now our application is all set and ready to go.
Note that the URL link for Login and Logout are '/login' and 'logout' respectively. This is the convention Auth0 has made us use.
Testing your application
To test our application, run the following command in your terminal and open http://localhost:3000/ on your web browser.
node app
If you have done everything right, your page should look like this:
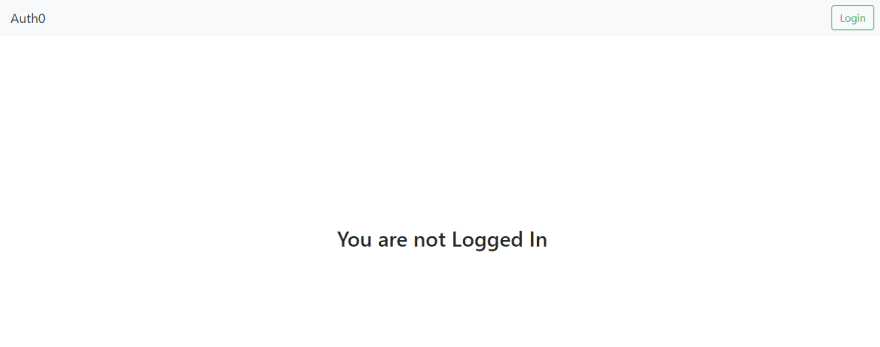
Now try the login and logout funtionality and see how Auth0 has helped us to achieve Authentication functionality within minutes.
Congratulations!!!
Conclusion
Auth0 has made building and adding authentication funtionality to our app very much easy. In this article, we were able to add this feature to our app with minutes. Although, Auth0 offers more functionalities for your applicatio. Authentication is a good way to start with Auth0.
This codes used in this tutorial can be found on my Github repo. Click here to access it.
Also follow me on {Twitter](https://twitter.com/itz_salemm) and ask you questions if you have any as I take web devevoplopemt tutorial series daily.
@itz_salem
Cheers.


Top comments (0)