
Introduction
Have you ever come across programs or task that takes a lot of time to process or give an actual output? Tasks such as sending emails and uploading data over the Internet takes time to process which can slow down your application’s workflow. These task should be run separately from other tasks.
Your application should be able to process with these task in the background and continue with other tasks. After these task have processed and the result is ready, then it can be served to the user.
I will be introducing you to setting up and configuration of celery and Redis in a flask project which handles async function or tasks like this. We would also take a look at the application of celery in real time with build and email sender app. Remember that these task takes time.
We would be making our email sender run as a background task.
Prerequisites
This tutorial assumes that you already know about the basics of Python and Flask and also assumes that you have python and Flask framework set up on your system or machine. You must also have the very least and basic understanding of HTML to build out email forms.
What is a Task Queue?
A task queue is a system that distributes task that needs to be complete as a background without interfering with the applications request and response cycle.
Task Queues makes Assigning work that slows down application processes while running easier. Intensive application can be handle by software applications like this in the background while users still interacts with the website and carry on with other activities.
This ensures that the user's engagement is consistent, timely, and unaffected by the workload.
What is Celery?
Celery is a Python task queue that allows task to run asynchronously with web applications without disturbing the application’s request response cycle.
Celery is highly scalable, which is one of the several reasons why it is being used for background work and also allowing new workers to be dispatched on-demand to handle increasing workload or traffic.
With Celery being a well supported project and also well documented, Celery still has a thriving user community, though it is still under development.
Celery is also easy to integrate into various web frameworks, with most of them providing libraries to assist with this. Celery can also interface with several other message brokers hence, its thriving community.
What is an Asynchronous Task?
An asynchronous task is simply a function that runs behind every other process running on your app. This kind of function, when called, does not affect the normal flow of the application.
With asynchronous operations, you can switch to a new task before the previous one is complete. By using asynchronous programming, you can handle many requests at once, accomplishing more in a shorter amount of time.
Installation and Configuration for Celery on Flask
Running Celery requires the use of a broker. Redis is the most well-known of the brokers.
For sending and receiving messages, Celery requires the use of message broker, such as
⦁ RabbitMQ
⦁ Redis
⦁ Amazon SQS
Note: Message brokers are programs built to aids the communication between services when sending information from both ends.
We would be making use of the Redis server in the tutorial.
Creating a Flask server
Creating a Flask server is easy. Navigate to the folder where you want your server created. Create a new python file and give it a name, in our case celeryapp.py
And add this simple code to your python script:
    from flask import Flask
    app = Flask(name__)
    @app.route("/")
    def home():
    return ""Hello, World!""
    if name == "__main":
    app.run(debug=True)
Now, let's test our server to make sure it's working.
To start our server, run the following commands in your terminal:
python celeryapp.py
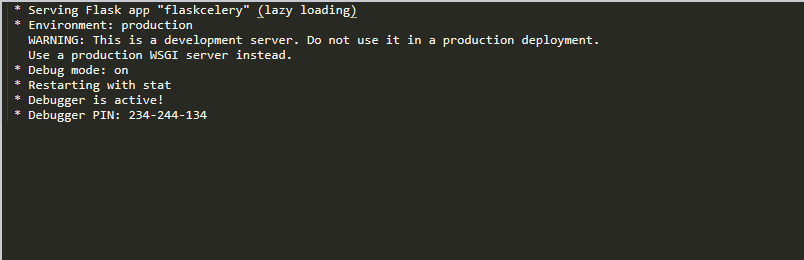
If you have followed the article correctly, your result should look simple to the image below.
Communicating between Celery and Flask
Now that we have created our server, we need to connect Celery with our flask application. To do this, update your celeryapp.py file to look like this below.
    #imports
    from flask import Flask
    from celery import Celery

    #creates a Flask object
    app = Flask(name)

    #Configure the redis server
    app.config['CELERY_BROKER_URL'] = 'redis://localhost:6379/0'
    app.config['CELERY_RESULT_BACKEND'] = 'redis://localhost:6379/0'

    #creates a Celery object
    celery = Celery(app.name, broker=app.config['CELERY_BROKER_URL'])
    celery.conf.update(app.config)
Celery is initialized by creating an object of class Celery with the application name and the connection to the message broker URL which is set to CELERY_BROKER_URL as key in the app.config. If you run something other than Redis or have the broker on a different machine, you will need to change the URL accordingly.
it’s always best to add additional configuration through celery.conf.update() for Celery. Though it is not a requirement, the CELERY_RESULT_BACKEND is only necessary to store status and results from tasks in Celery.
The function that would run as a background task is just a normal function with has the celery.task decorator. With just this decorator, the function would always run in the back ground. For example:
    @celery.task
    def async_function(arg1, arg2):
    #Async task
    return result
Just like any other function, to execute our celery task, it needs to be invoke, To invoke the function, add the following code to your celeryapp.py file.
`async_function(10, 30)`
Sending an Asynchronous Email with Celery.
Now, let's see how Celery works in the real world. Let's apply Celery in sending an email with our flask application. First, we need to build out our email form to let users send emails. Here is the HTML template to build the form.
    <html>
      <head>
        <title>Flask and Celery</title>
      </head>
      <body>
        <h2>Sending Asynchronous Email</h2>
        {% for message in get_flashed_messages() %}
        <p style="color: red;">{{ message }}</p>
        {% endfor %}
        <form method="POST">
          <p>Send email to: <input type="text" name="email" value="{{ email }}"></p>
          <input type="submit" name="submit" value="Send">
        </form>
      </body>
    </html>
This is just a regular HTML syntax with the ability to show flask messages from Flask. Hopefully, you should be able to get around with it.
Note: The code above is the index.html file.
To send Emails, we would make use of the Flask-Mail extension.
Flask-Mail requires some configuration, including information about the email server that it will use to send emails.
Add the following code to your celeryapp.py app to configure your Email sender:
    Flask-Mail configuration
    app.config['MAIL_SERVER'] = 'smtp.googlemail.com'
    app.config['MAIL_PORT'] = 587
    app.config['MAIL_USE_TLS'] = True
    app.config['MAIL_USERNAME'] = os.environ.get('MAIL_USERNAME')
    app.config['MAIL_PASSWORD'] = os.environ.get('MAIL_PASSWORD')
    app.config['MAIL_DEFAULT_SENDER'] = 'flask@example.com'
Note: For this to work, make sure you have saved your email and password to an environment variables. For security reasons and easy accessibility my password and email are stored in an environment variables.
Since we have a single route in this app, we created a route index alone to cater for it. Update your celeryapp.py file with the following code.
    @app.route('/', methods=['GET', 'POST'])
    def index():
    if request.method == 'GET':
    return render_template('index.html', email=session.get('email', ''))
    email = request.form['email']
    session['email'] = email
    # sends this content
    email_msg = {
        'subject': 'Testing Celery with Flask',
        'to': email,
        'body': 'Testing background task with Celery'
    }
    if request.form['submit'] == 'Send':
        # sends the email content to the backgraound function
        send_email.delay(email_msg)
        flash('Sending email to {0}'.format(email))
    else:
        flash('No Email sent')

    return redirect(url_for('index'))
The code above shows a function, which gets the input from our html form and saves it in a session, for easier accessibility.
This function checks for events on the submit button and send_email after the submit button is clicked. The email_msg contains the subject, recipient’s email address, and the body of the message being sent.
To allow users know what is going in the background, a flash message is displayed when the email is being submitted.
Note: We saved the user's value in the text field in the session to remember it after the page reloads.
The last piece of this application is the asynchronous task that gets the job done when a user submits the email form.
    @celery.task
    def send_email(email_msg):
    #Async function to send an email with Flask-Mail
    msg_sub = Message(email_msg['subject'],
    email_sender = app.config['MAIL_DEFAULT_SENDER'],
    recipient = [email_msg['to']])
    msg_sub.body = email_msg['body']
    with app.app_context():
    mail.send(msg_sub)
As said earlier, this task is decorated with celery.task to make it run in the background.
The function creates a Message object from Flask-Mail using the email data dictionary. For Flask-Mail to run, it must build an application context before calling the send() method.
Conclusion
Celery more than a few extra steps beyond simply sending a job to a background thread, but the benefits in terms of flexibility and scalability are hard to ignore.
Sending a scheduled task is easier done using celery than any other means of running scheduled task. Imagine you want to perform a task daily, In this case, Celery can be used to run programs in the background with any necessarily human triggered.
Although Celery is used in most cases for long running task, it can also be used to connect to third party APIs. As soon as data is gotten back from the API in your celery task, it is then served to the user.


Top comments (0)